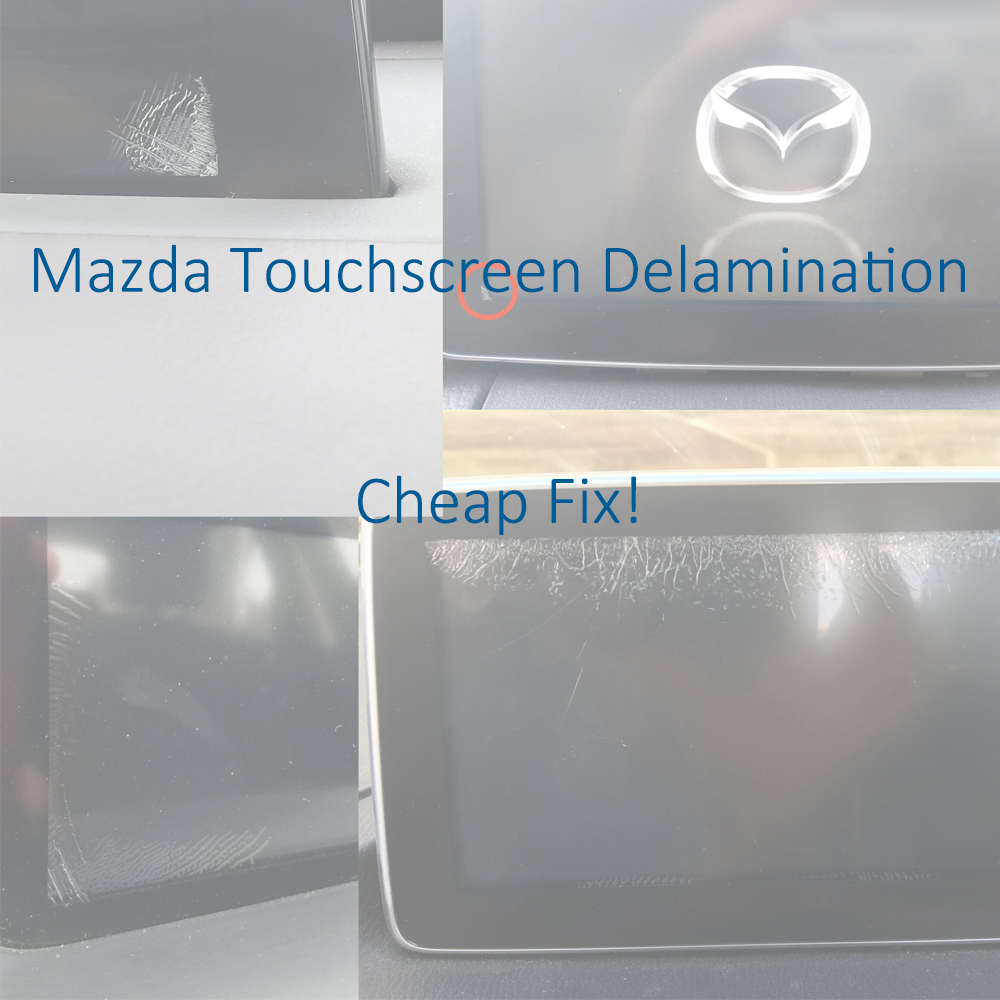
Mazda Connect Touchscreen Digitizer Replacement Guide
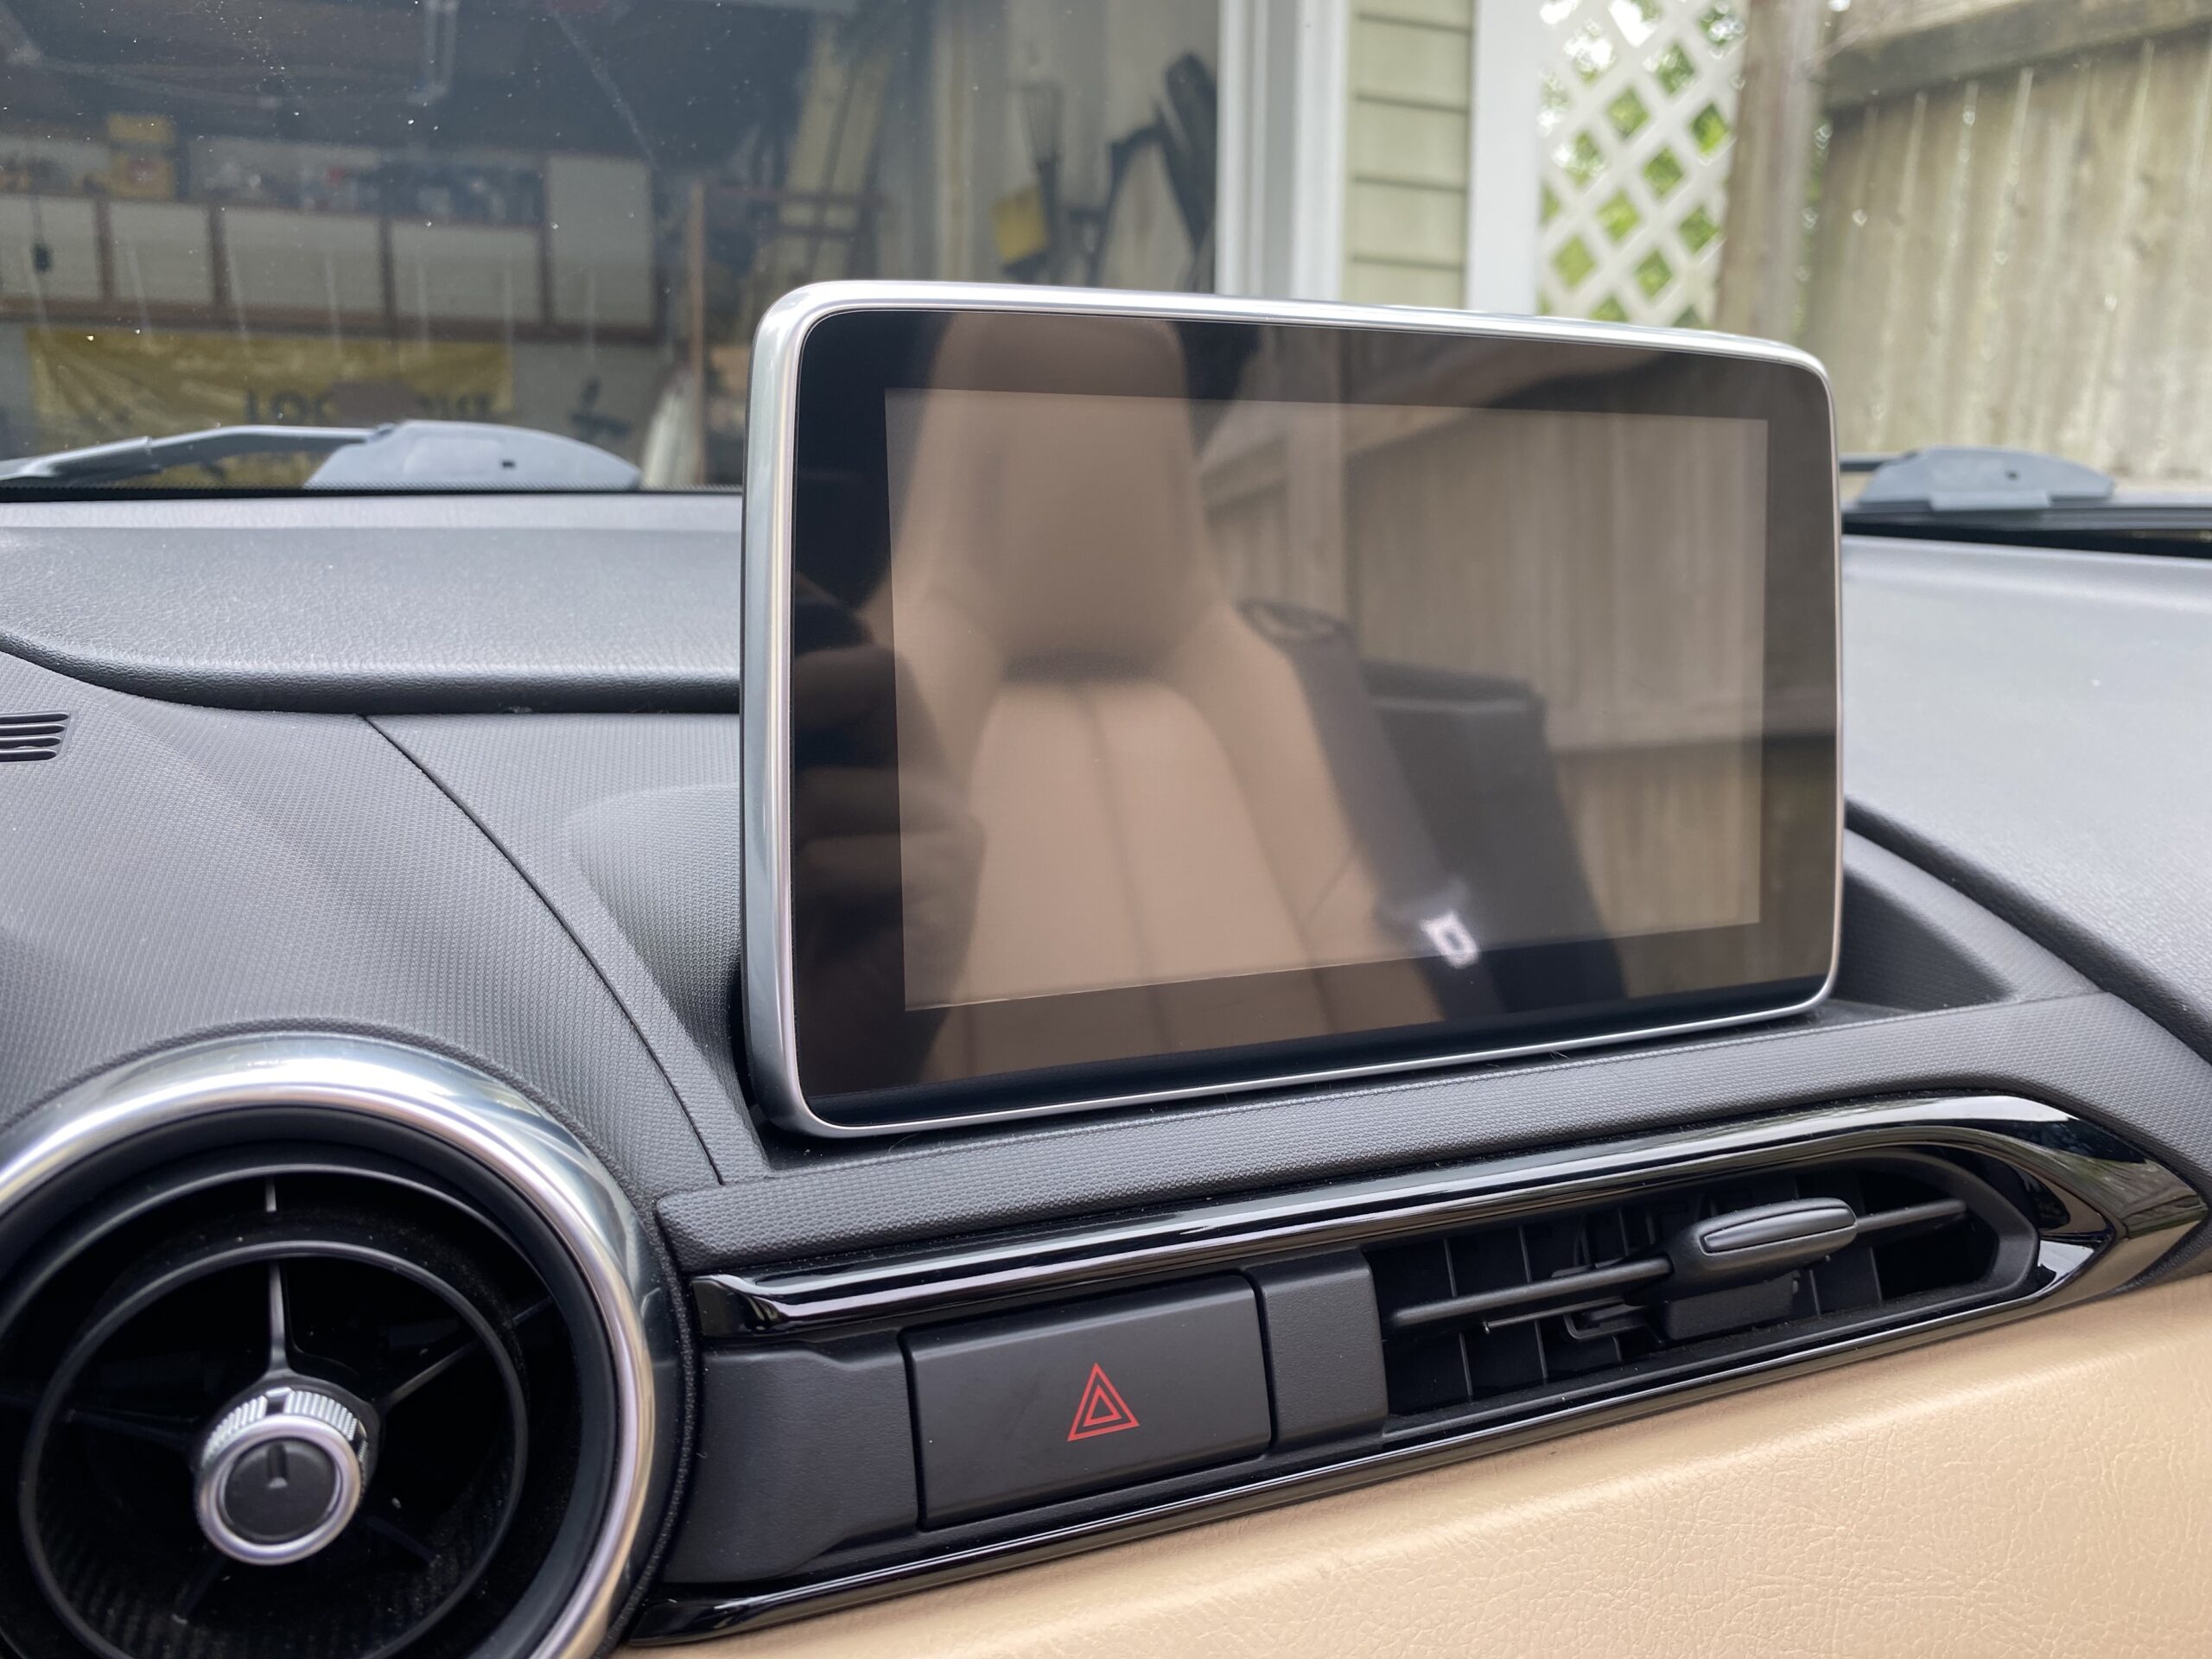
If your Mazda Connect screen has developed cracks, ghost touch issues, or random touchscreen behavior, you may be able to fix it without replacing the entire CMU or screen assembly.
This repair uses basic tools and an inexpensive replacement digitizer, typically around $15–$25, making it far cheaper than a dealership repair or full screen replacement.
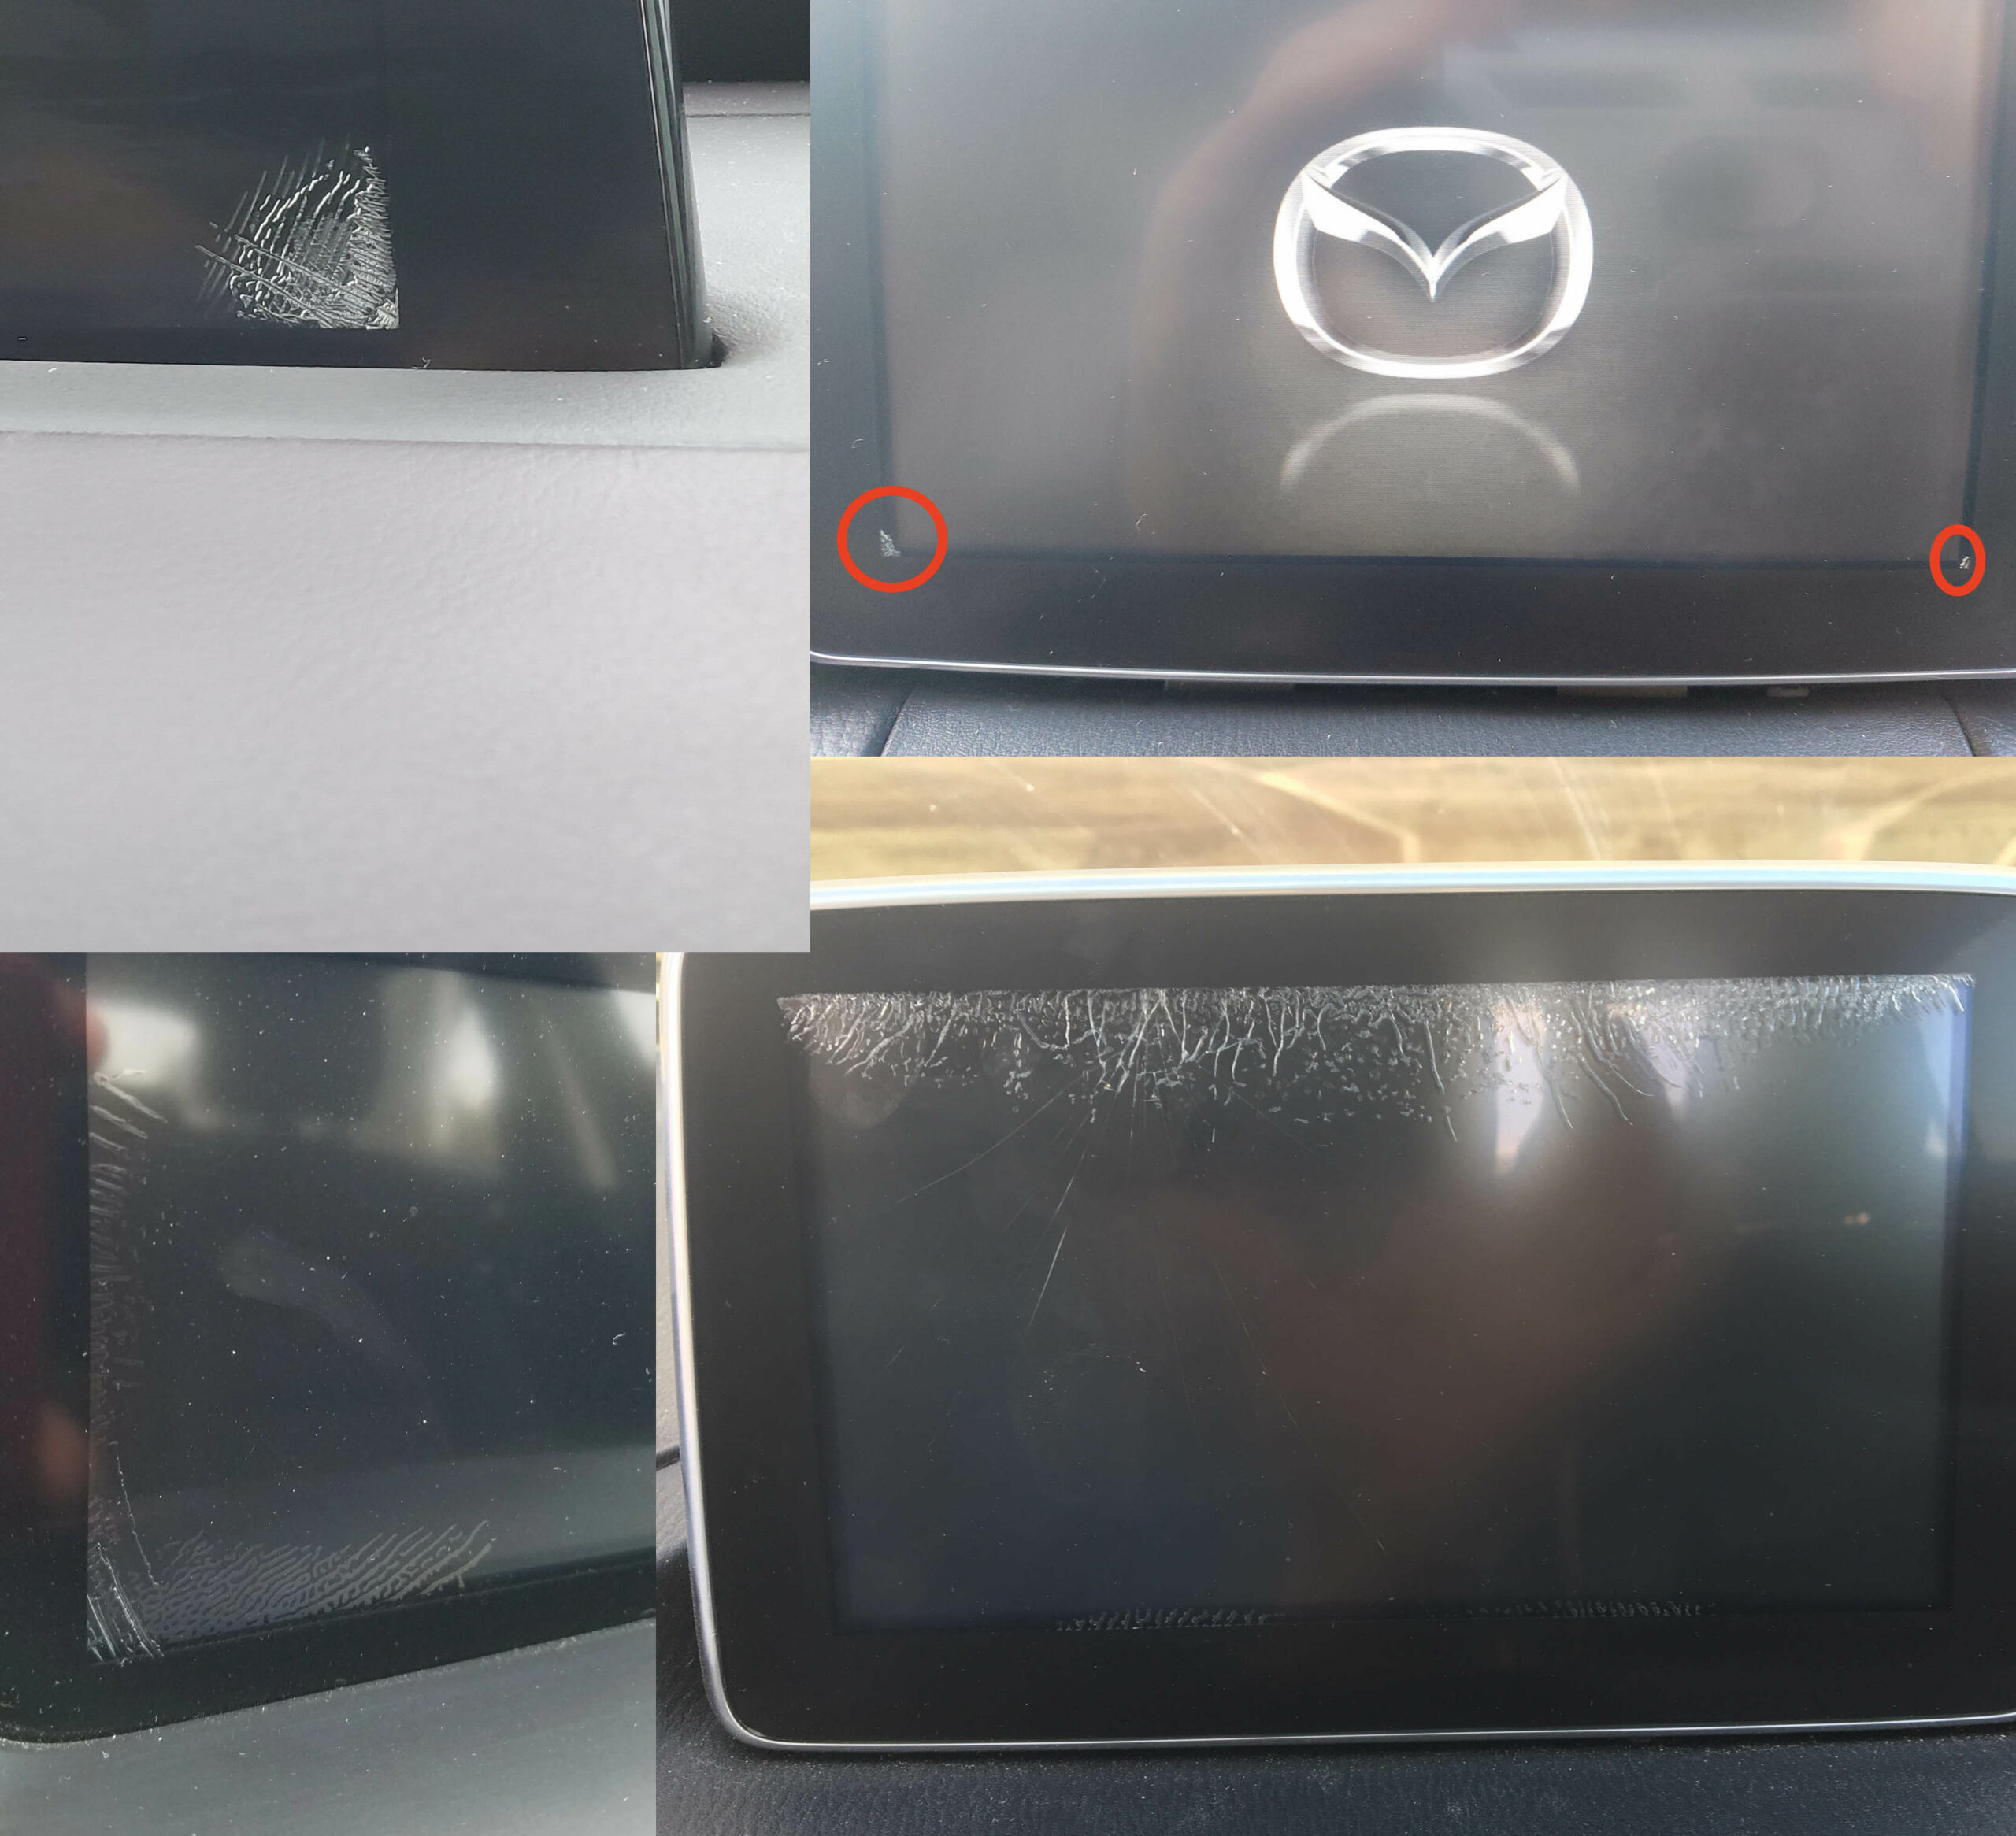
Common Symptoms
This issue is usually caused by adhesive delamination between the touchscreen cover and the digitizer after repeated hot and cold cycles.
- Spider cracking around the edges of the screen
- Ghost touches or random inputs
- Touchscreen areas that stop responding
- Erratic screen behavior
If your vehicle is still under full warranty, Mazda may replace the unit at no charge.
View Mazda TSB / warranty information
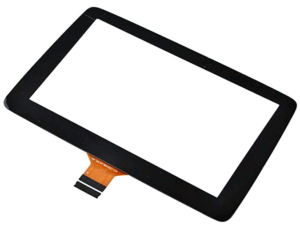
Important: 36-Pin vs 50-Pin Digitizers
Before ordering parts, verify which touchscreen digitizer your screen uses.
- 36-pin digitizer — older style
- 50-pin digitizer — newer style
The 36-pin version is typically found on older assemblies, while the 50-pin digitizer is the newer design. Always confirm your connector type before purchasing a replacement.
It is said that 2018+ models with the black bezel trim (instead of chrome) feature the newer 50 pin digitizer. If someone can confirm this, and post a comment, that would be extremely helpful.
Note 2: None of this applies to the ND3 (2024+) This is a completely different screen, and so far no reports of digitizer de-lamination.
Before You Begin
Use caution: parts of this repair require careful handling to avoid damaging the screen PCB or ribbon cables. If you are not comfortable working on delicate electronics, this may not be the right DIY project for you.
These photos were taken during reassembly after the screen was repaired, so some images may show the unit going back together rather than coming apart.
Tools and Parts
If this guide helps you, consider using the affiliate links below to purchase the needed parts.
Buy 36 pin replacement touchscreen on eBay (Affiliate Link)
Buy 36 pin replacement touchscreen on Amazon (Affiliate Link)
Buy 50 pin replacement touchscreen on eBay (Affiliate Link)
Buy 50 pin replacement touchscreen on Amazon (Affiliate Link)
Disclosure: When you click certain links on this site and make a purchase, this site may earn a commission through affiliate programs, including the eBay Partner Network and Amazon affiliate links.
Step-by-Step Photo Guide
Follow the repair in stages instead of scrolling through one long wall of photos.
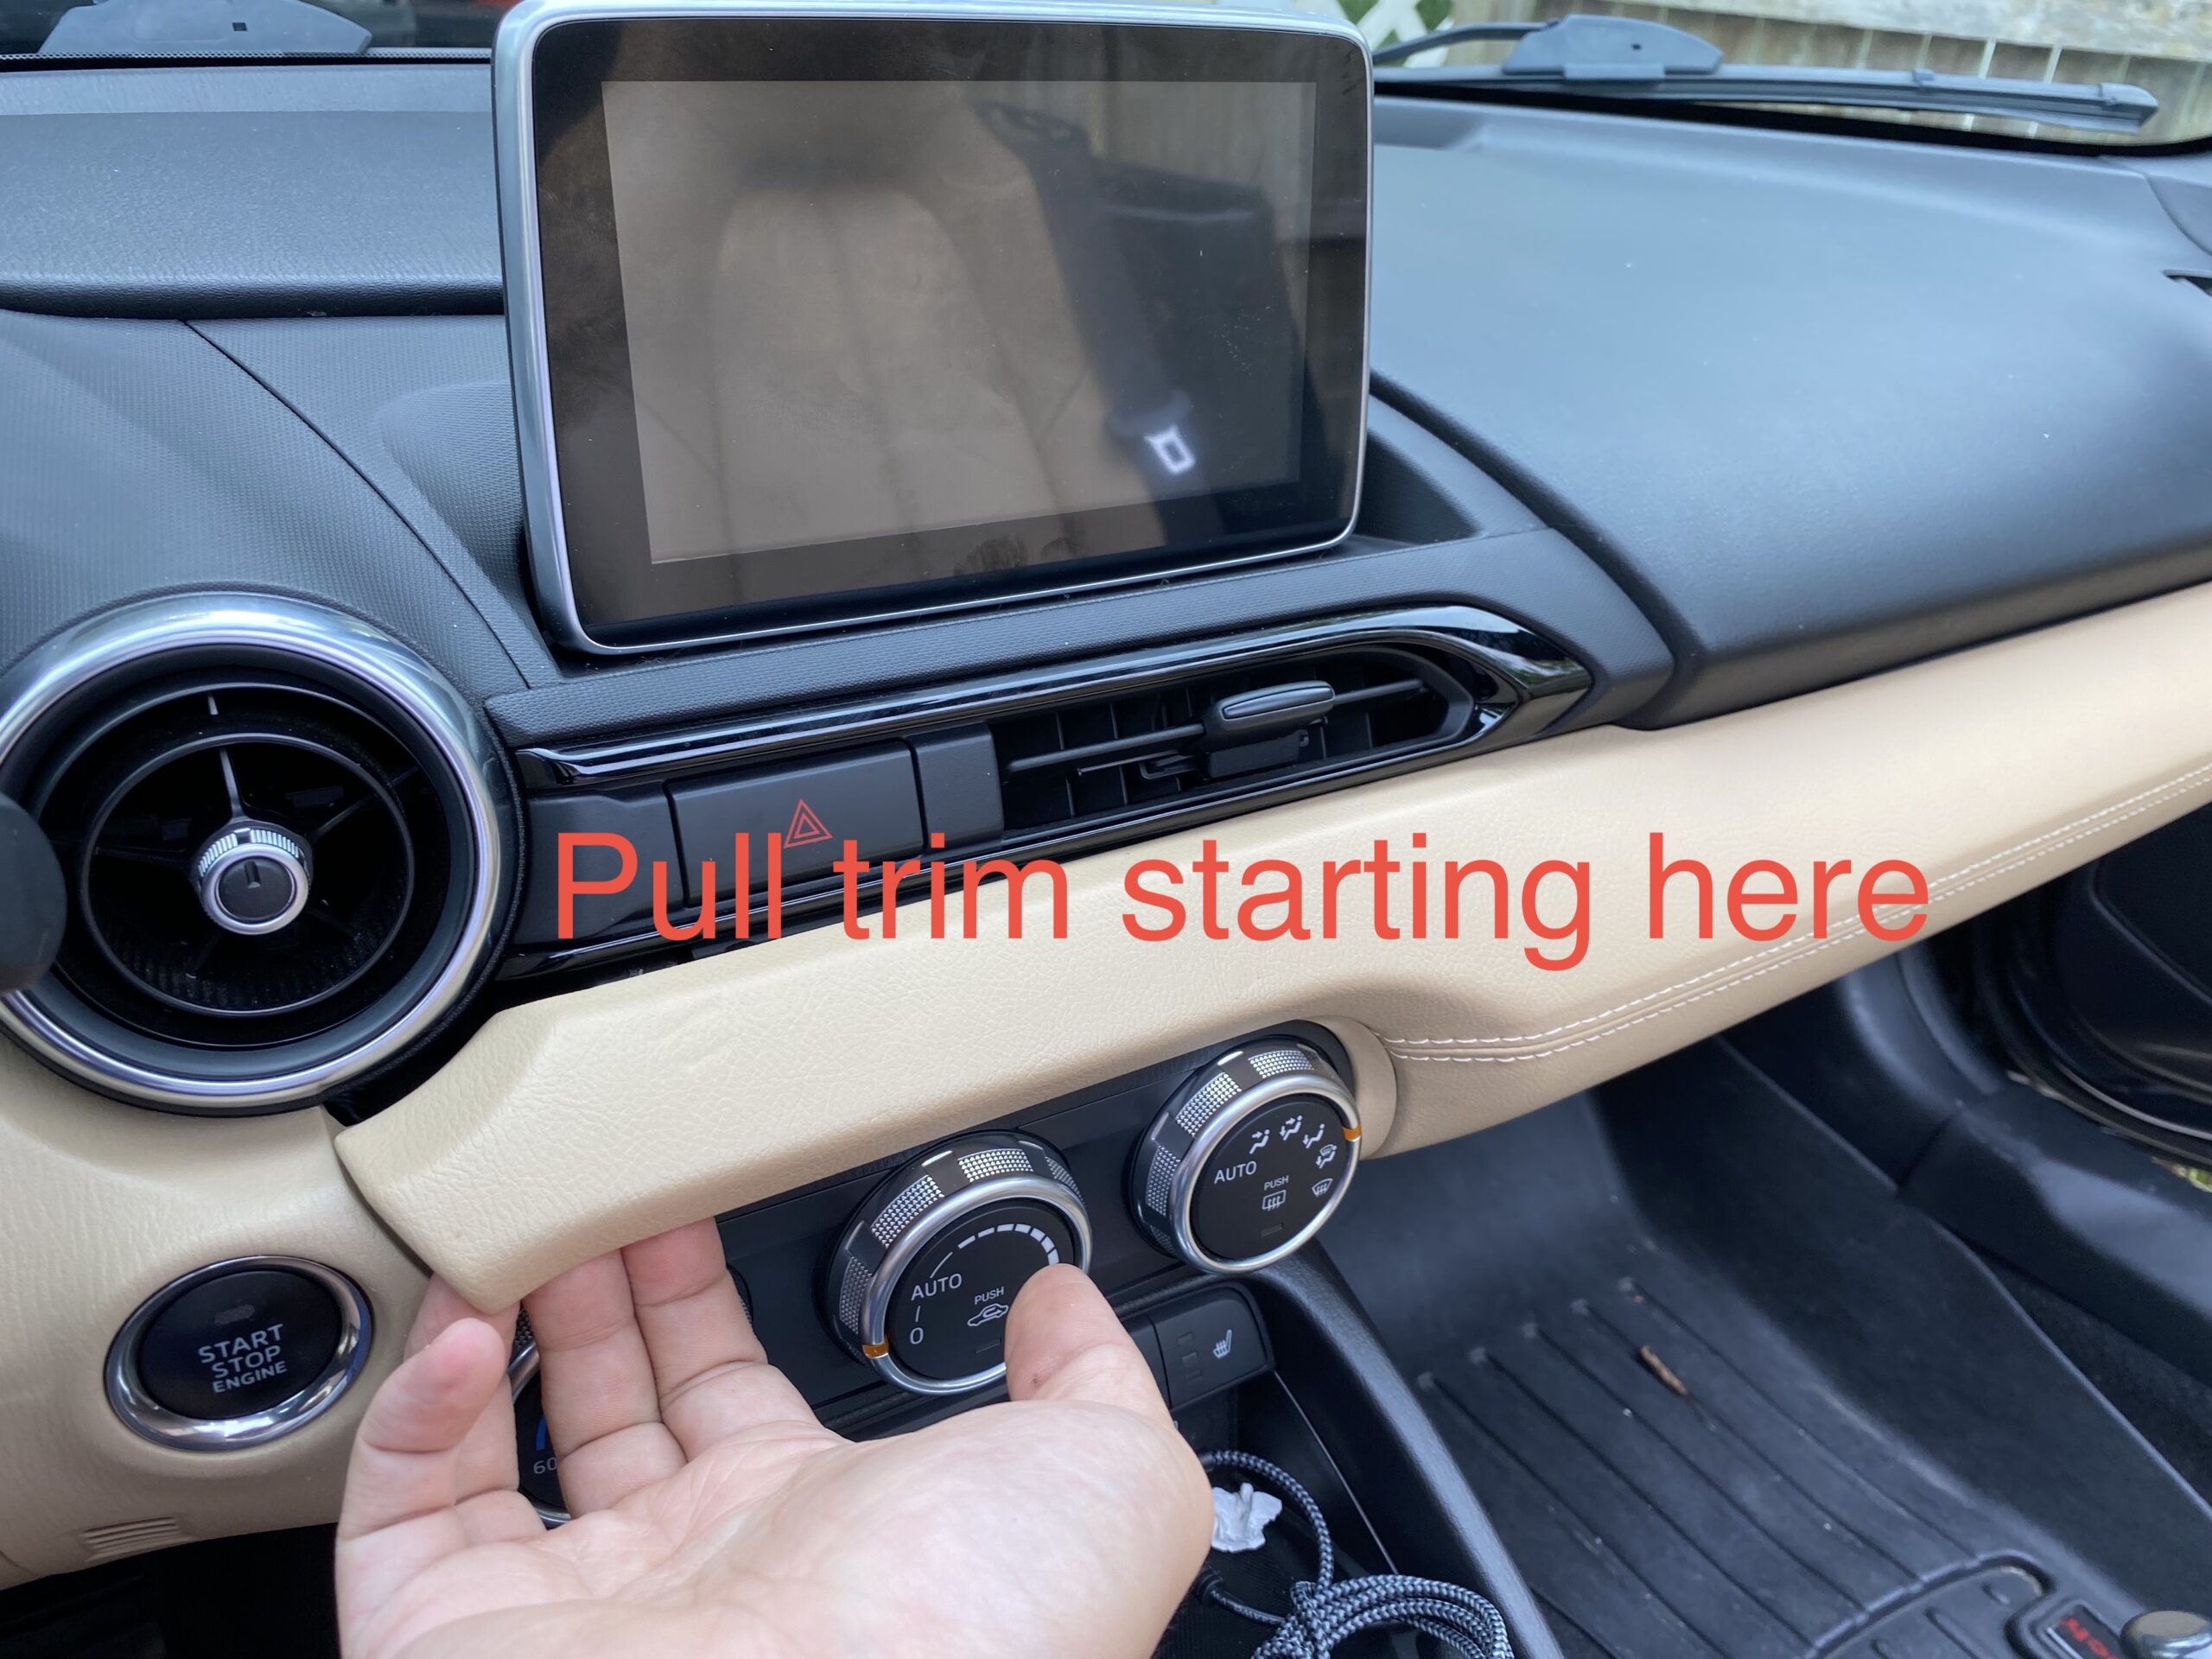
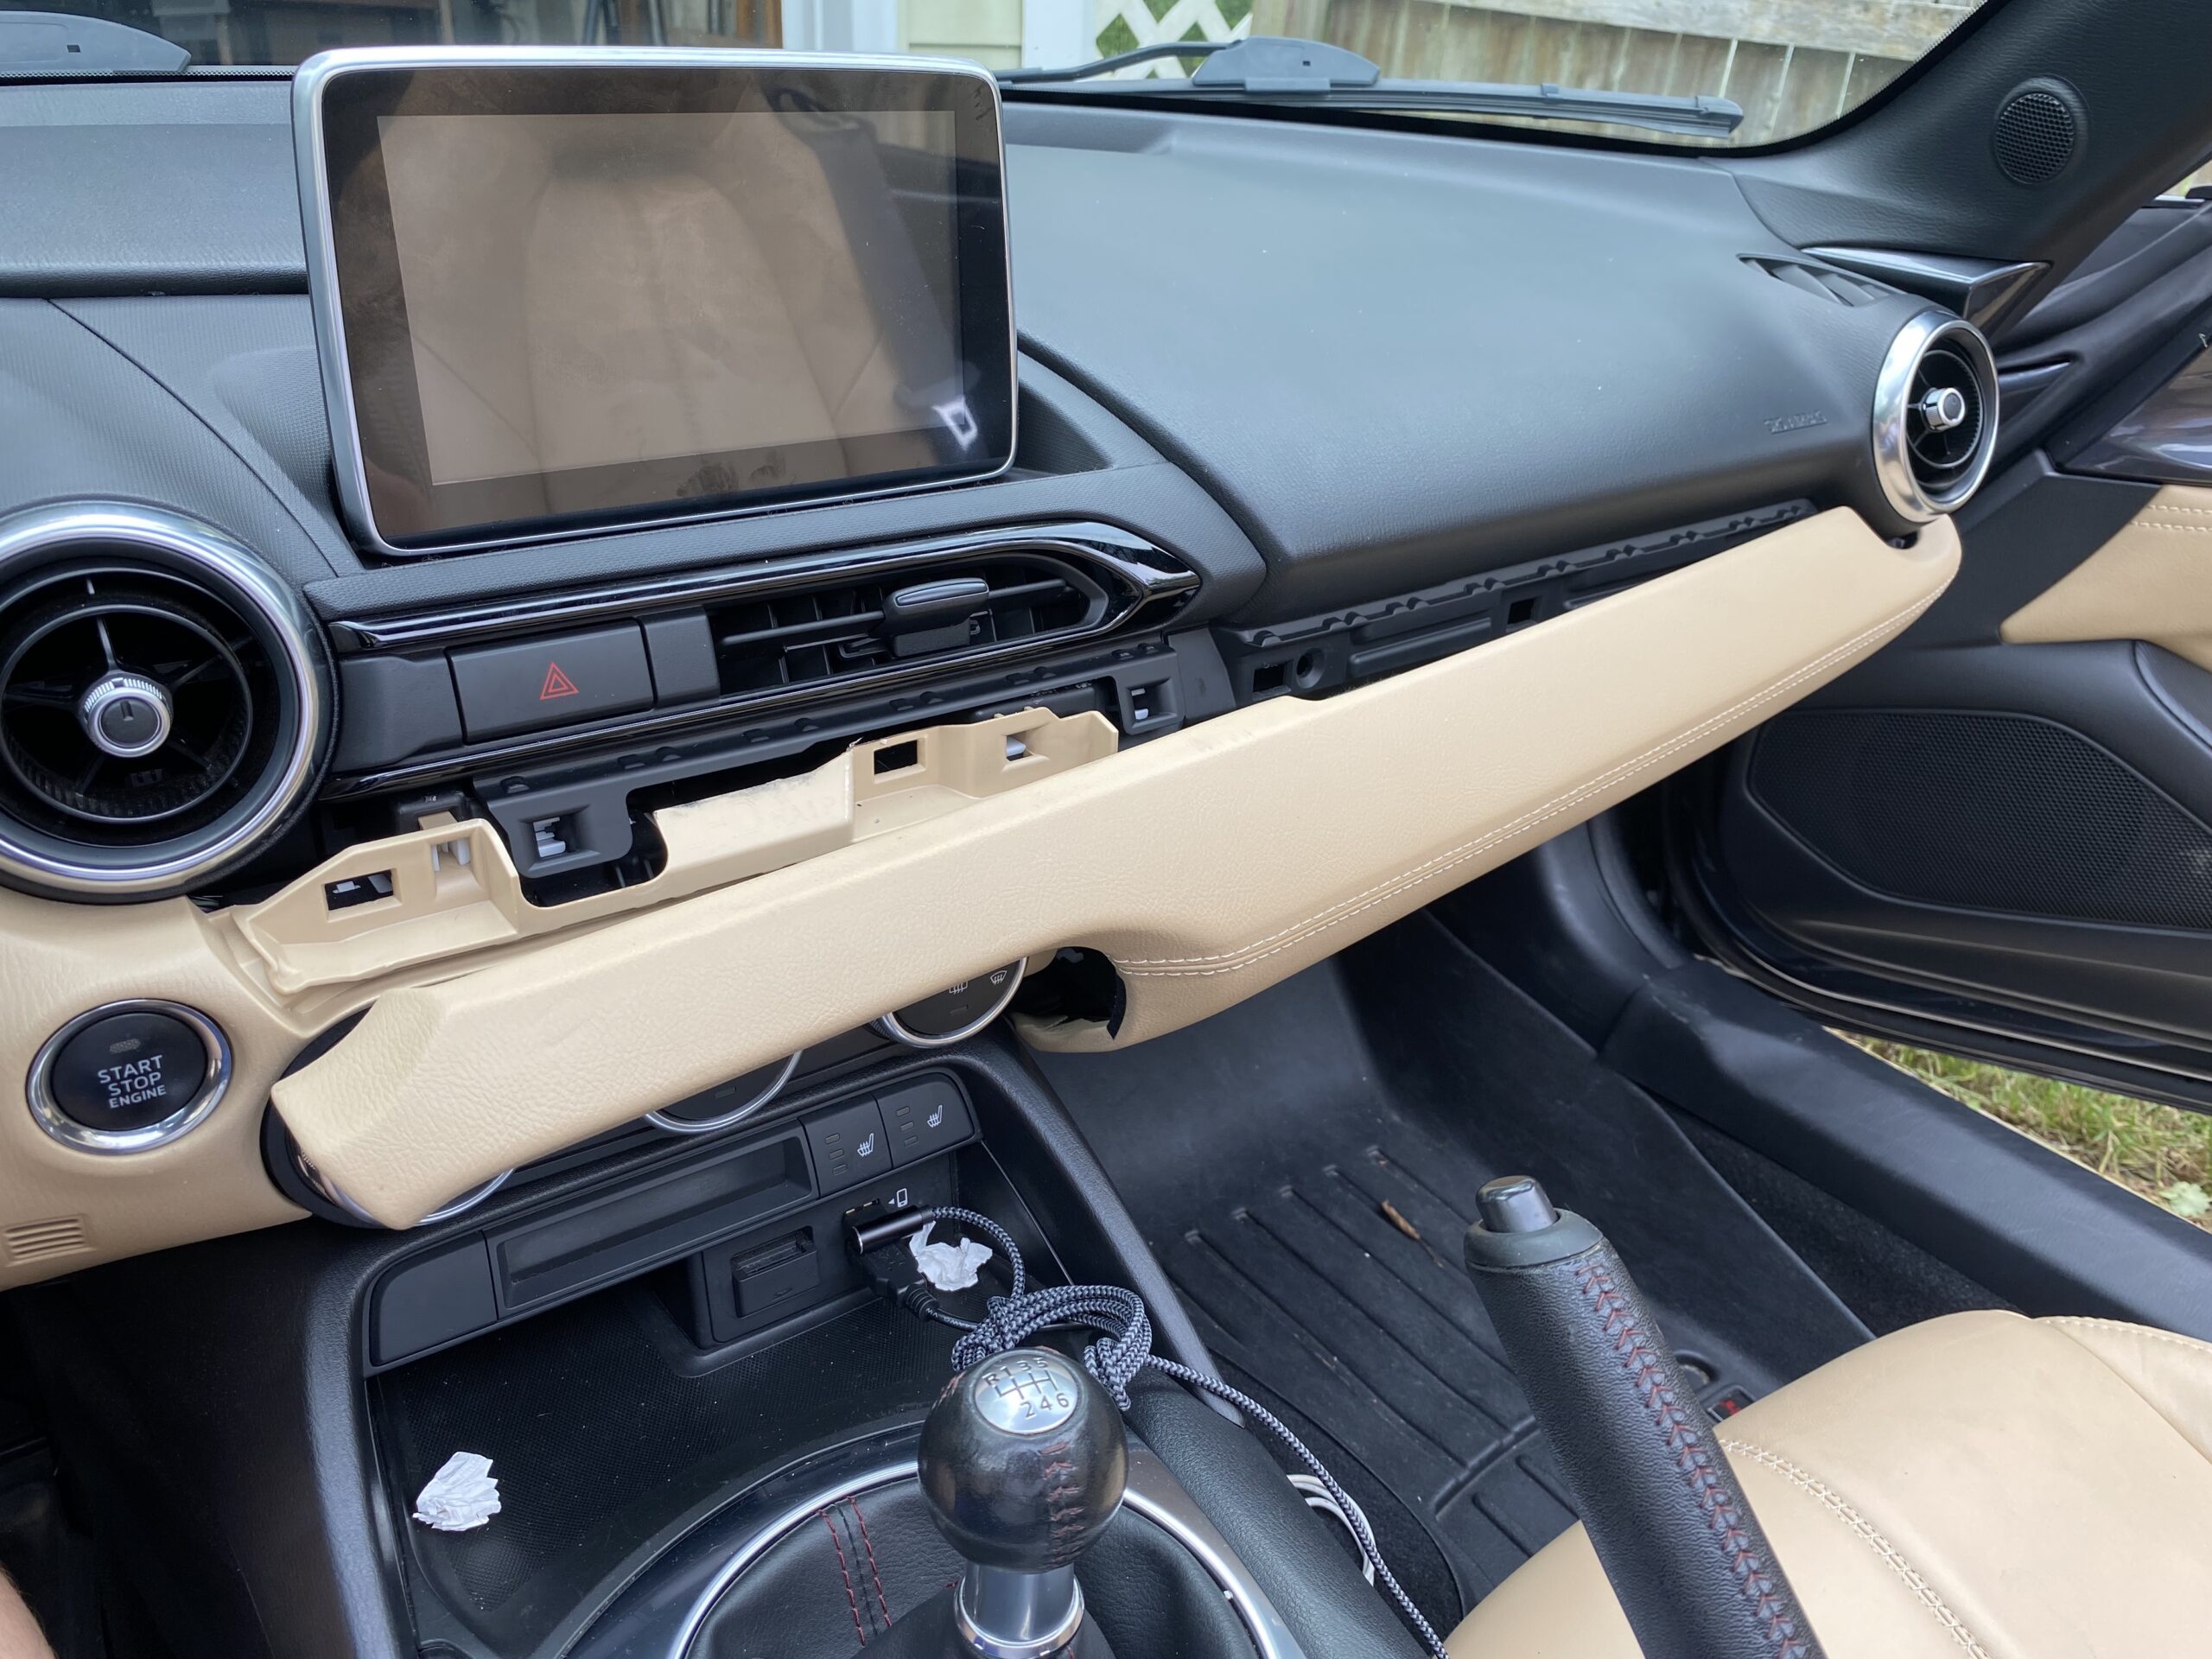
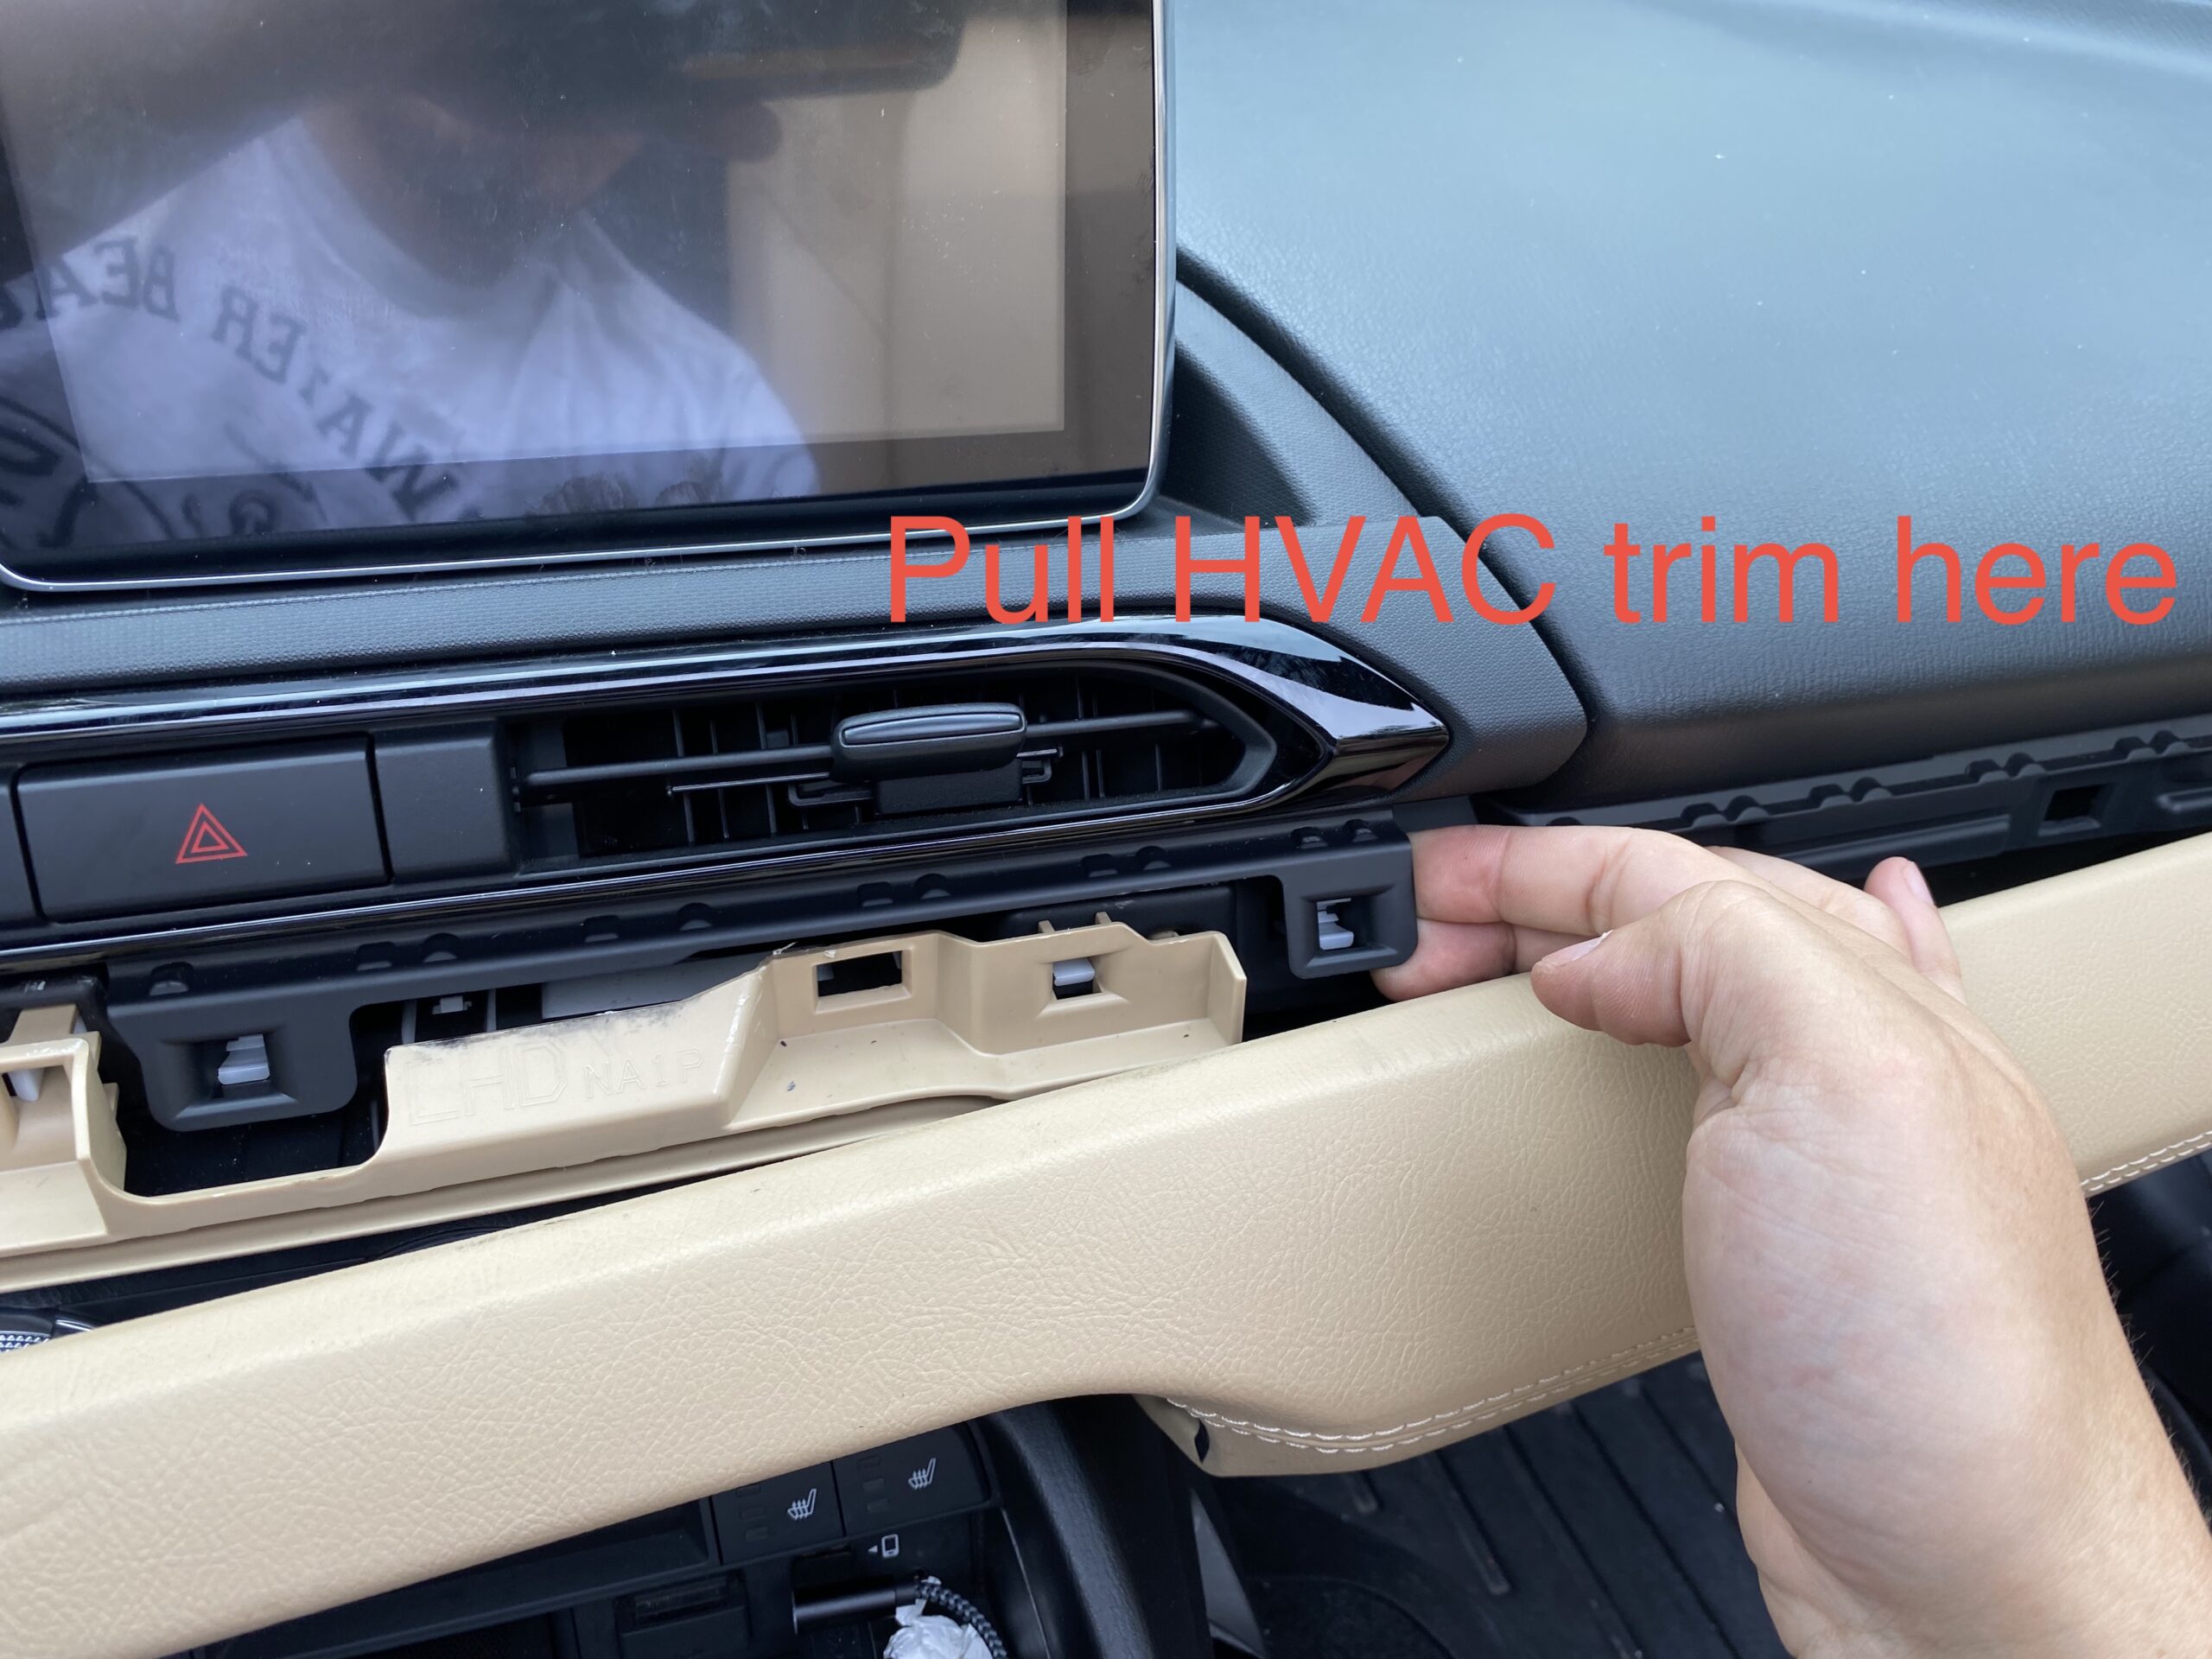
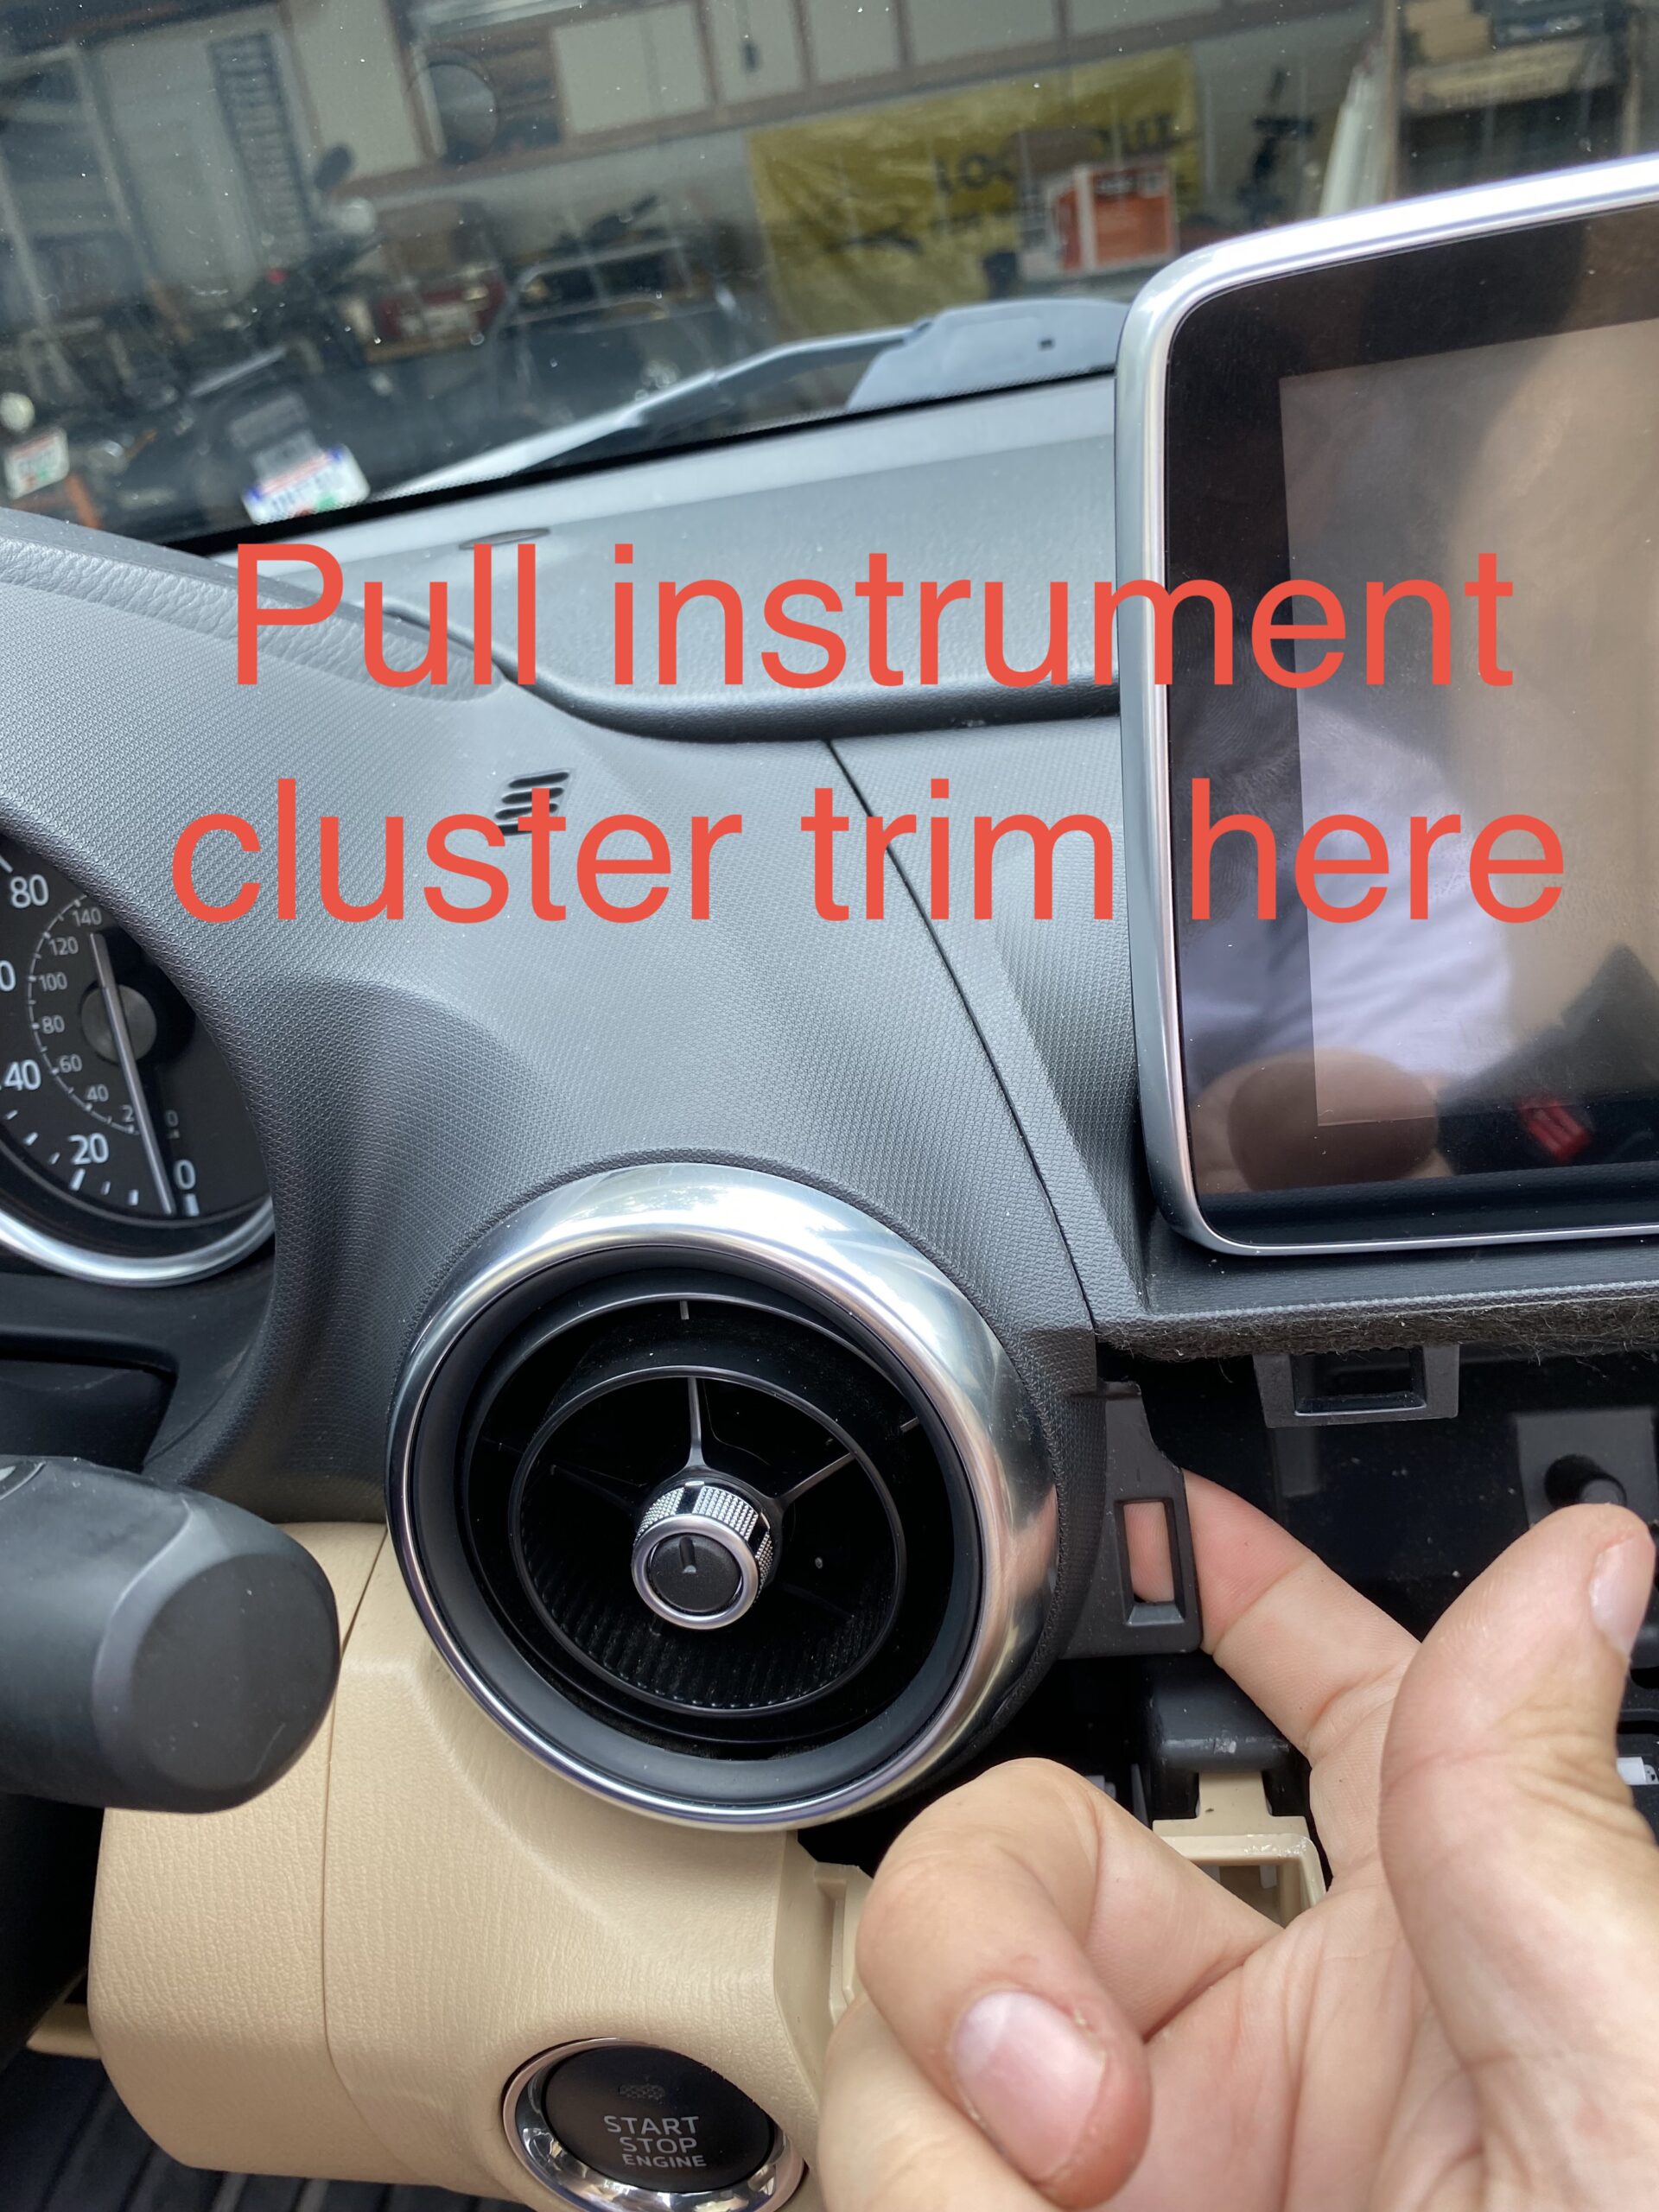
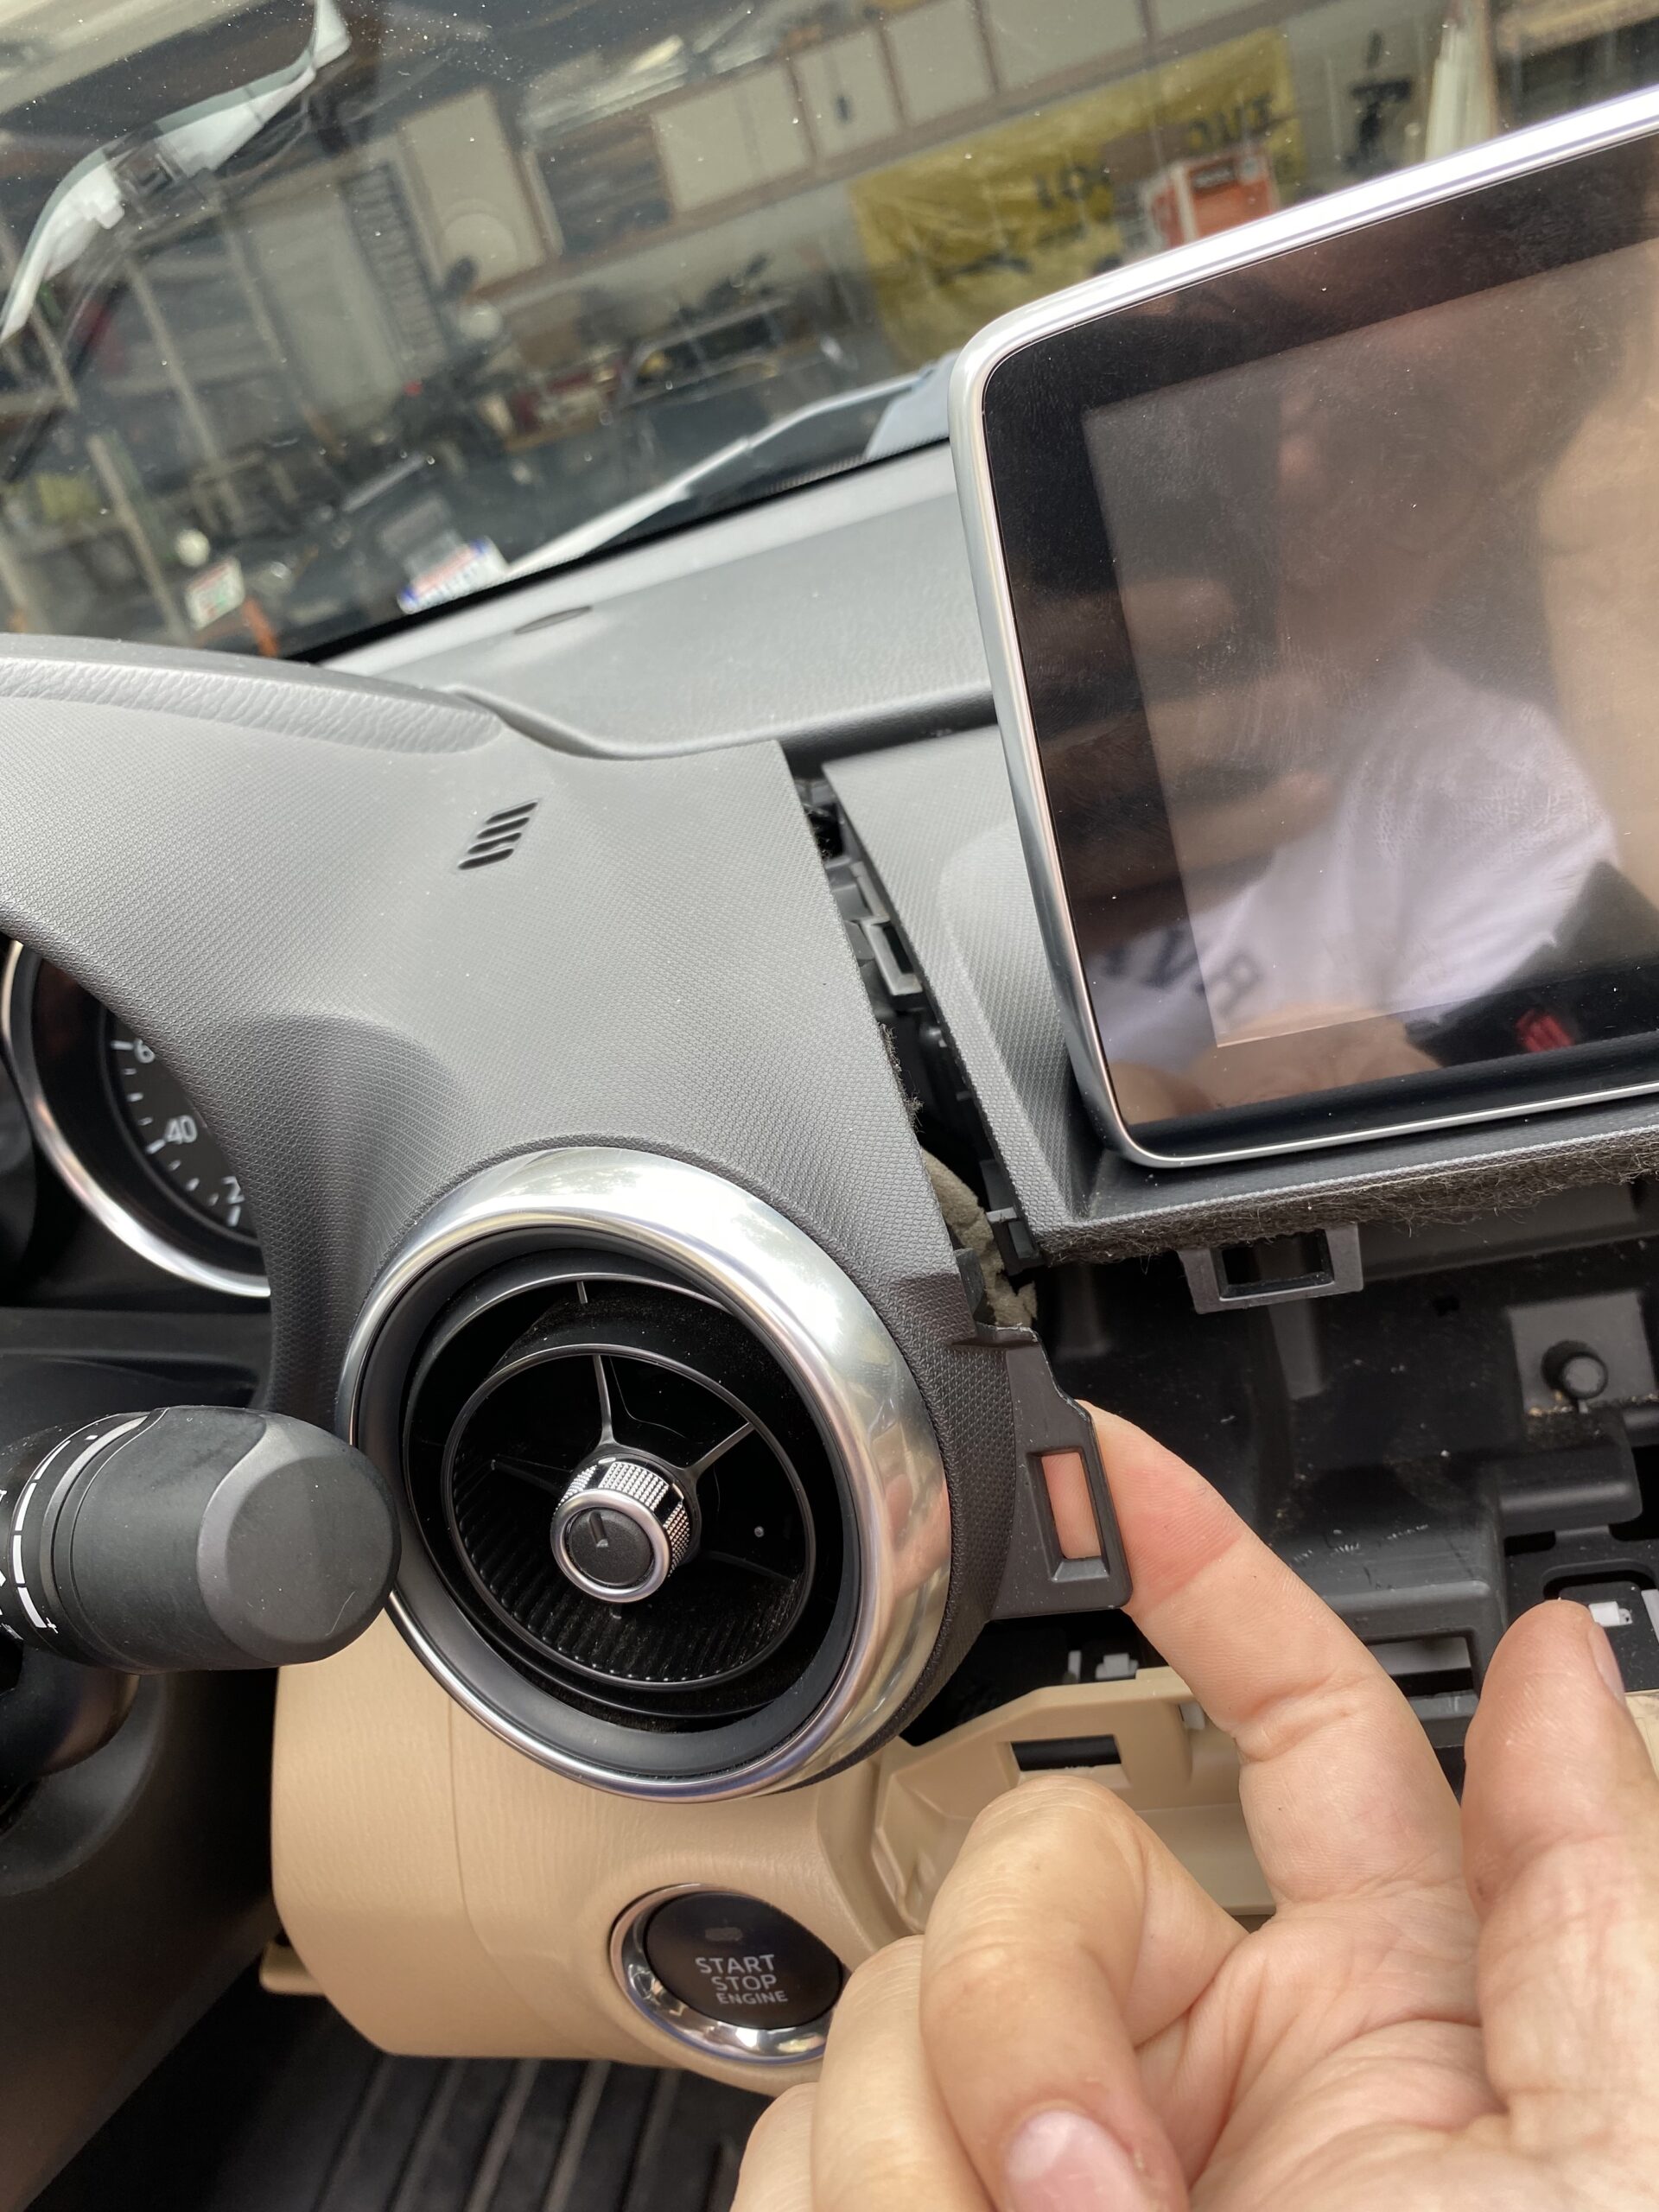
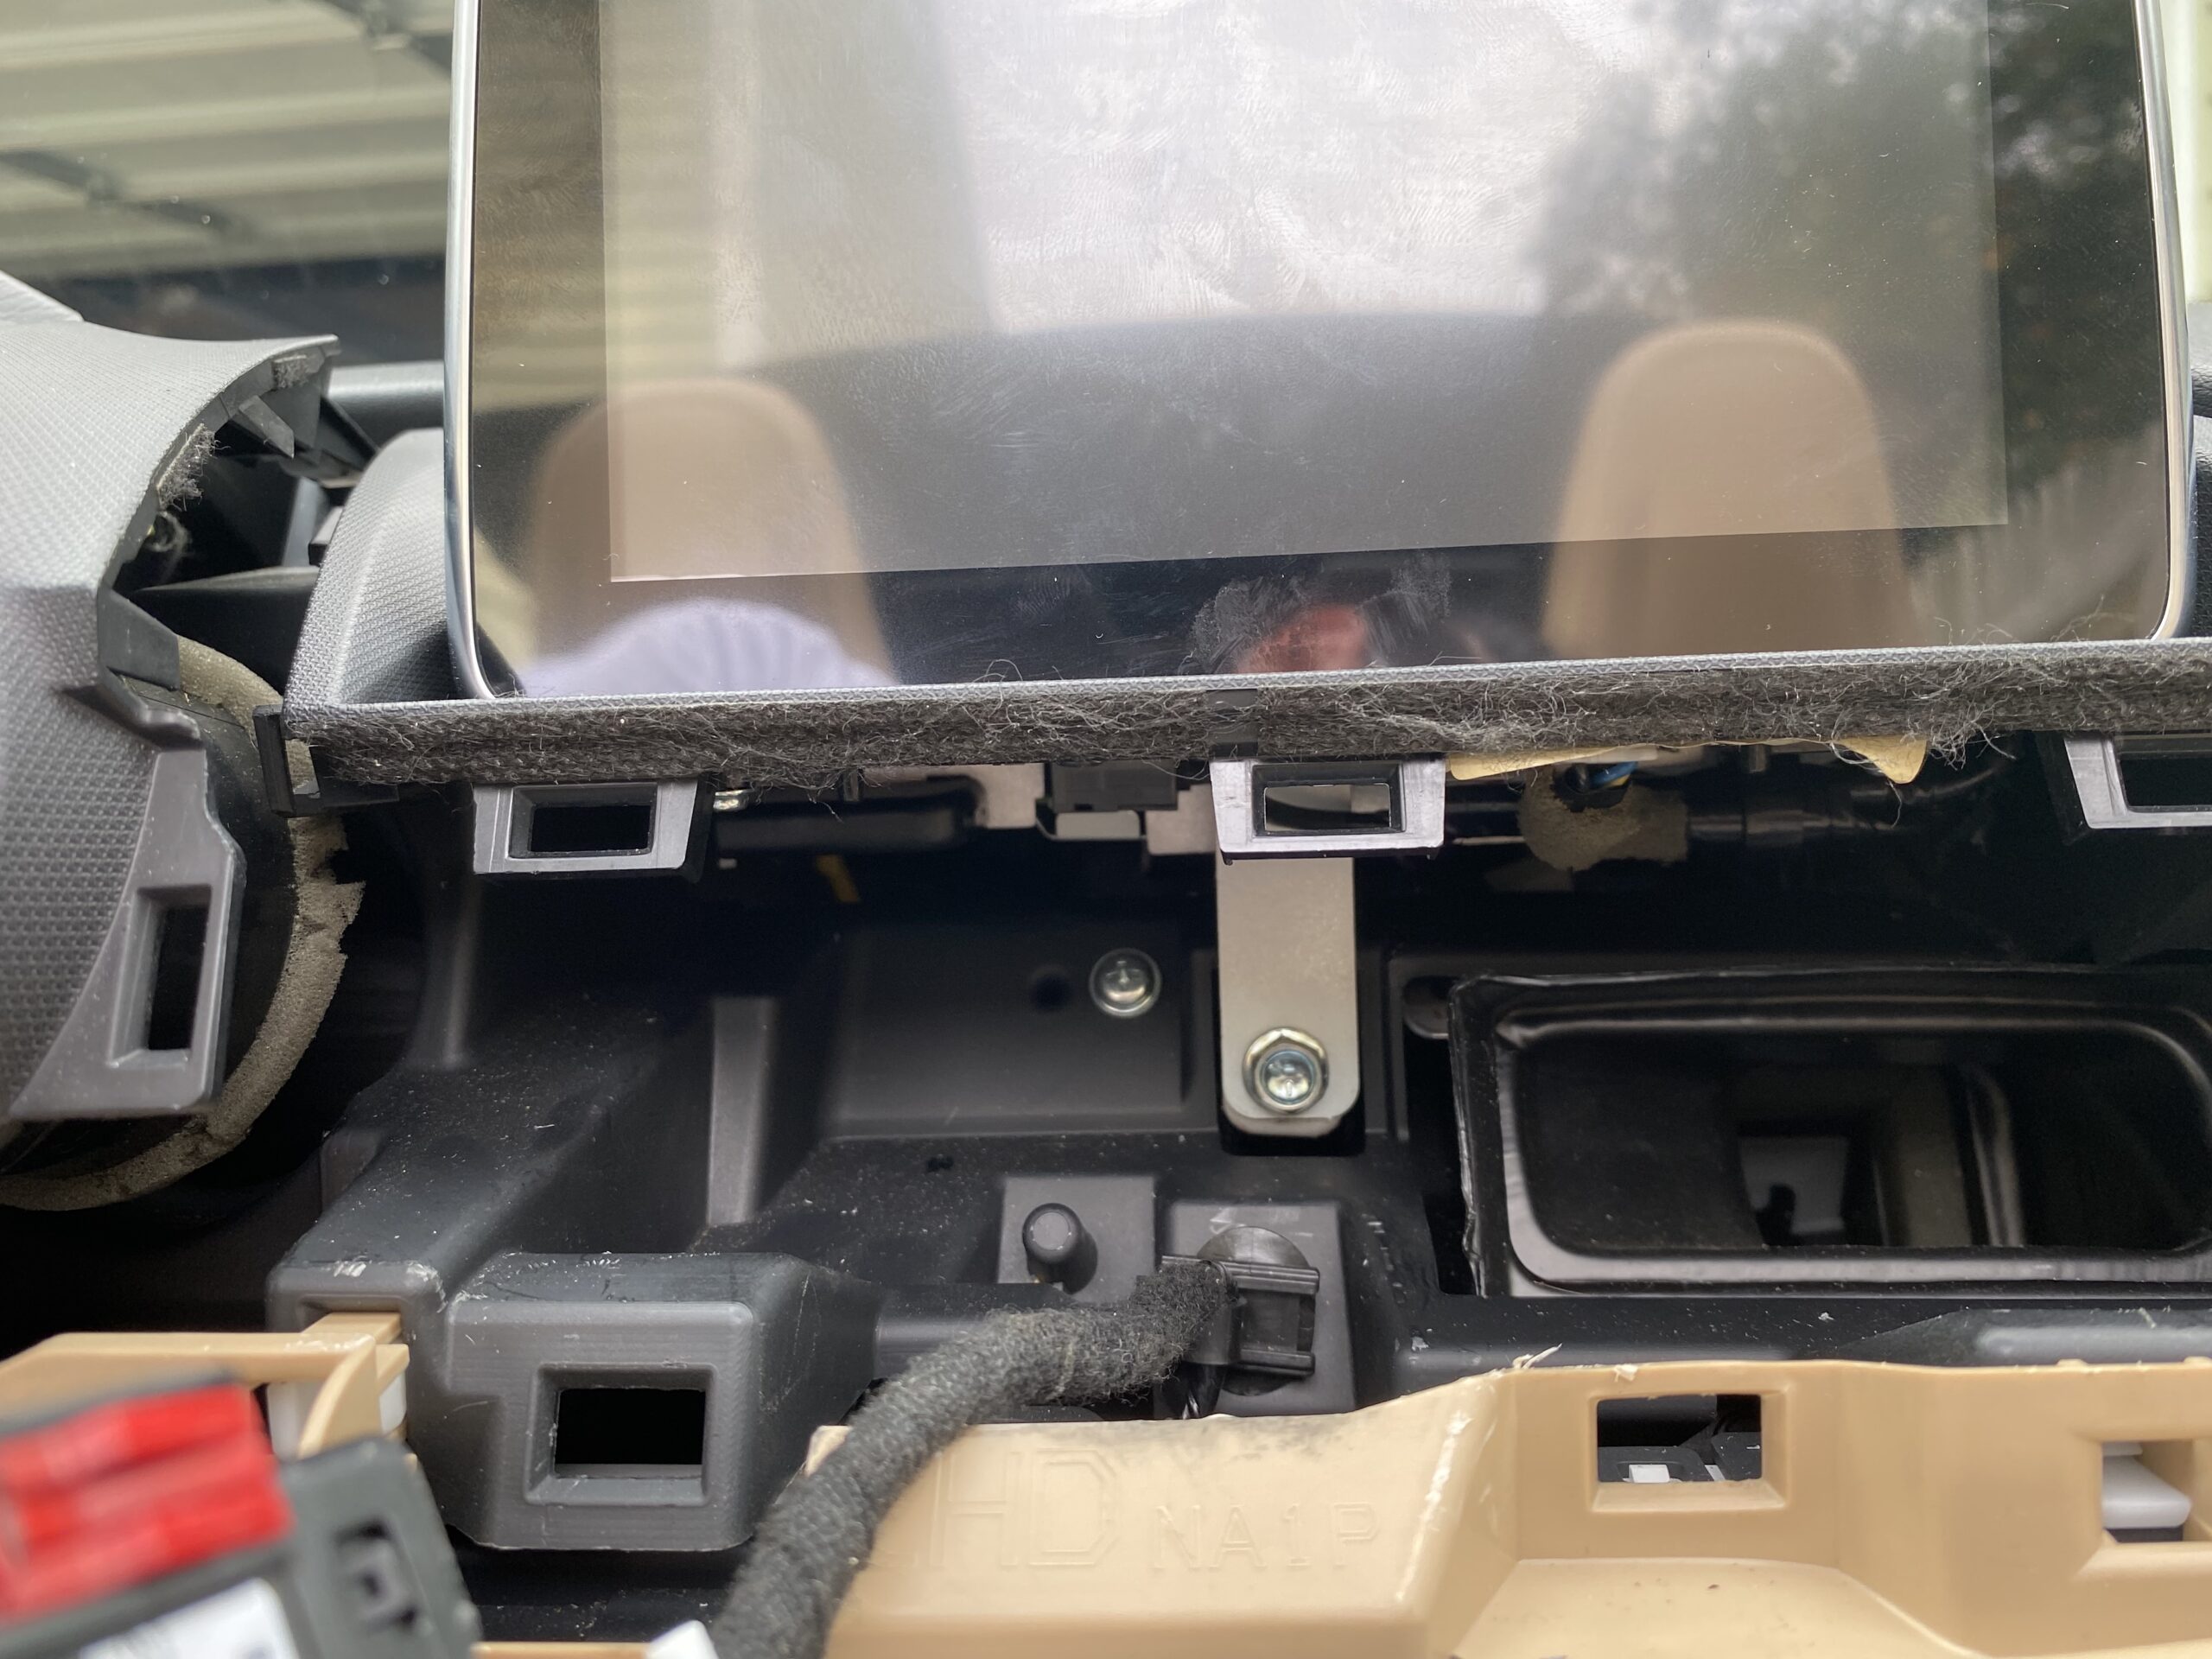
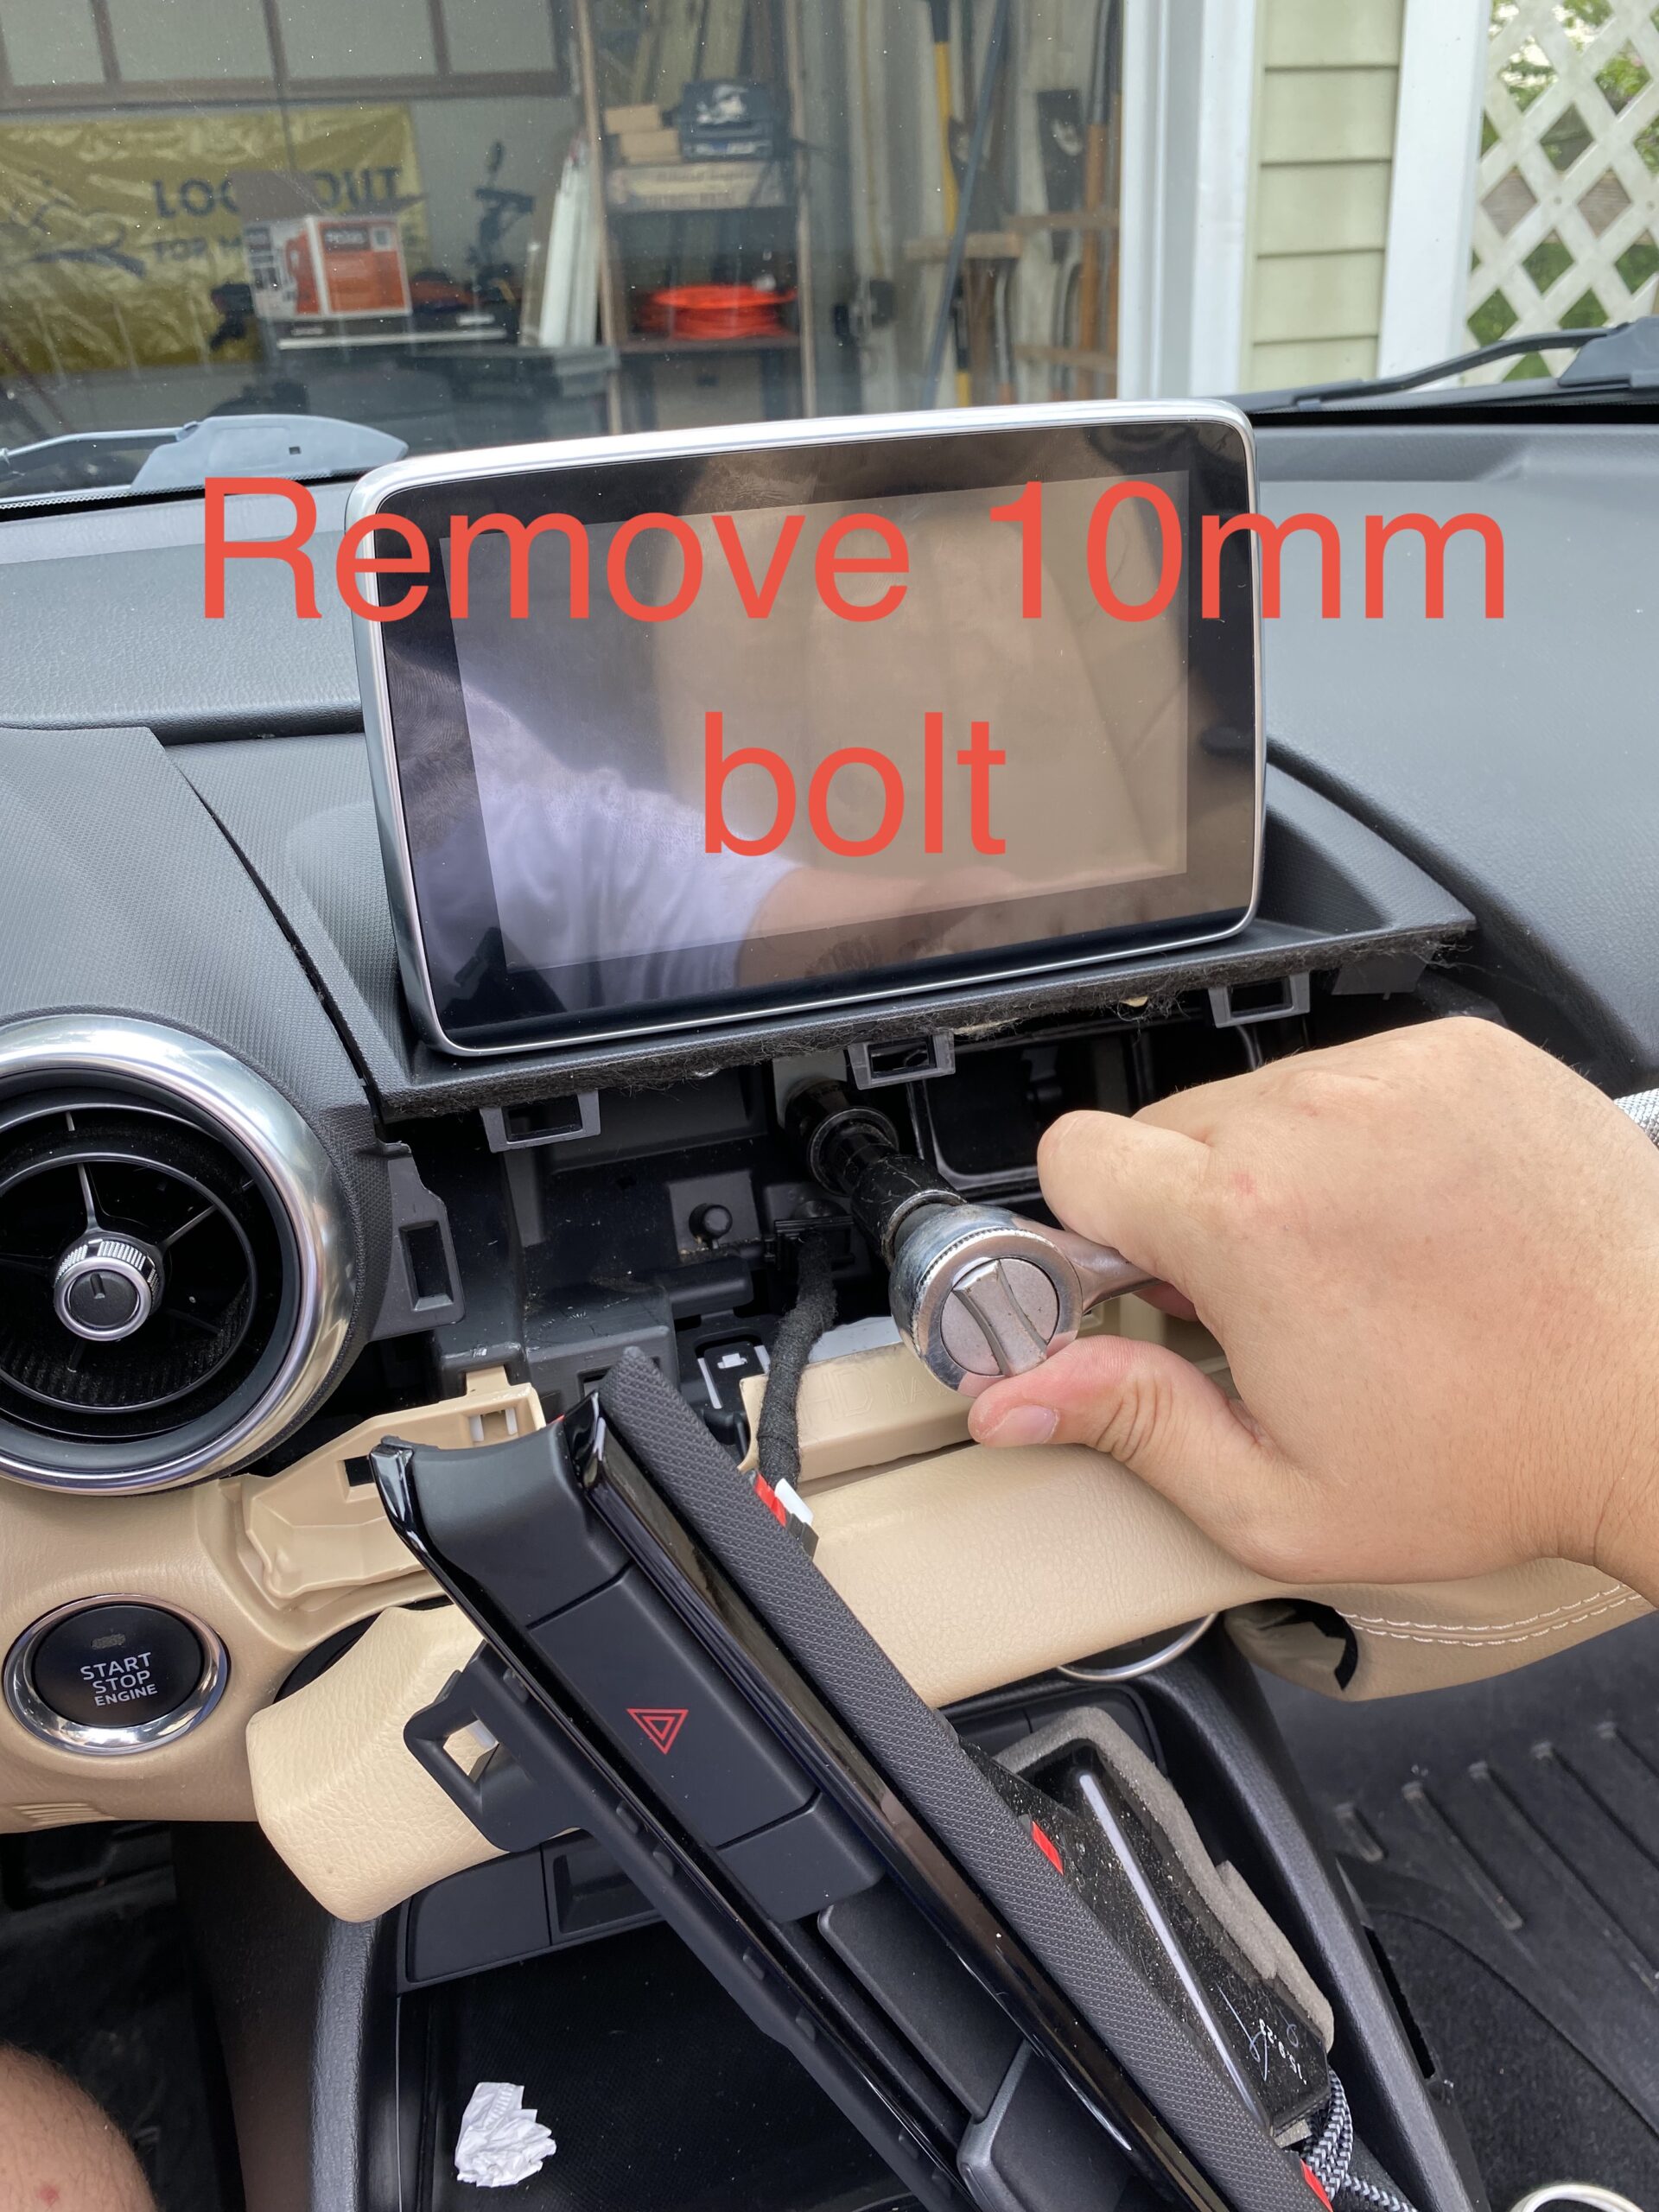
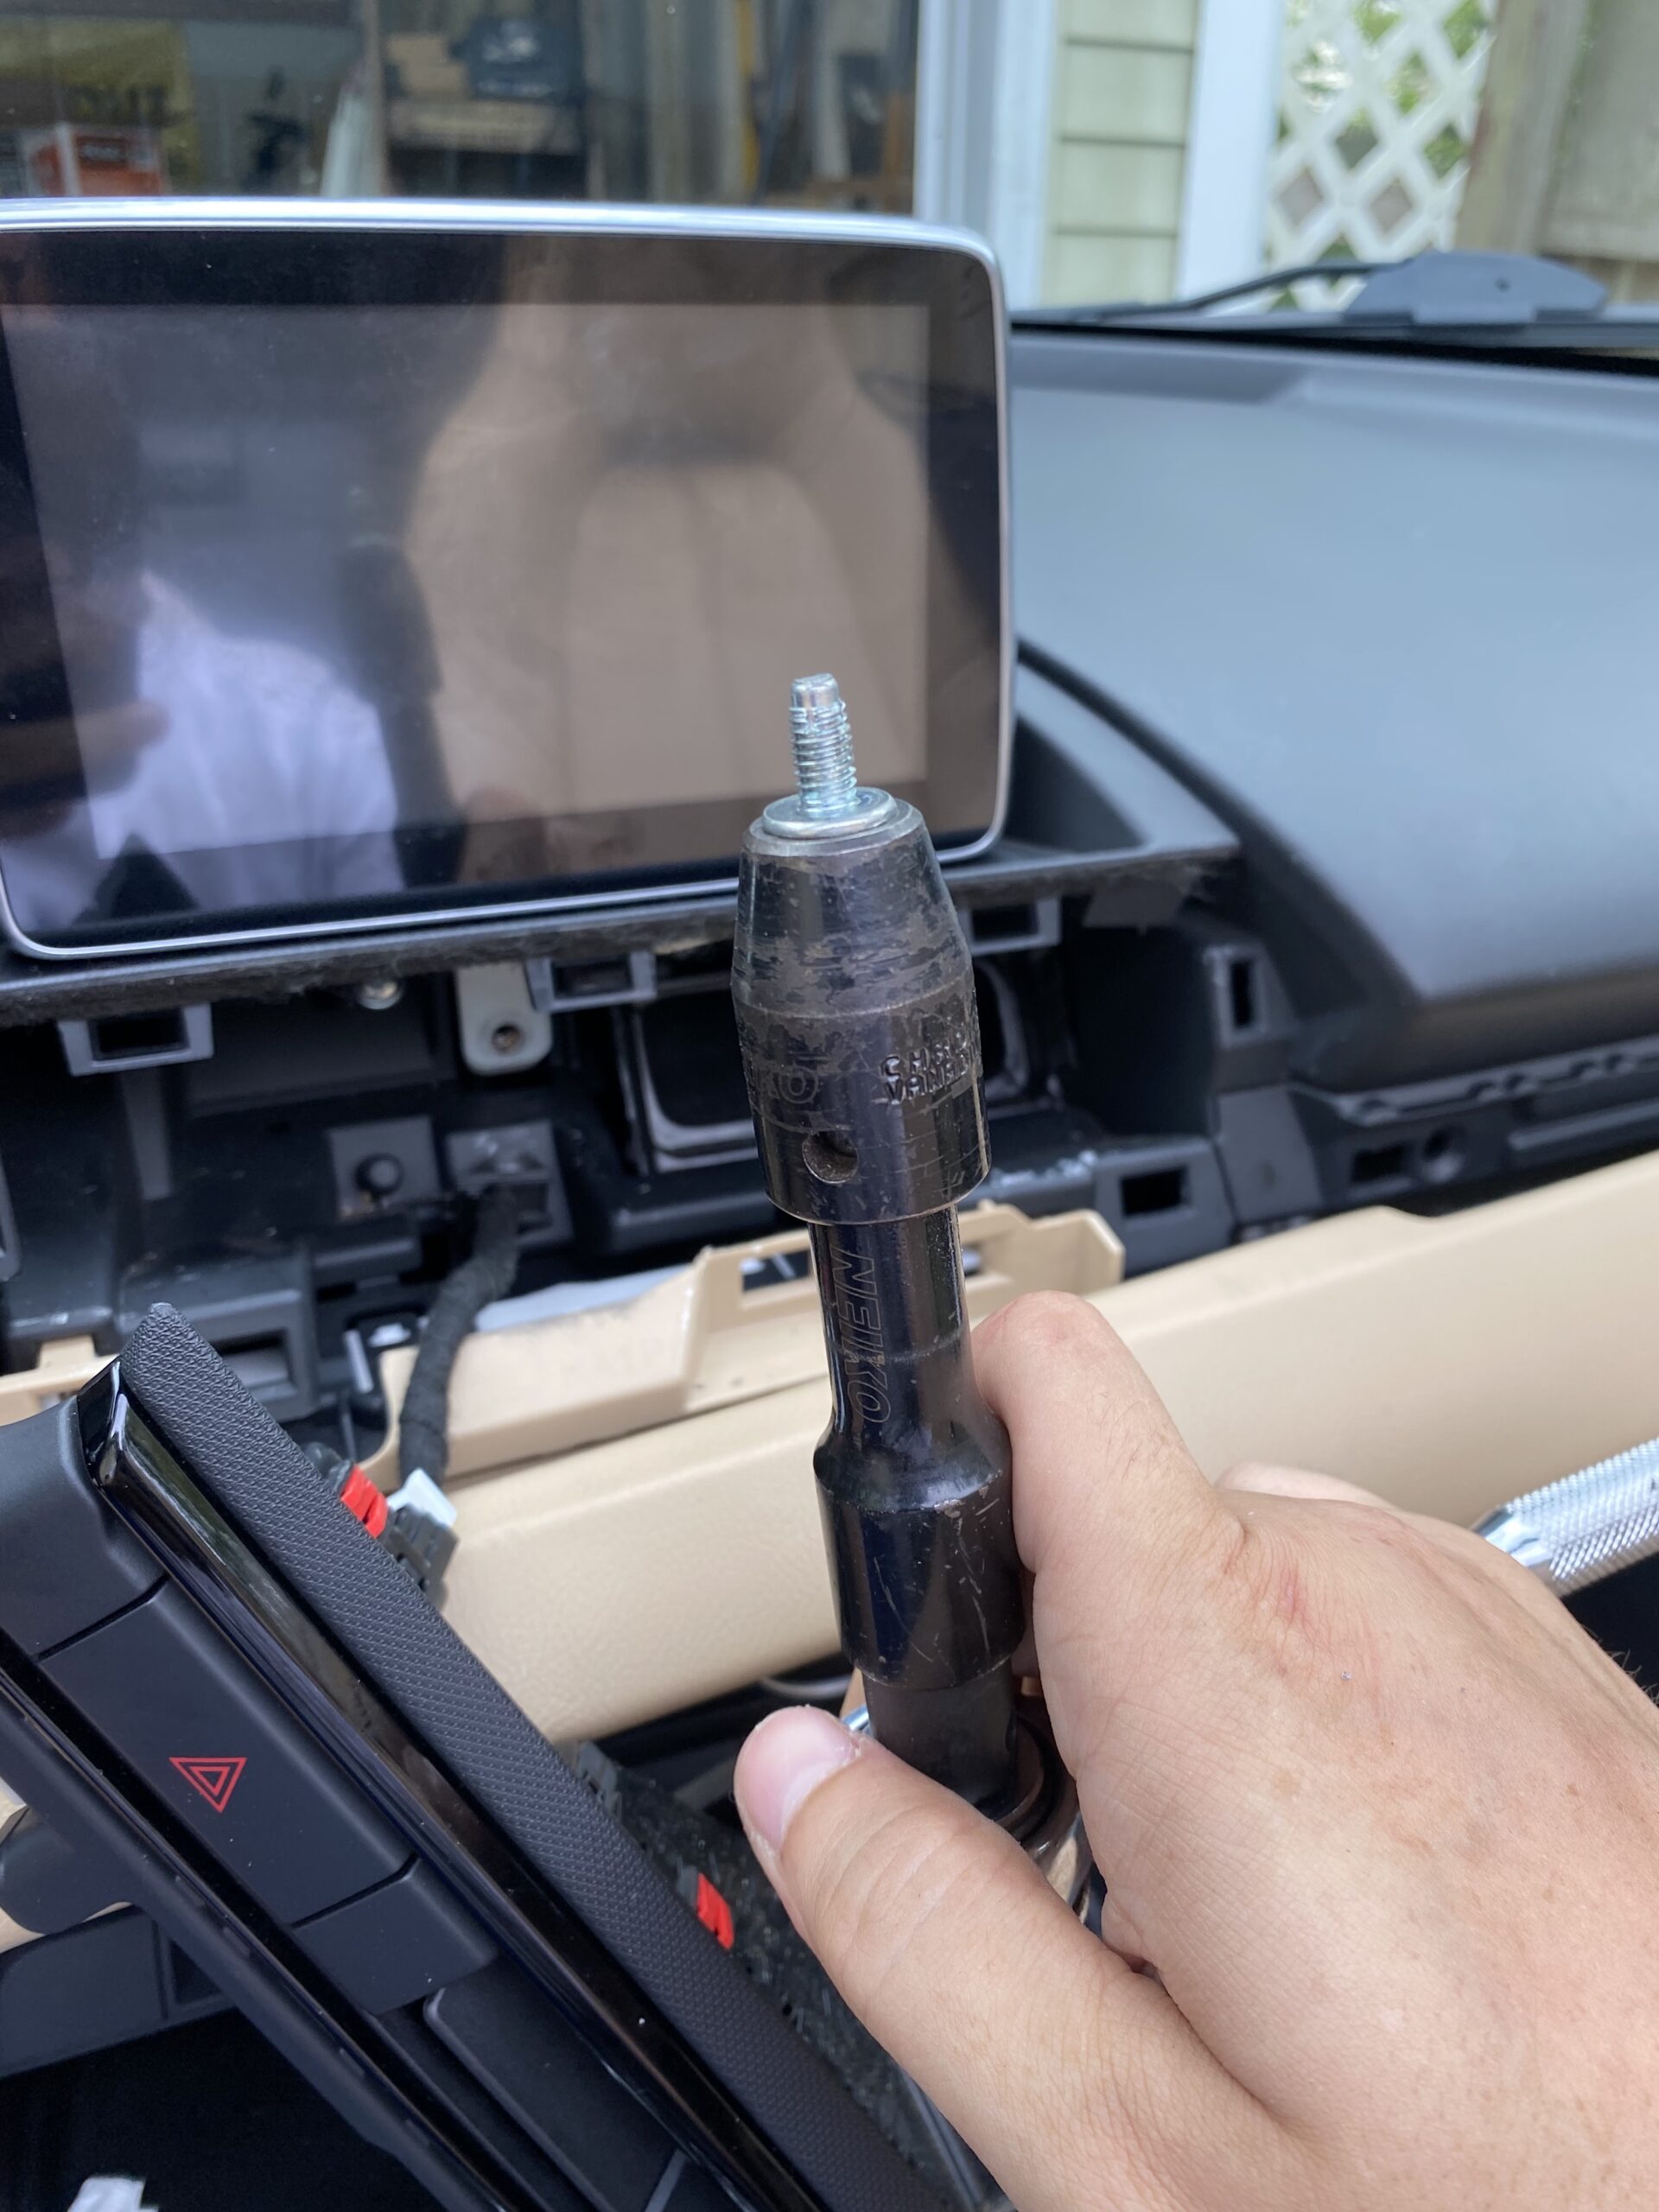
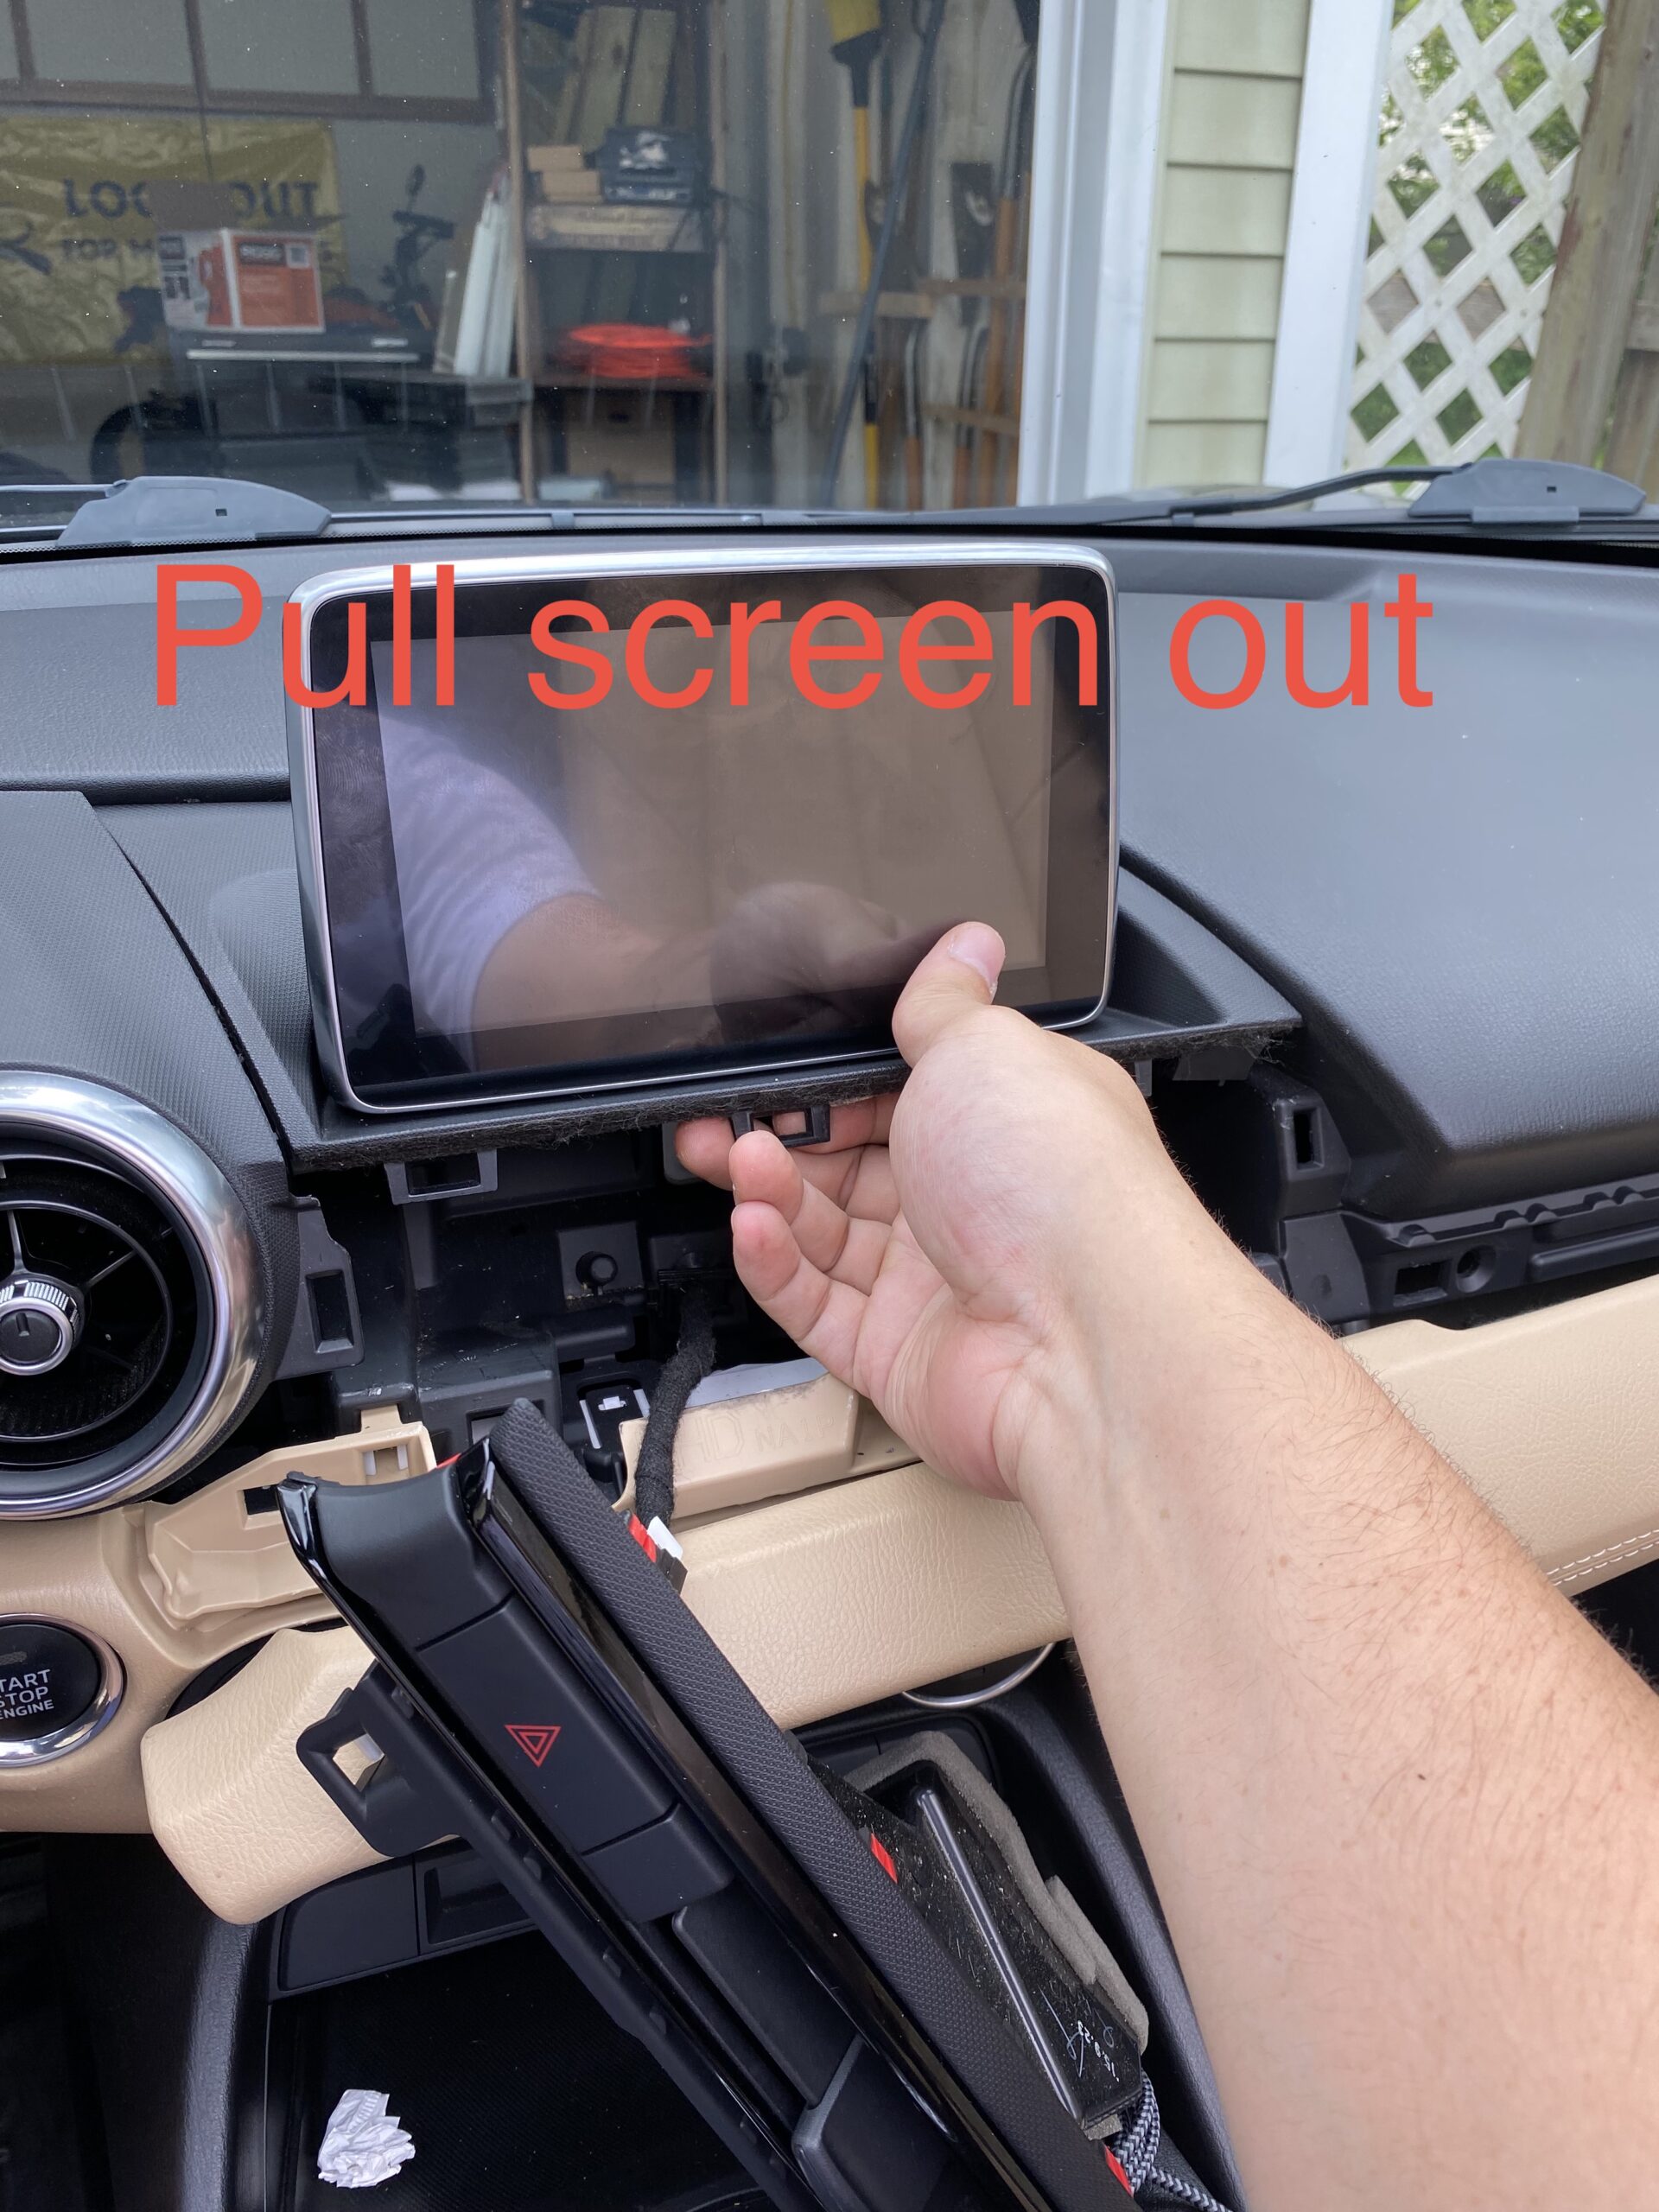
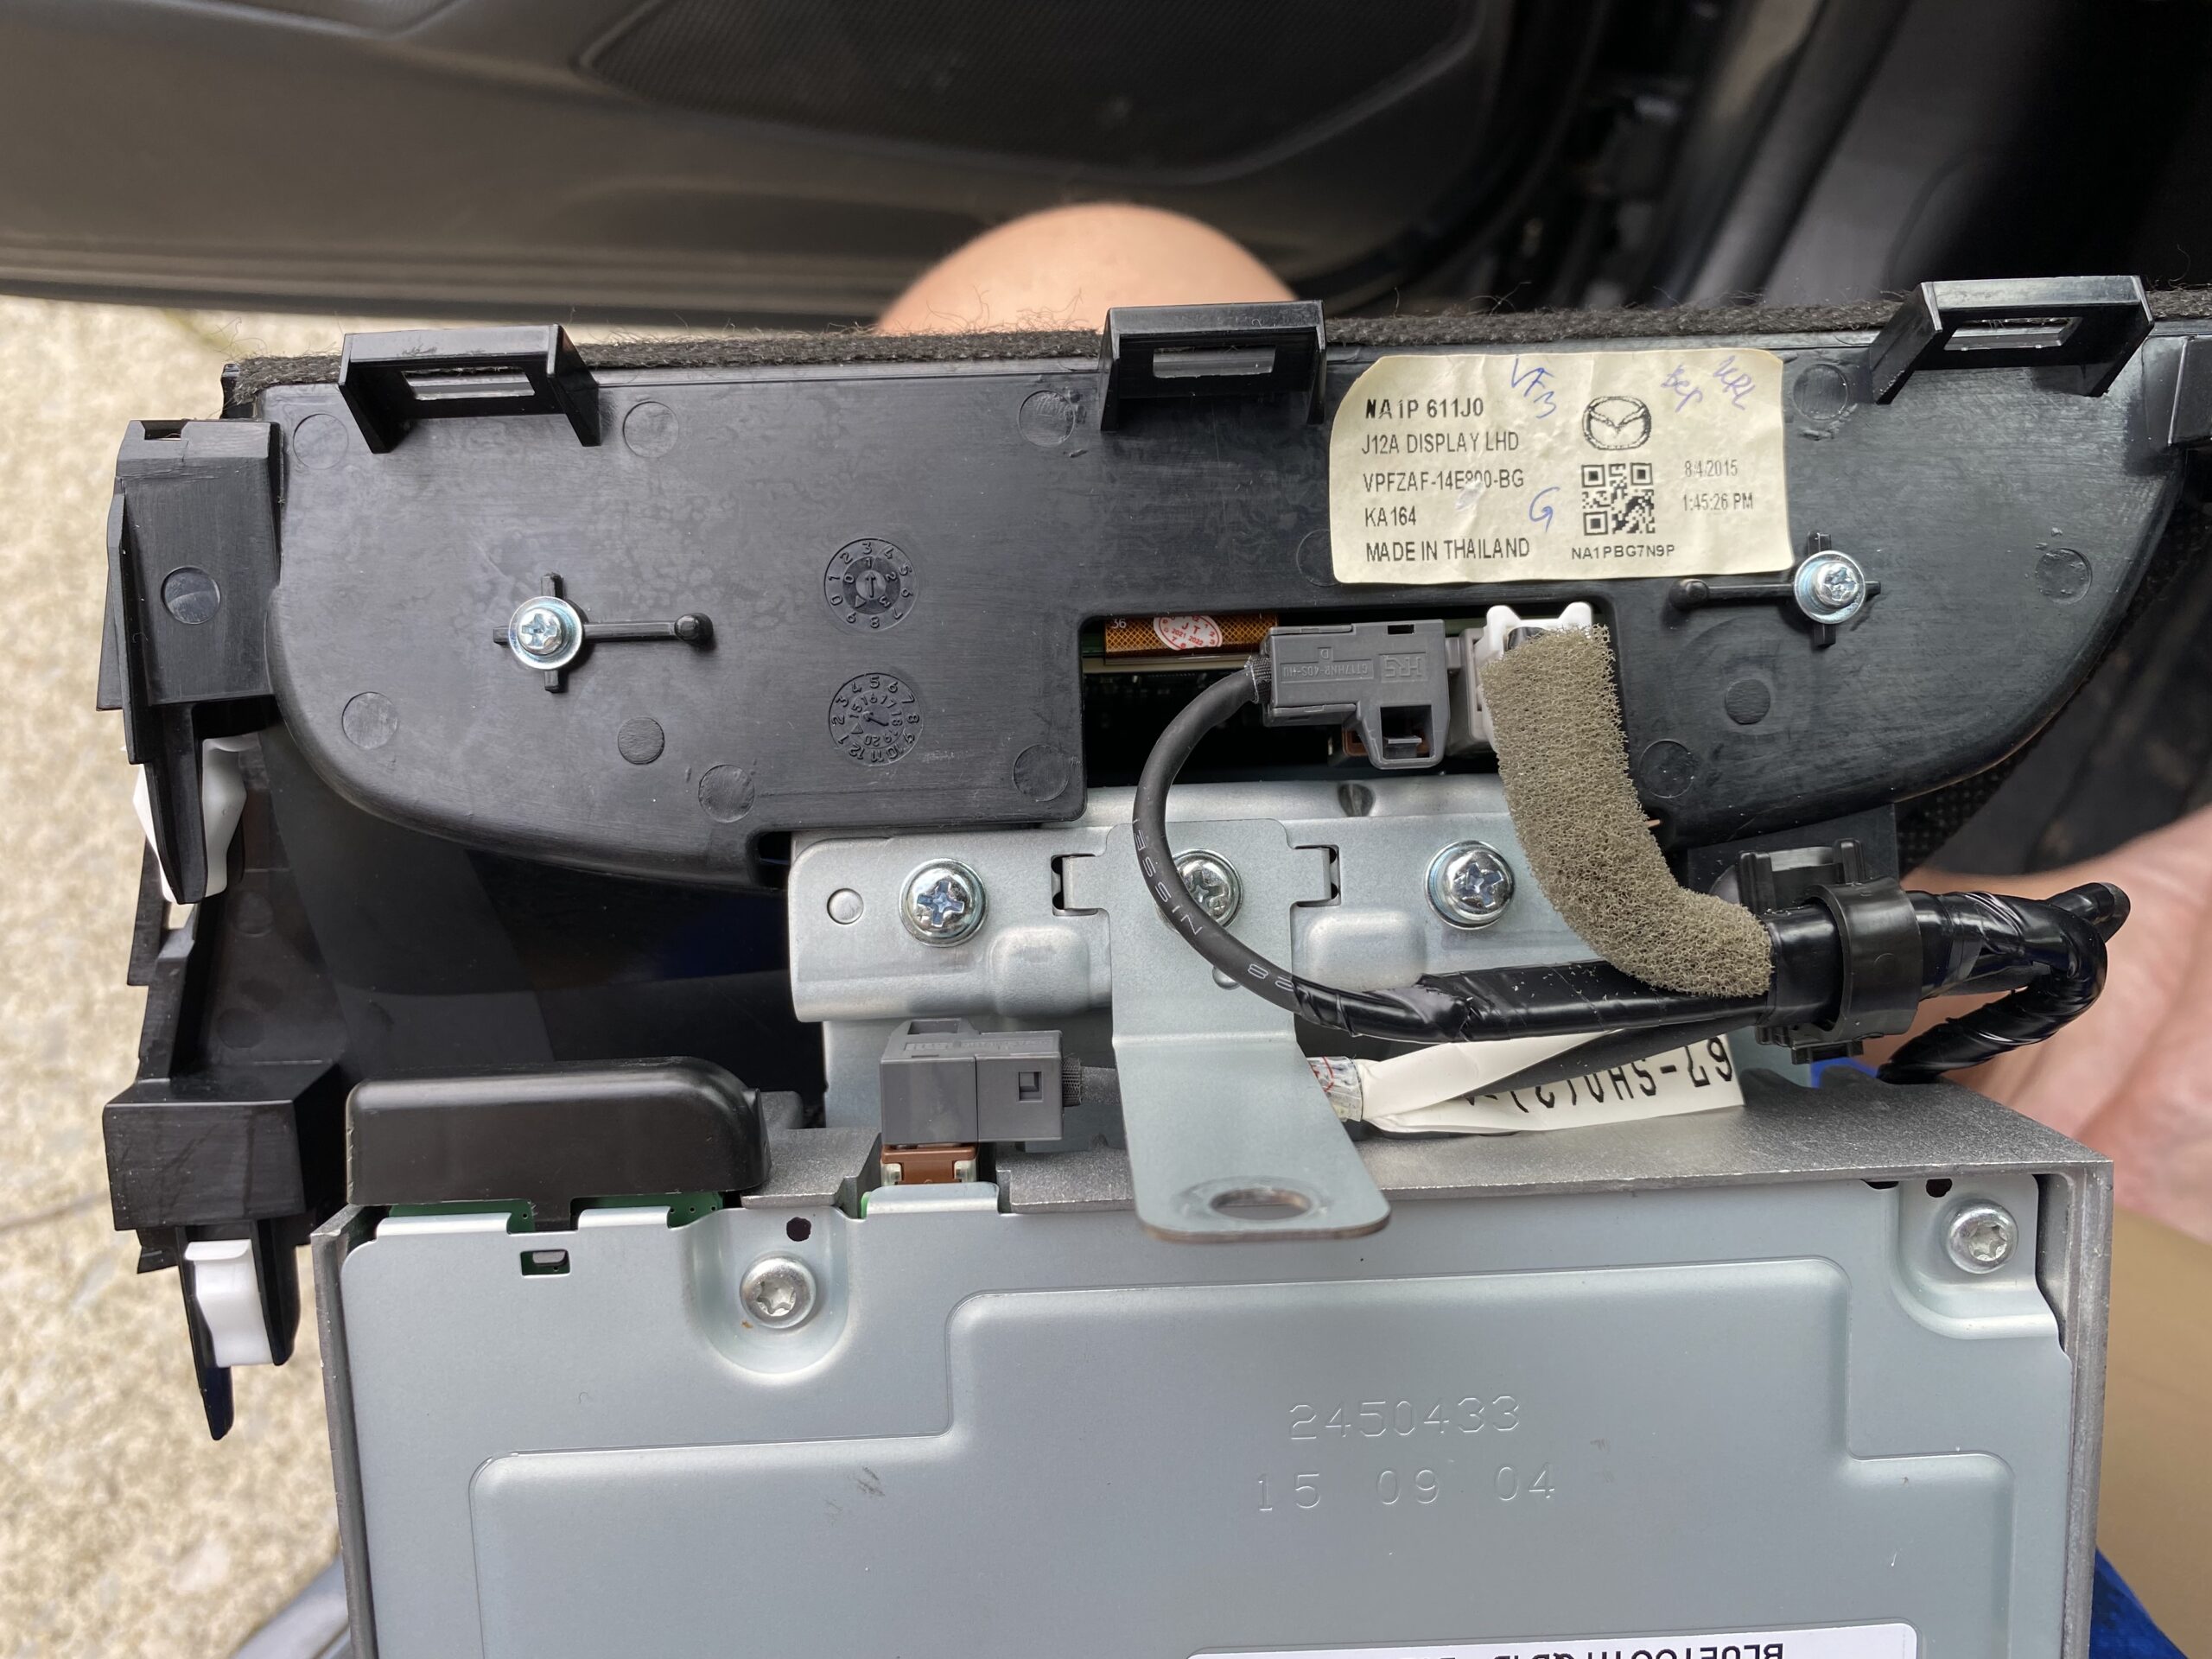
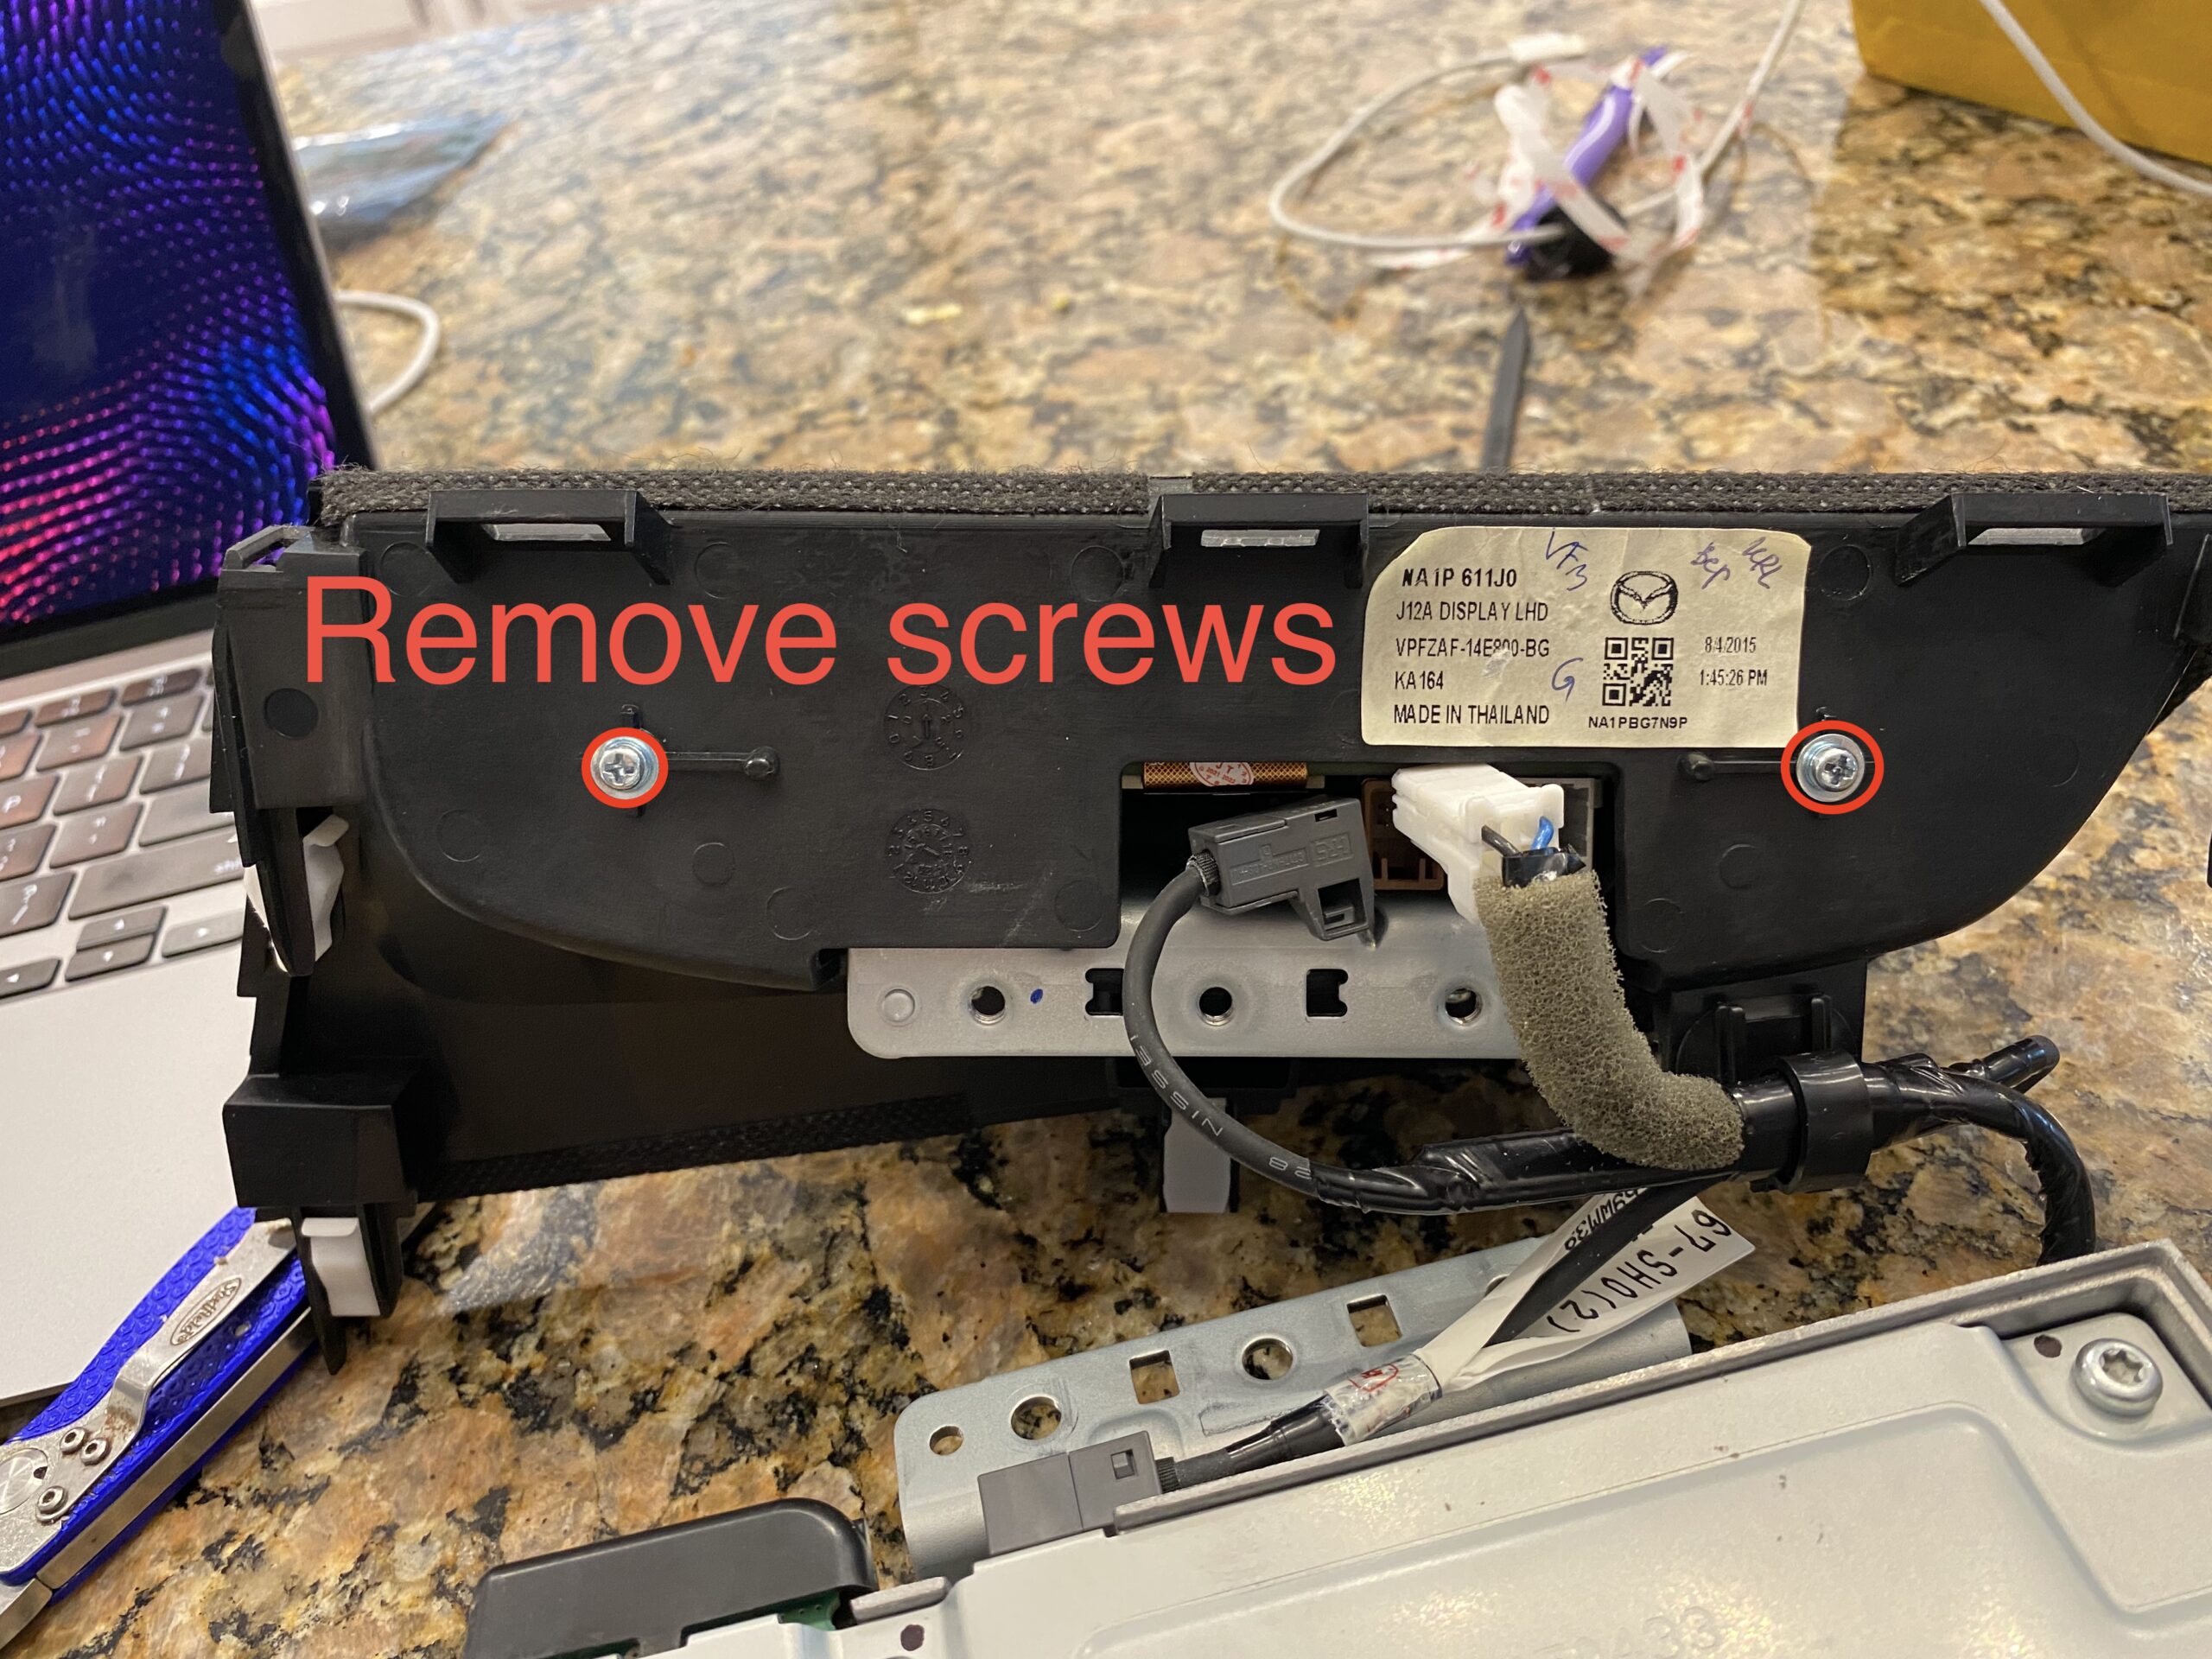
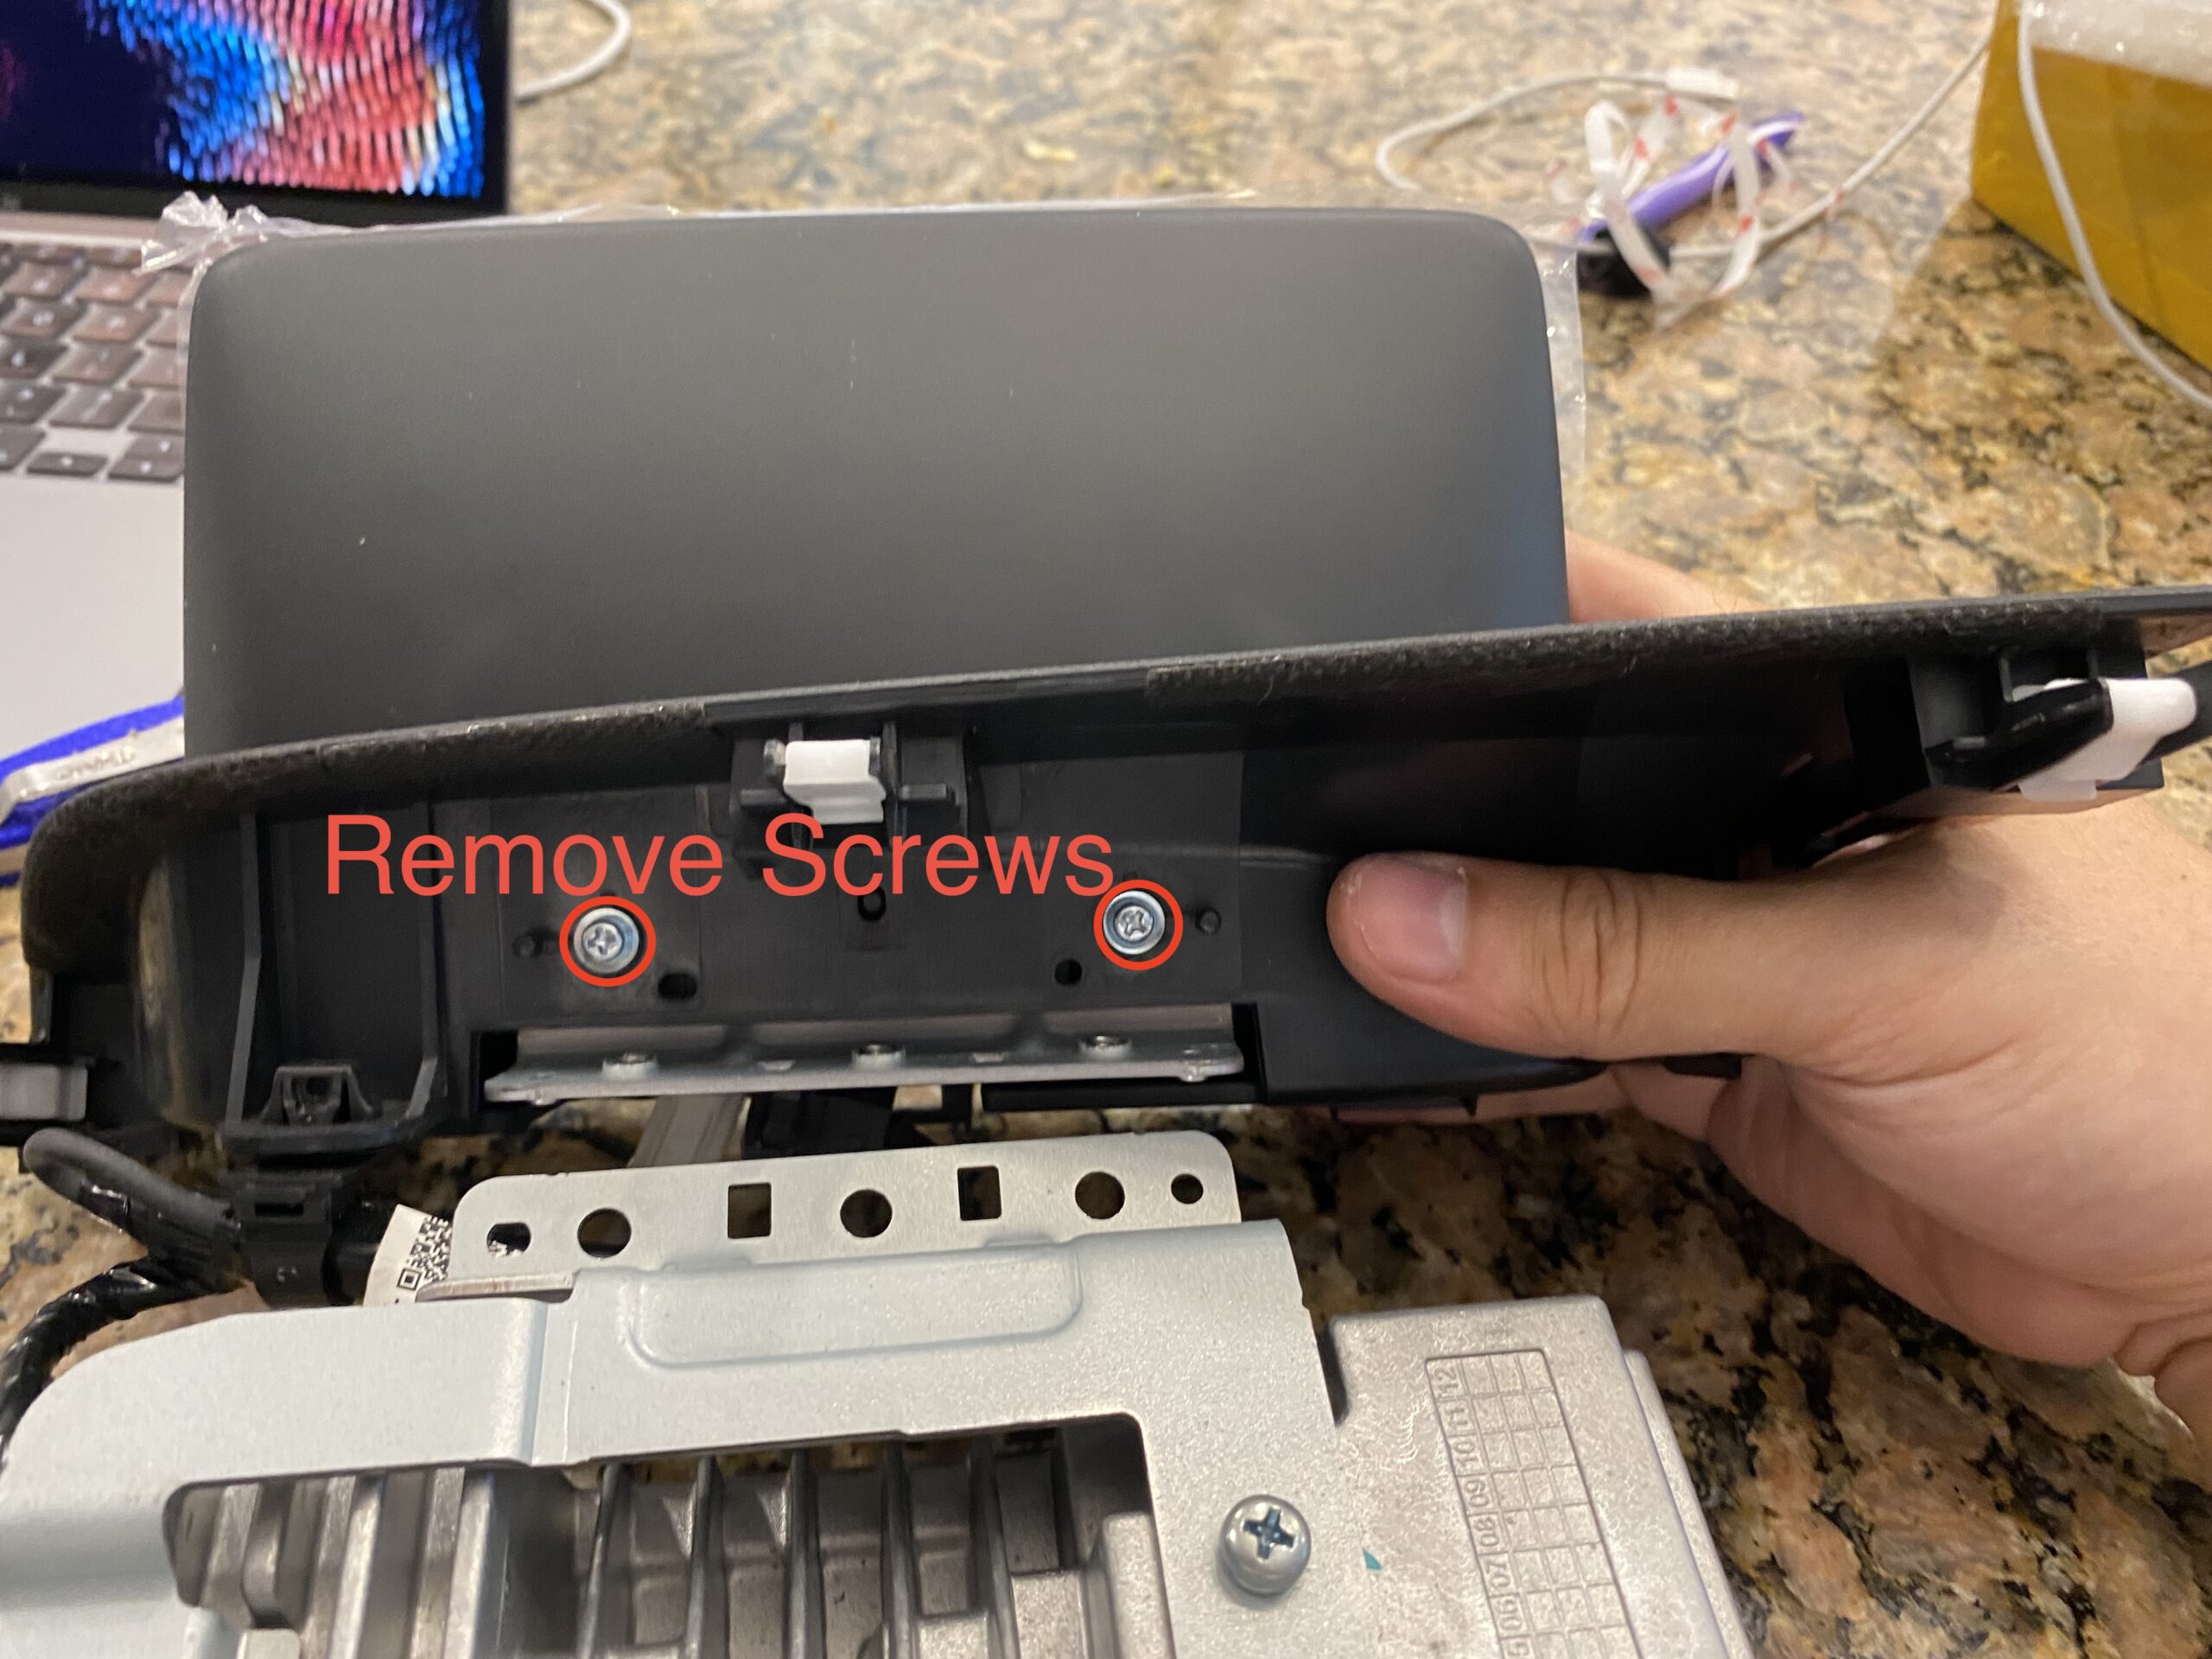
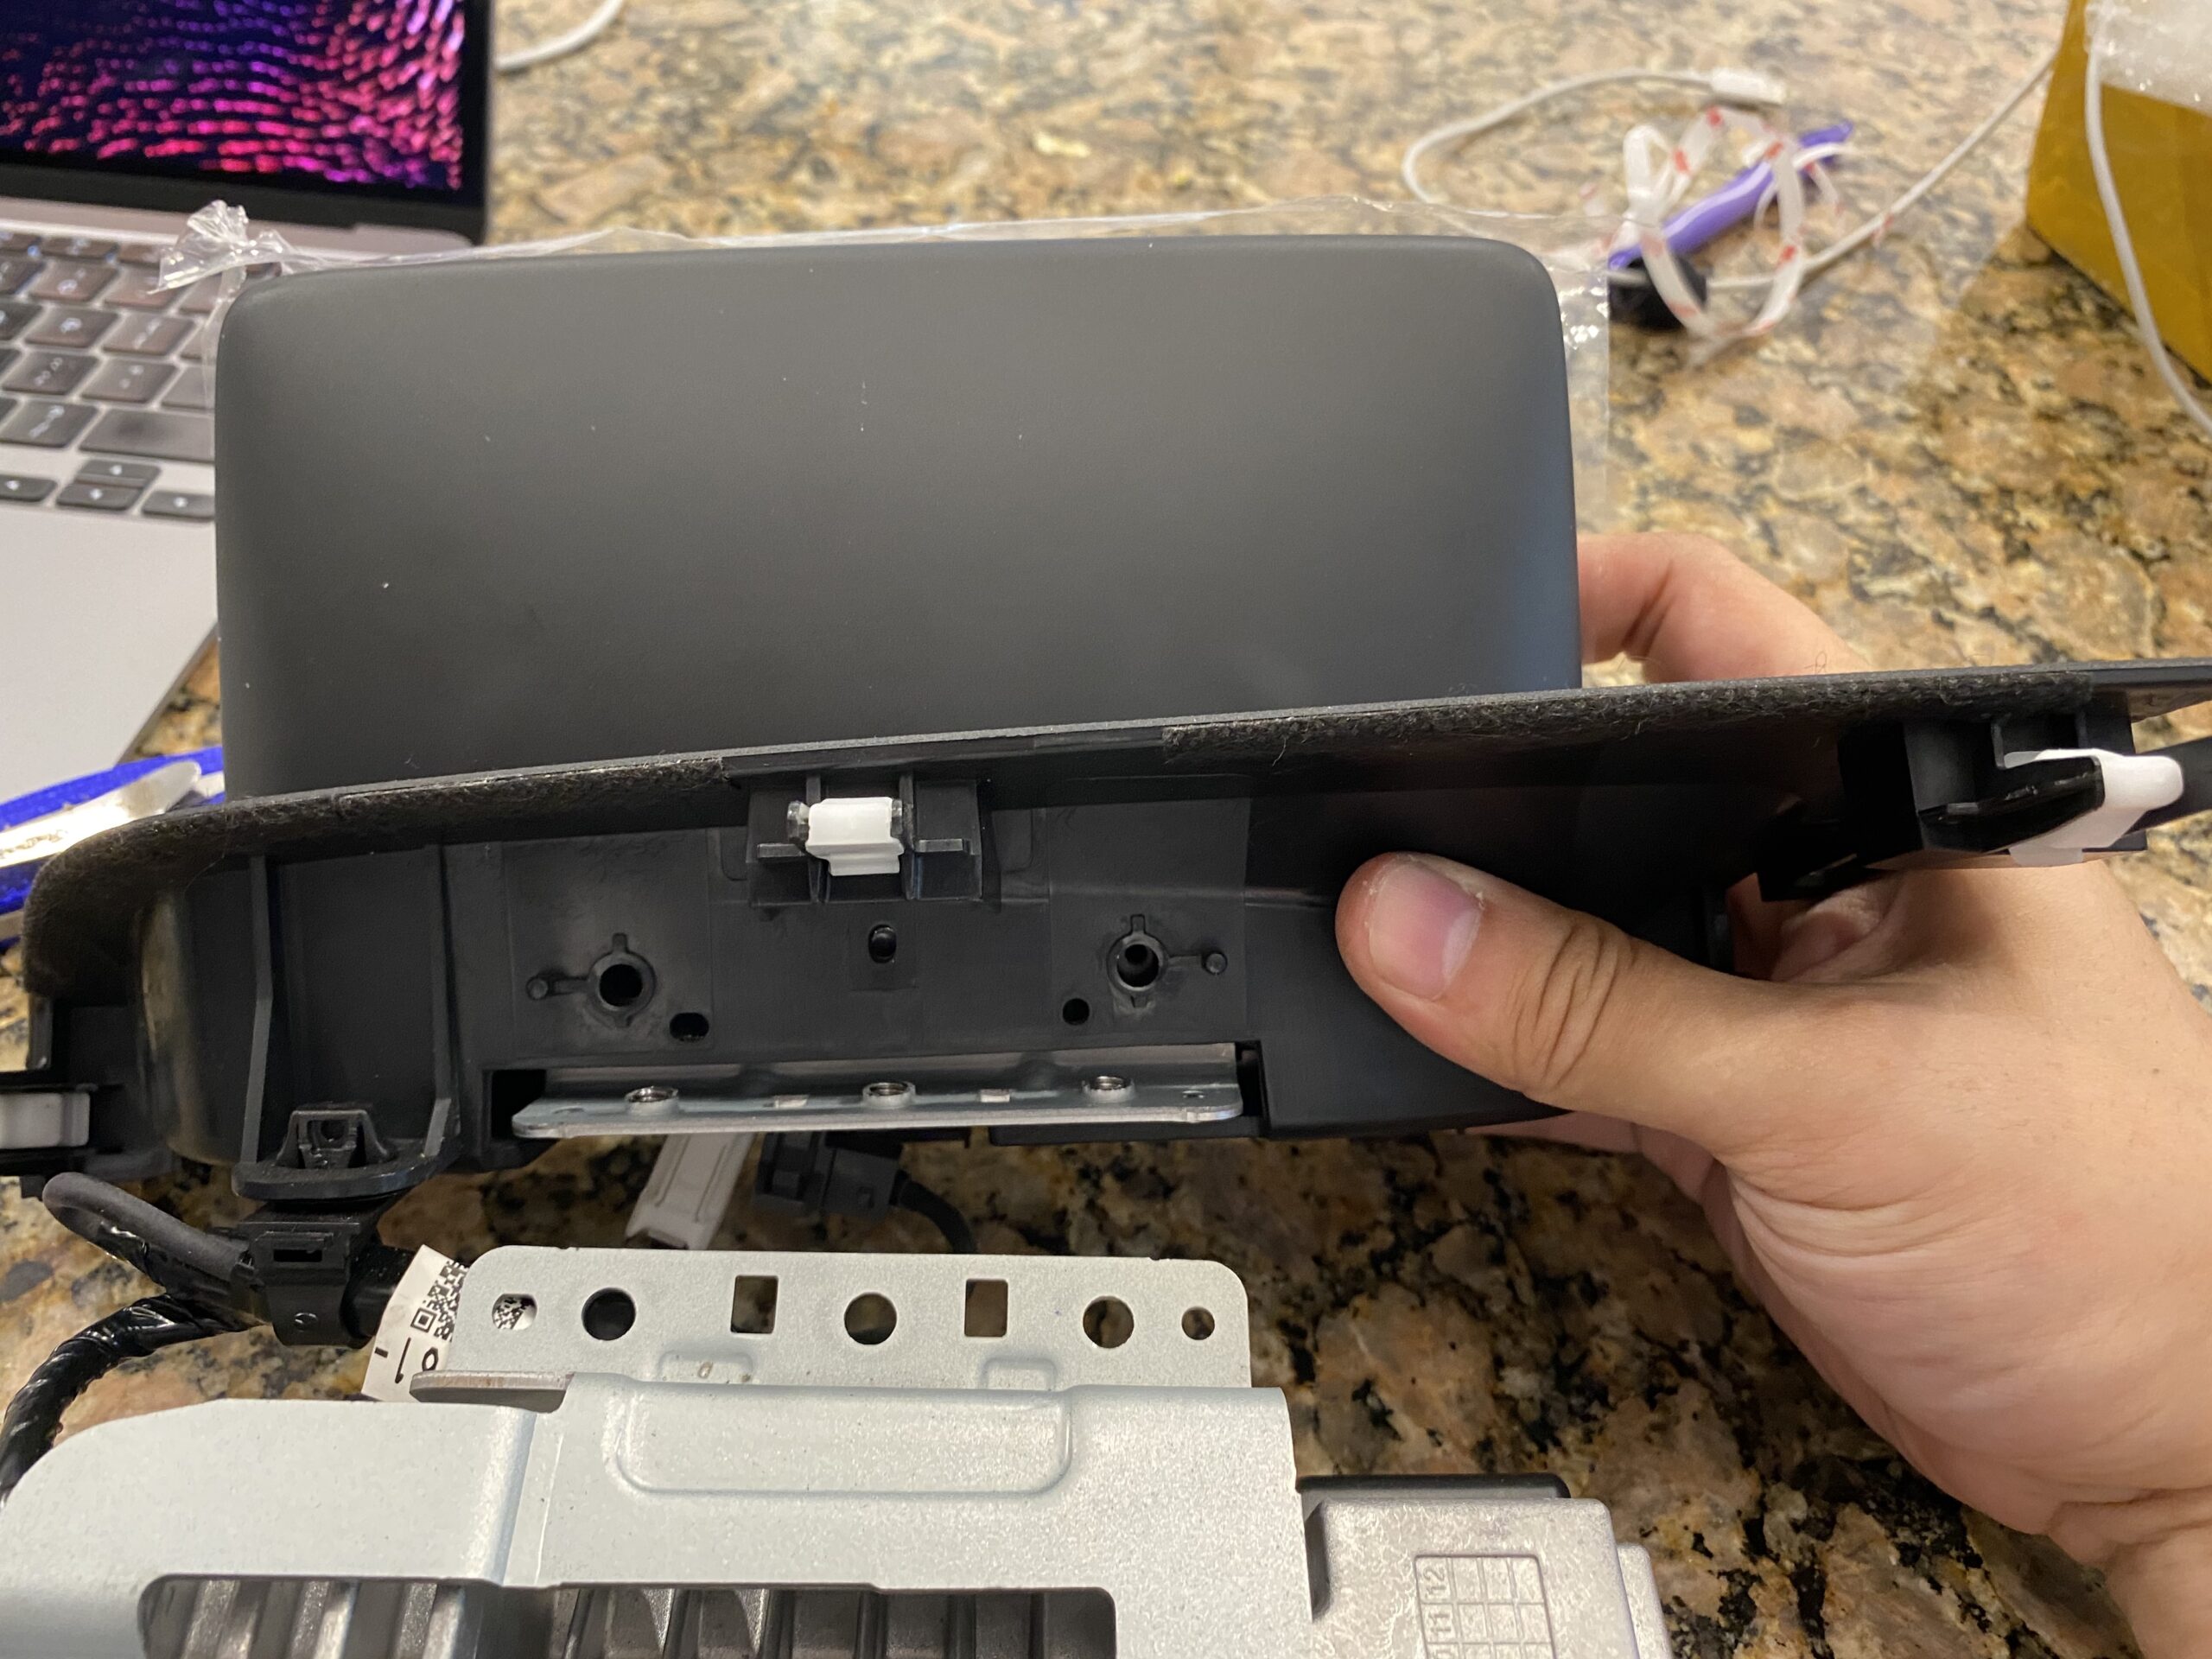
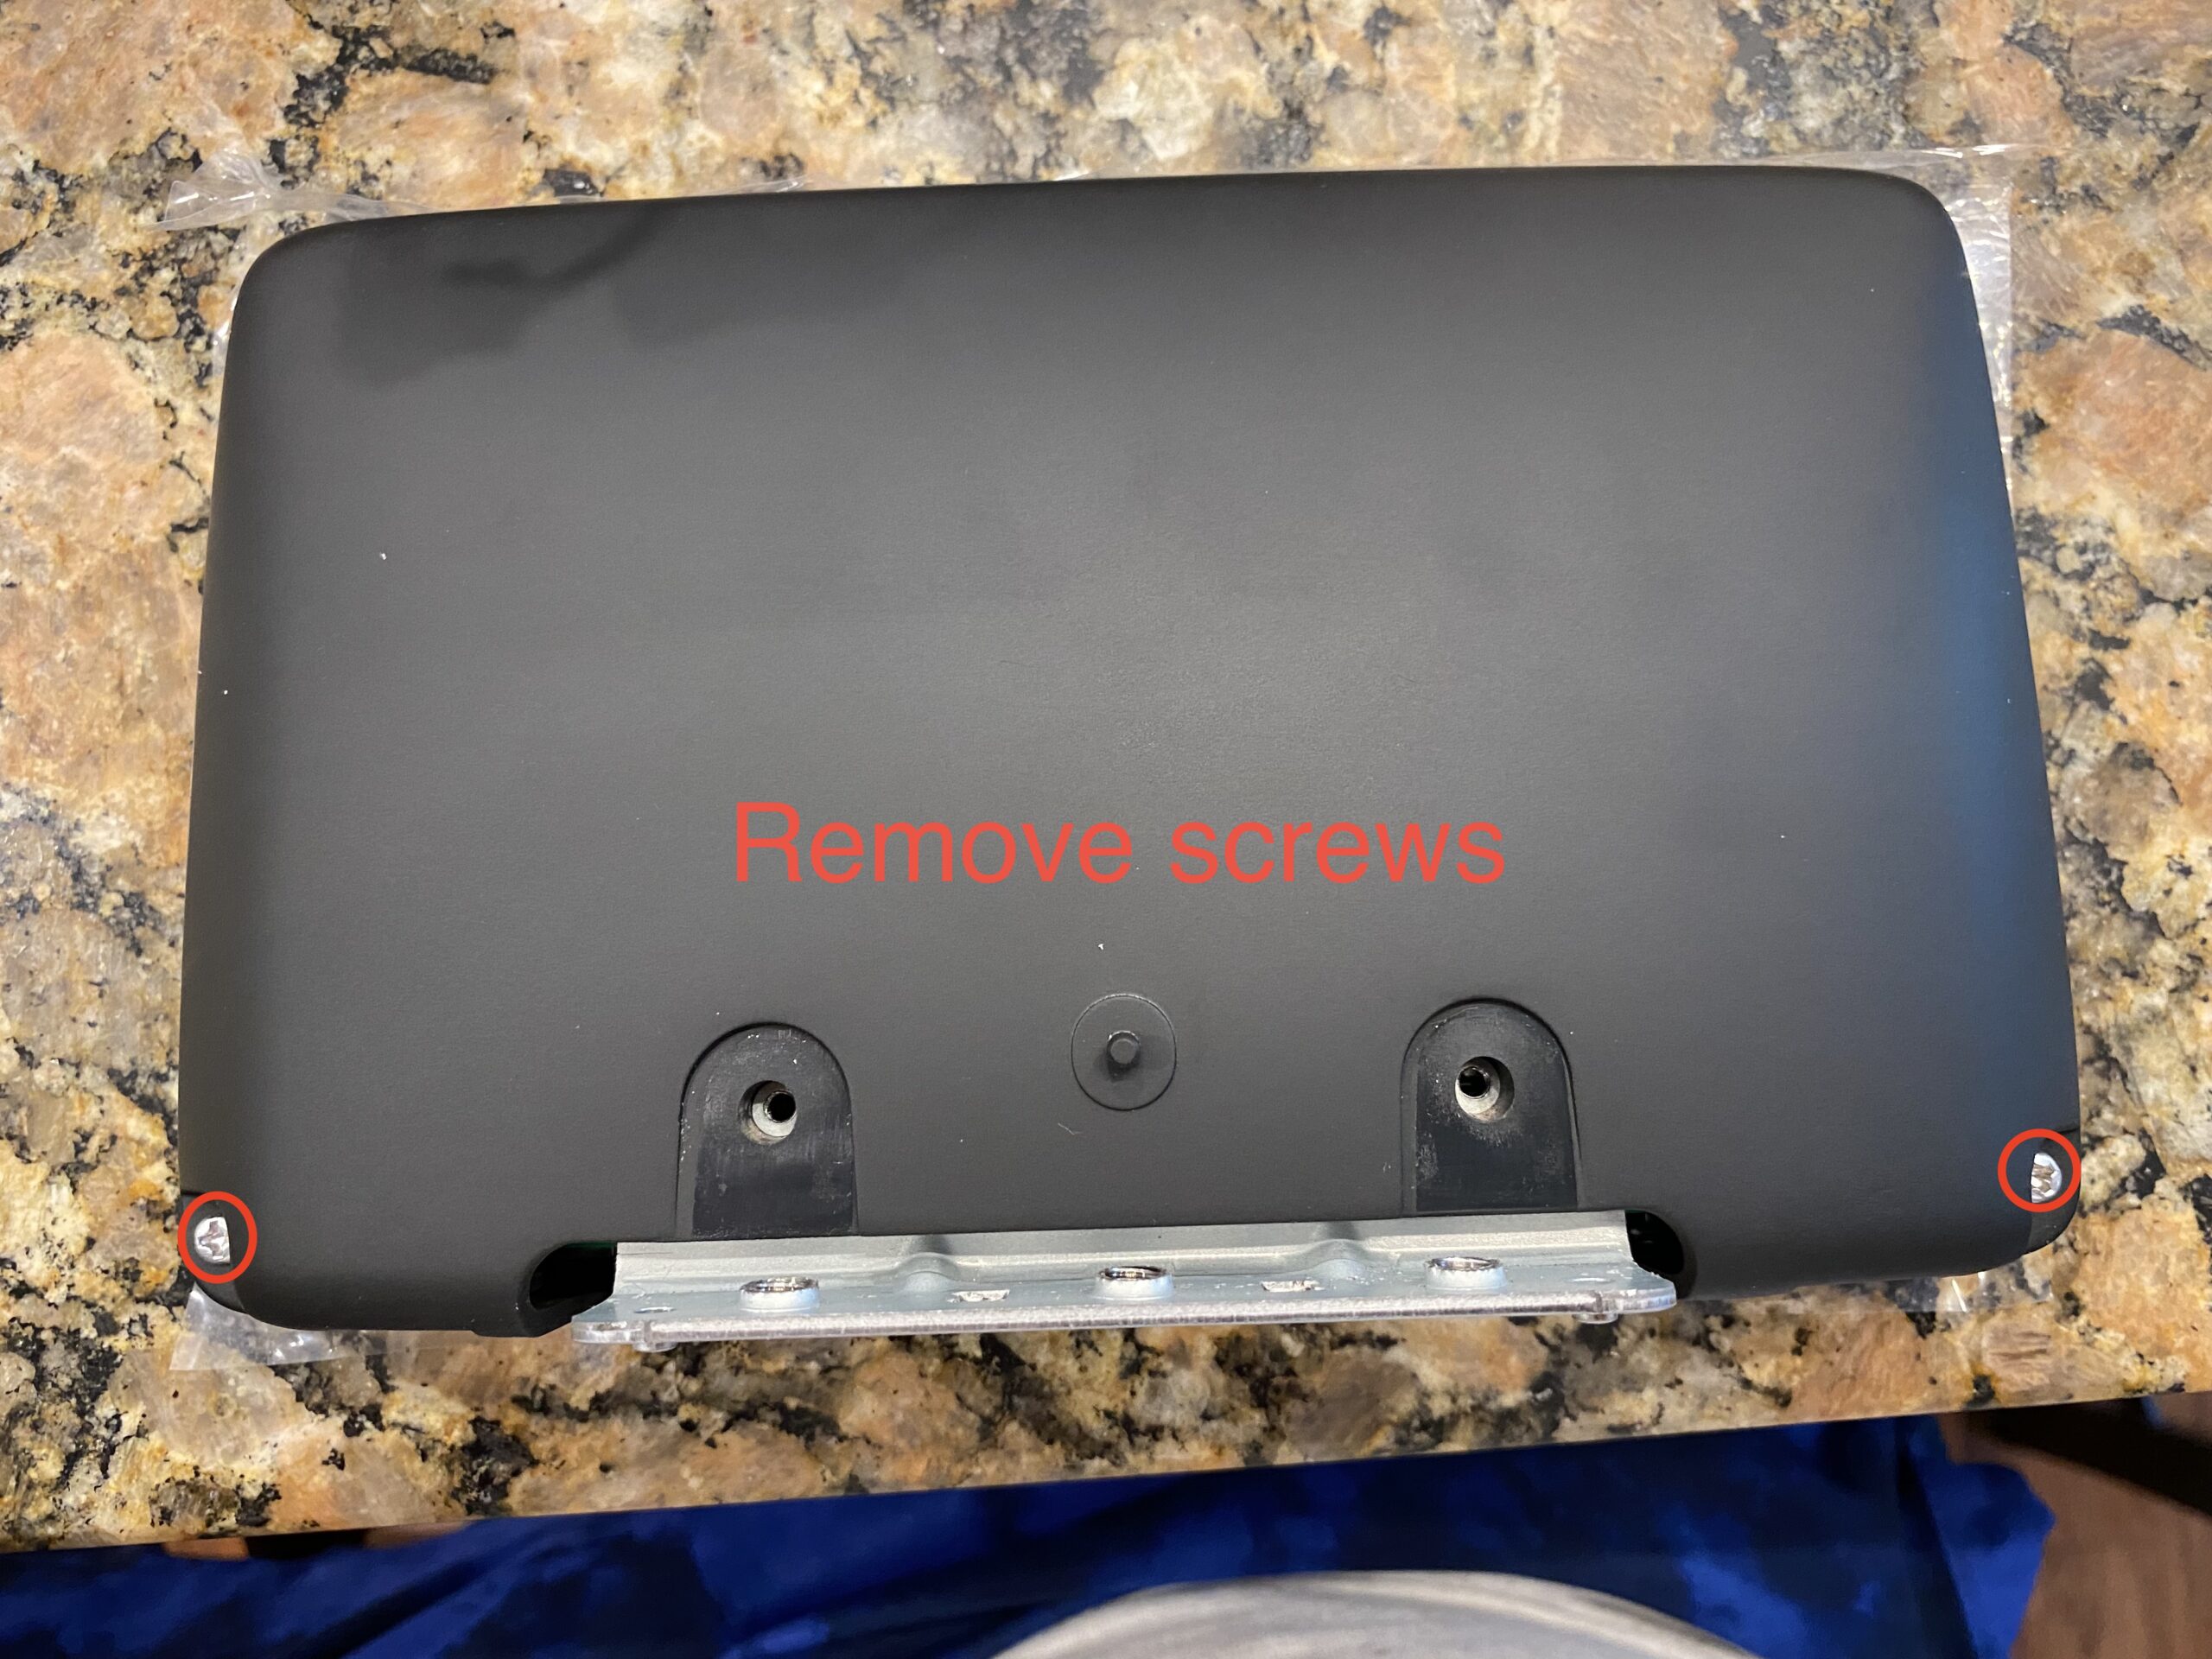
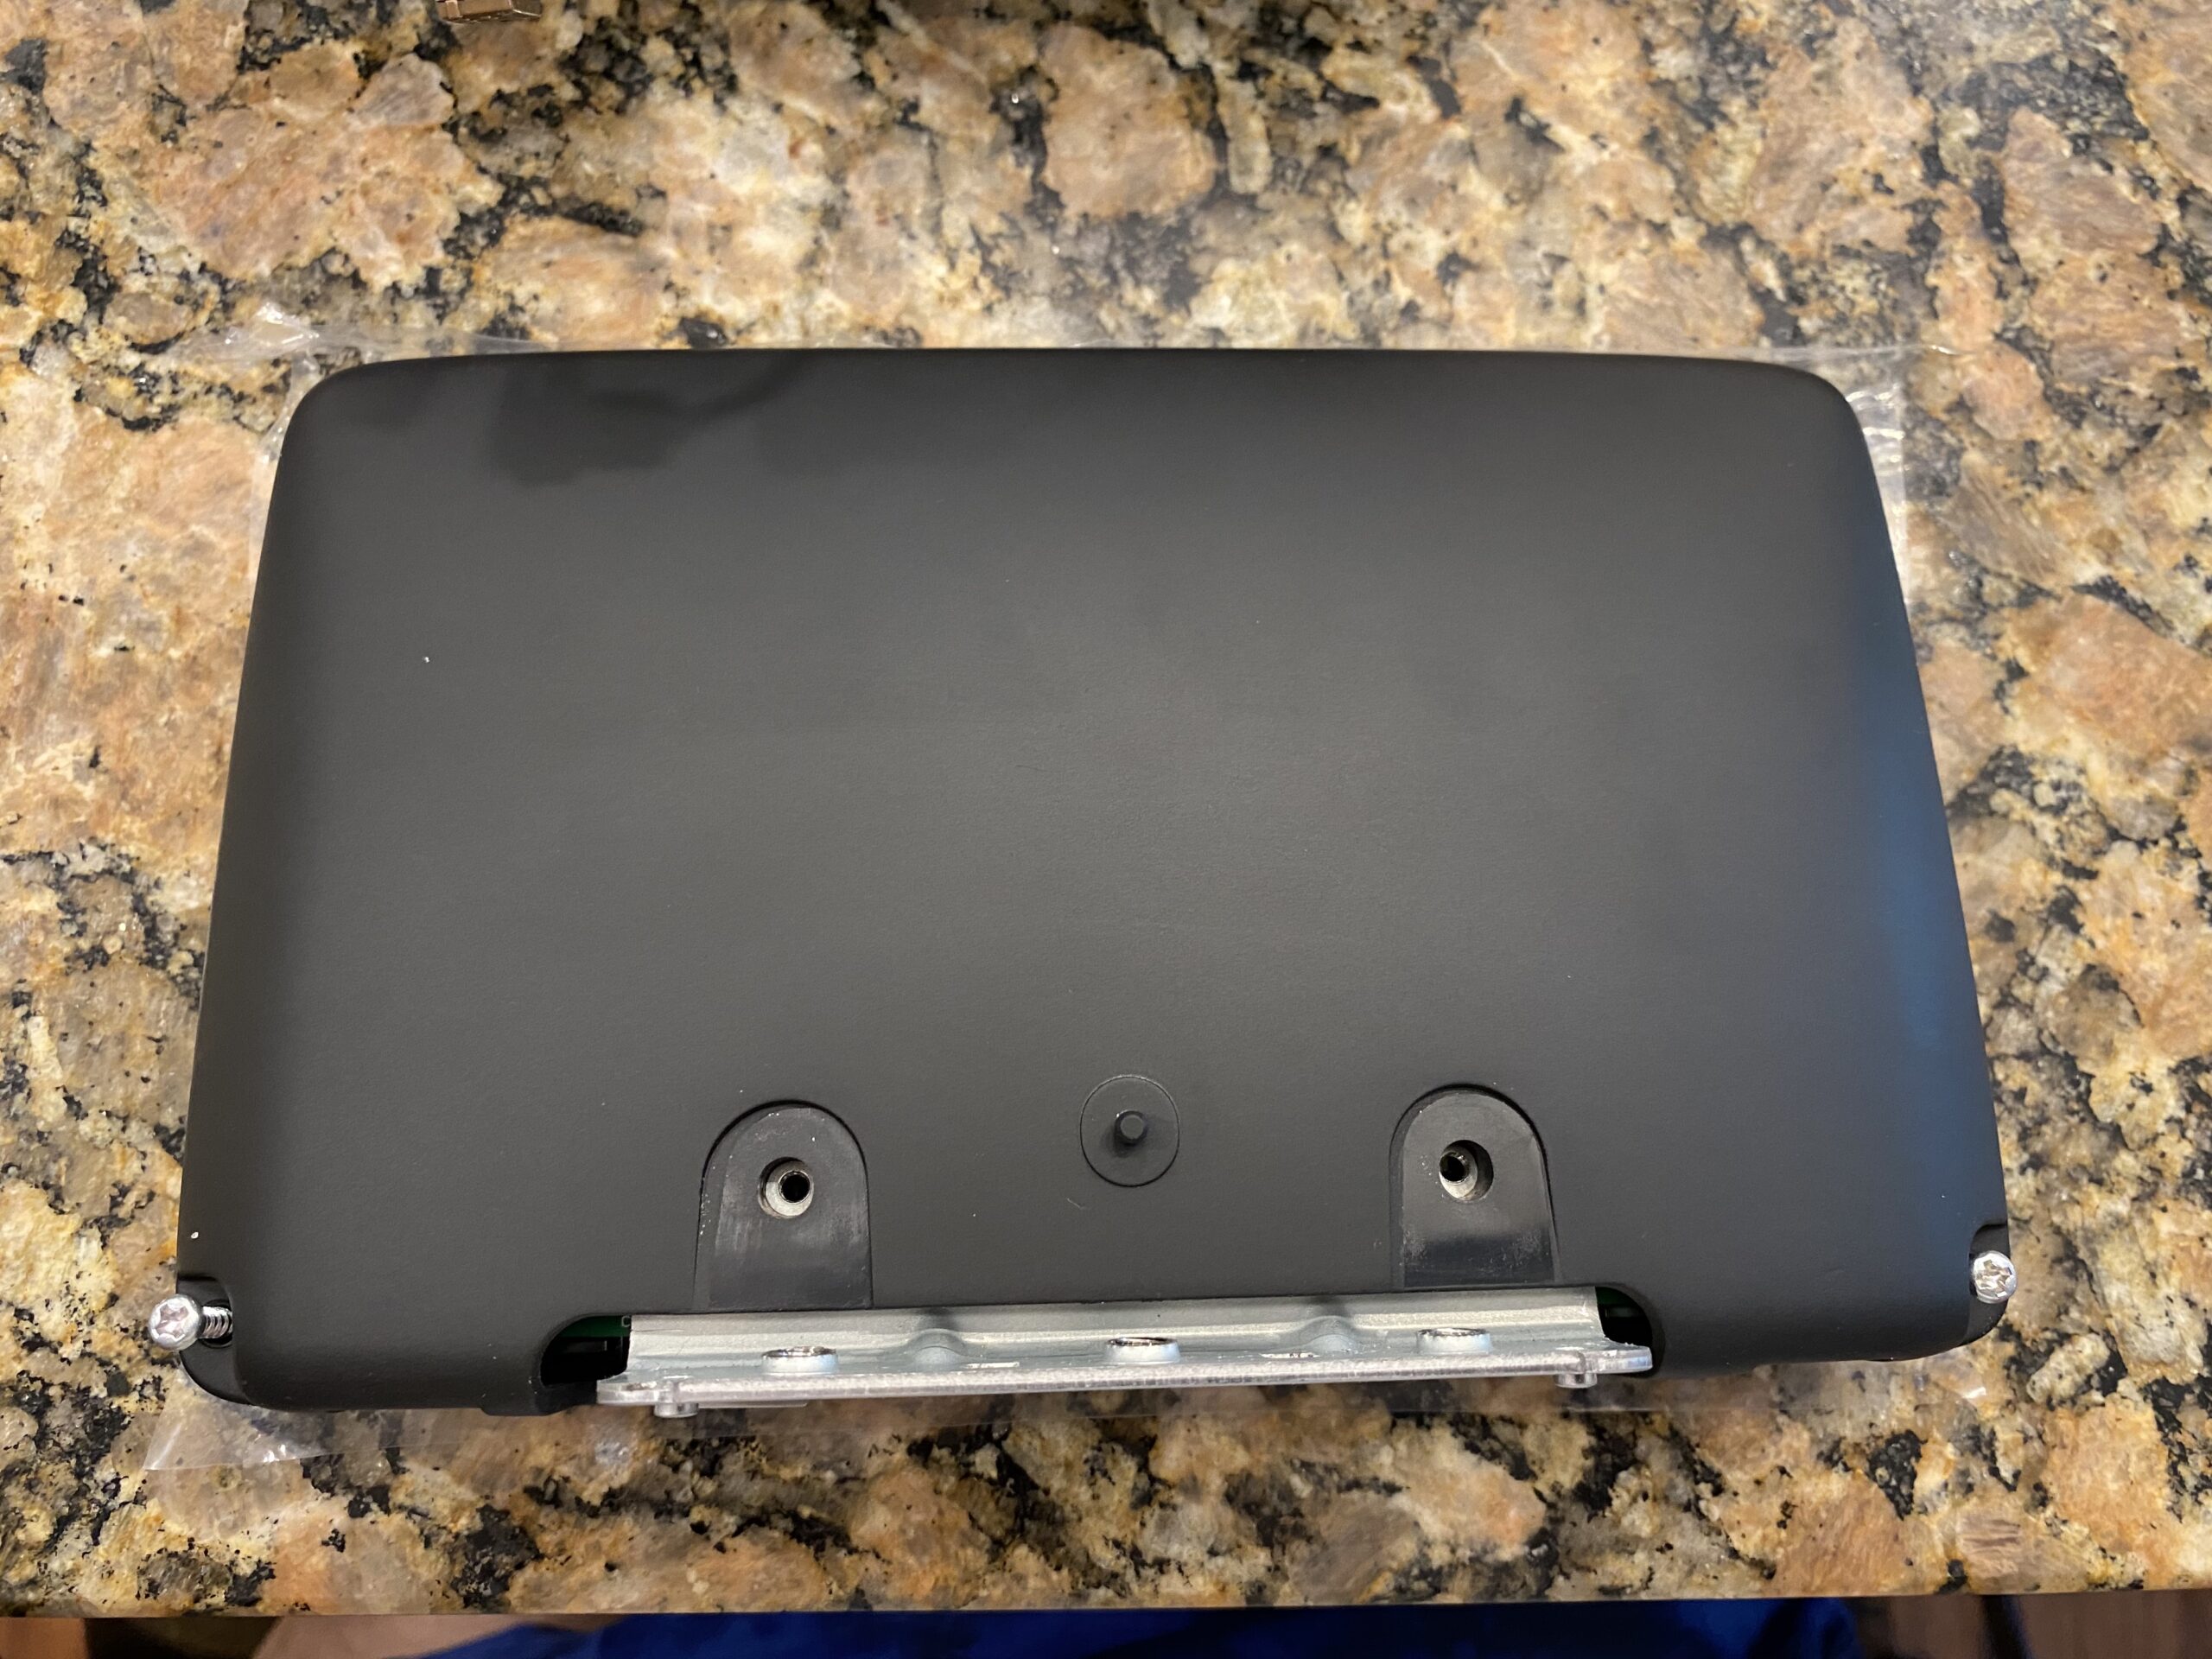
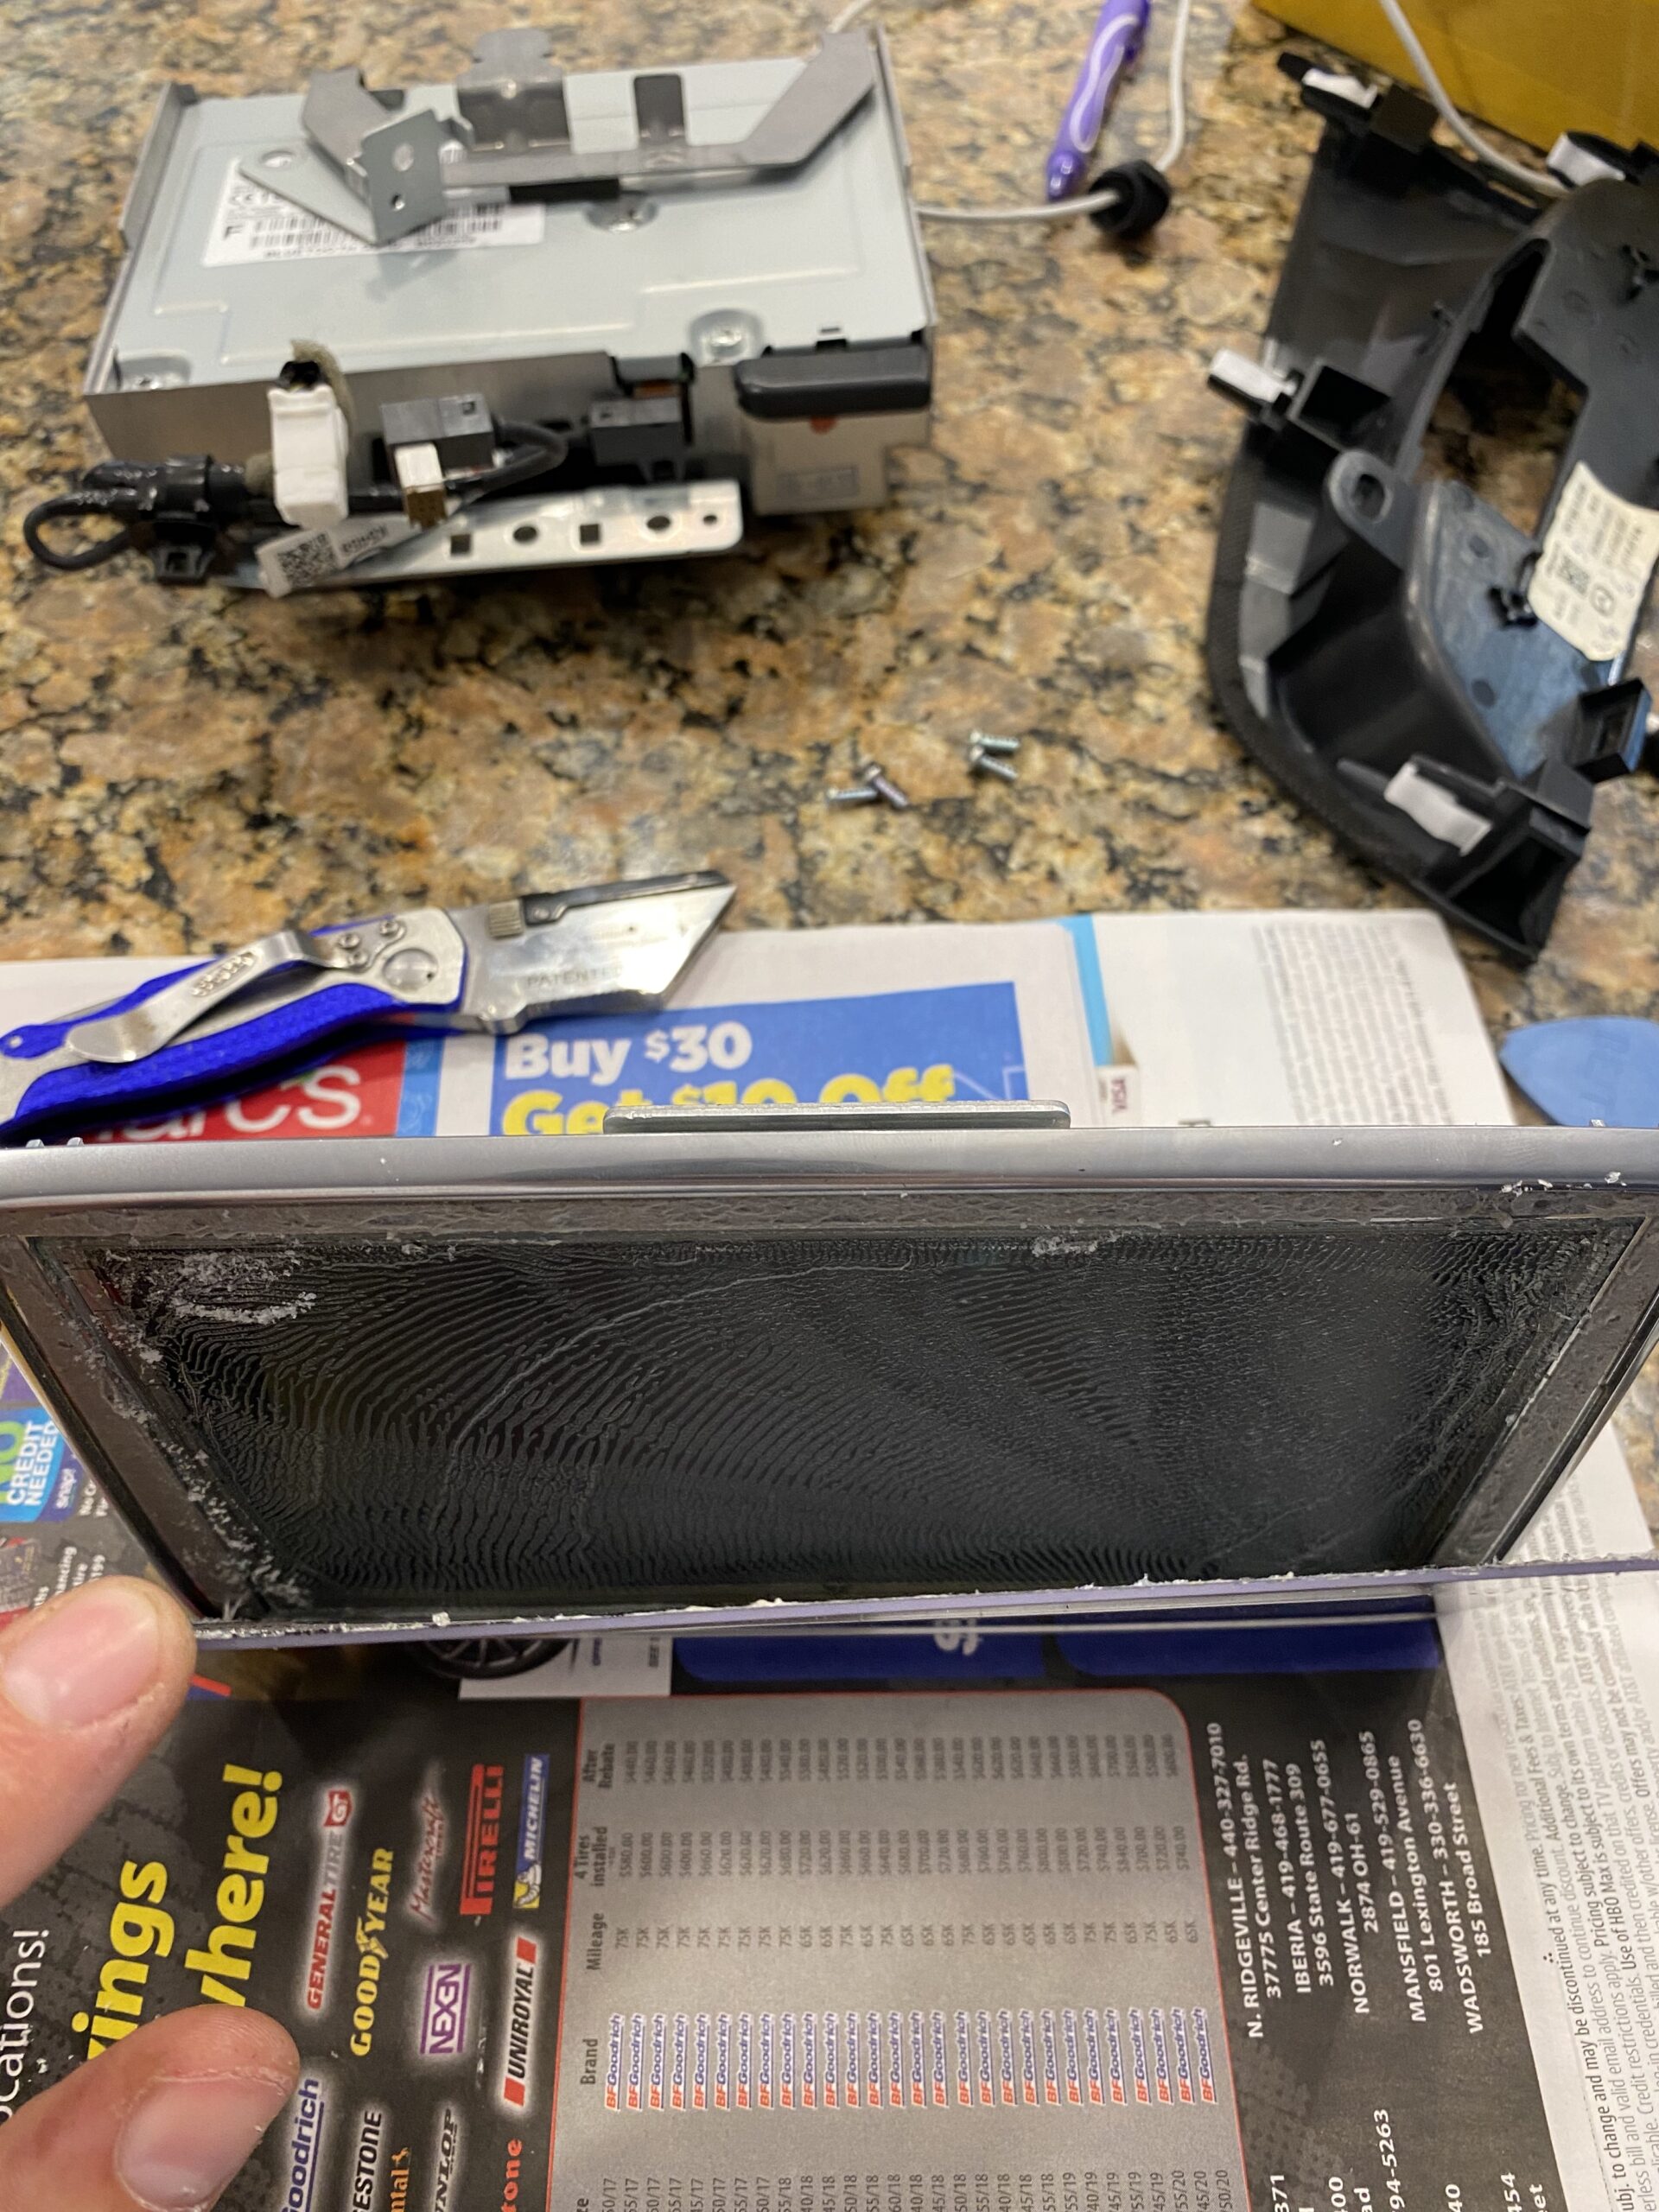
Step 1 — Remove the display and surrounding trim
Start by removing the trim pieces and screen assembly carefully. Keep track of screws and clips as you go.

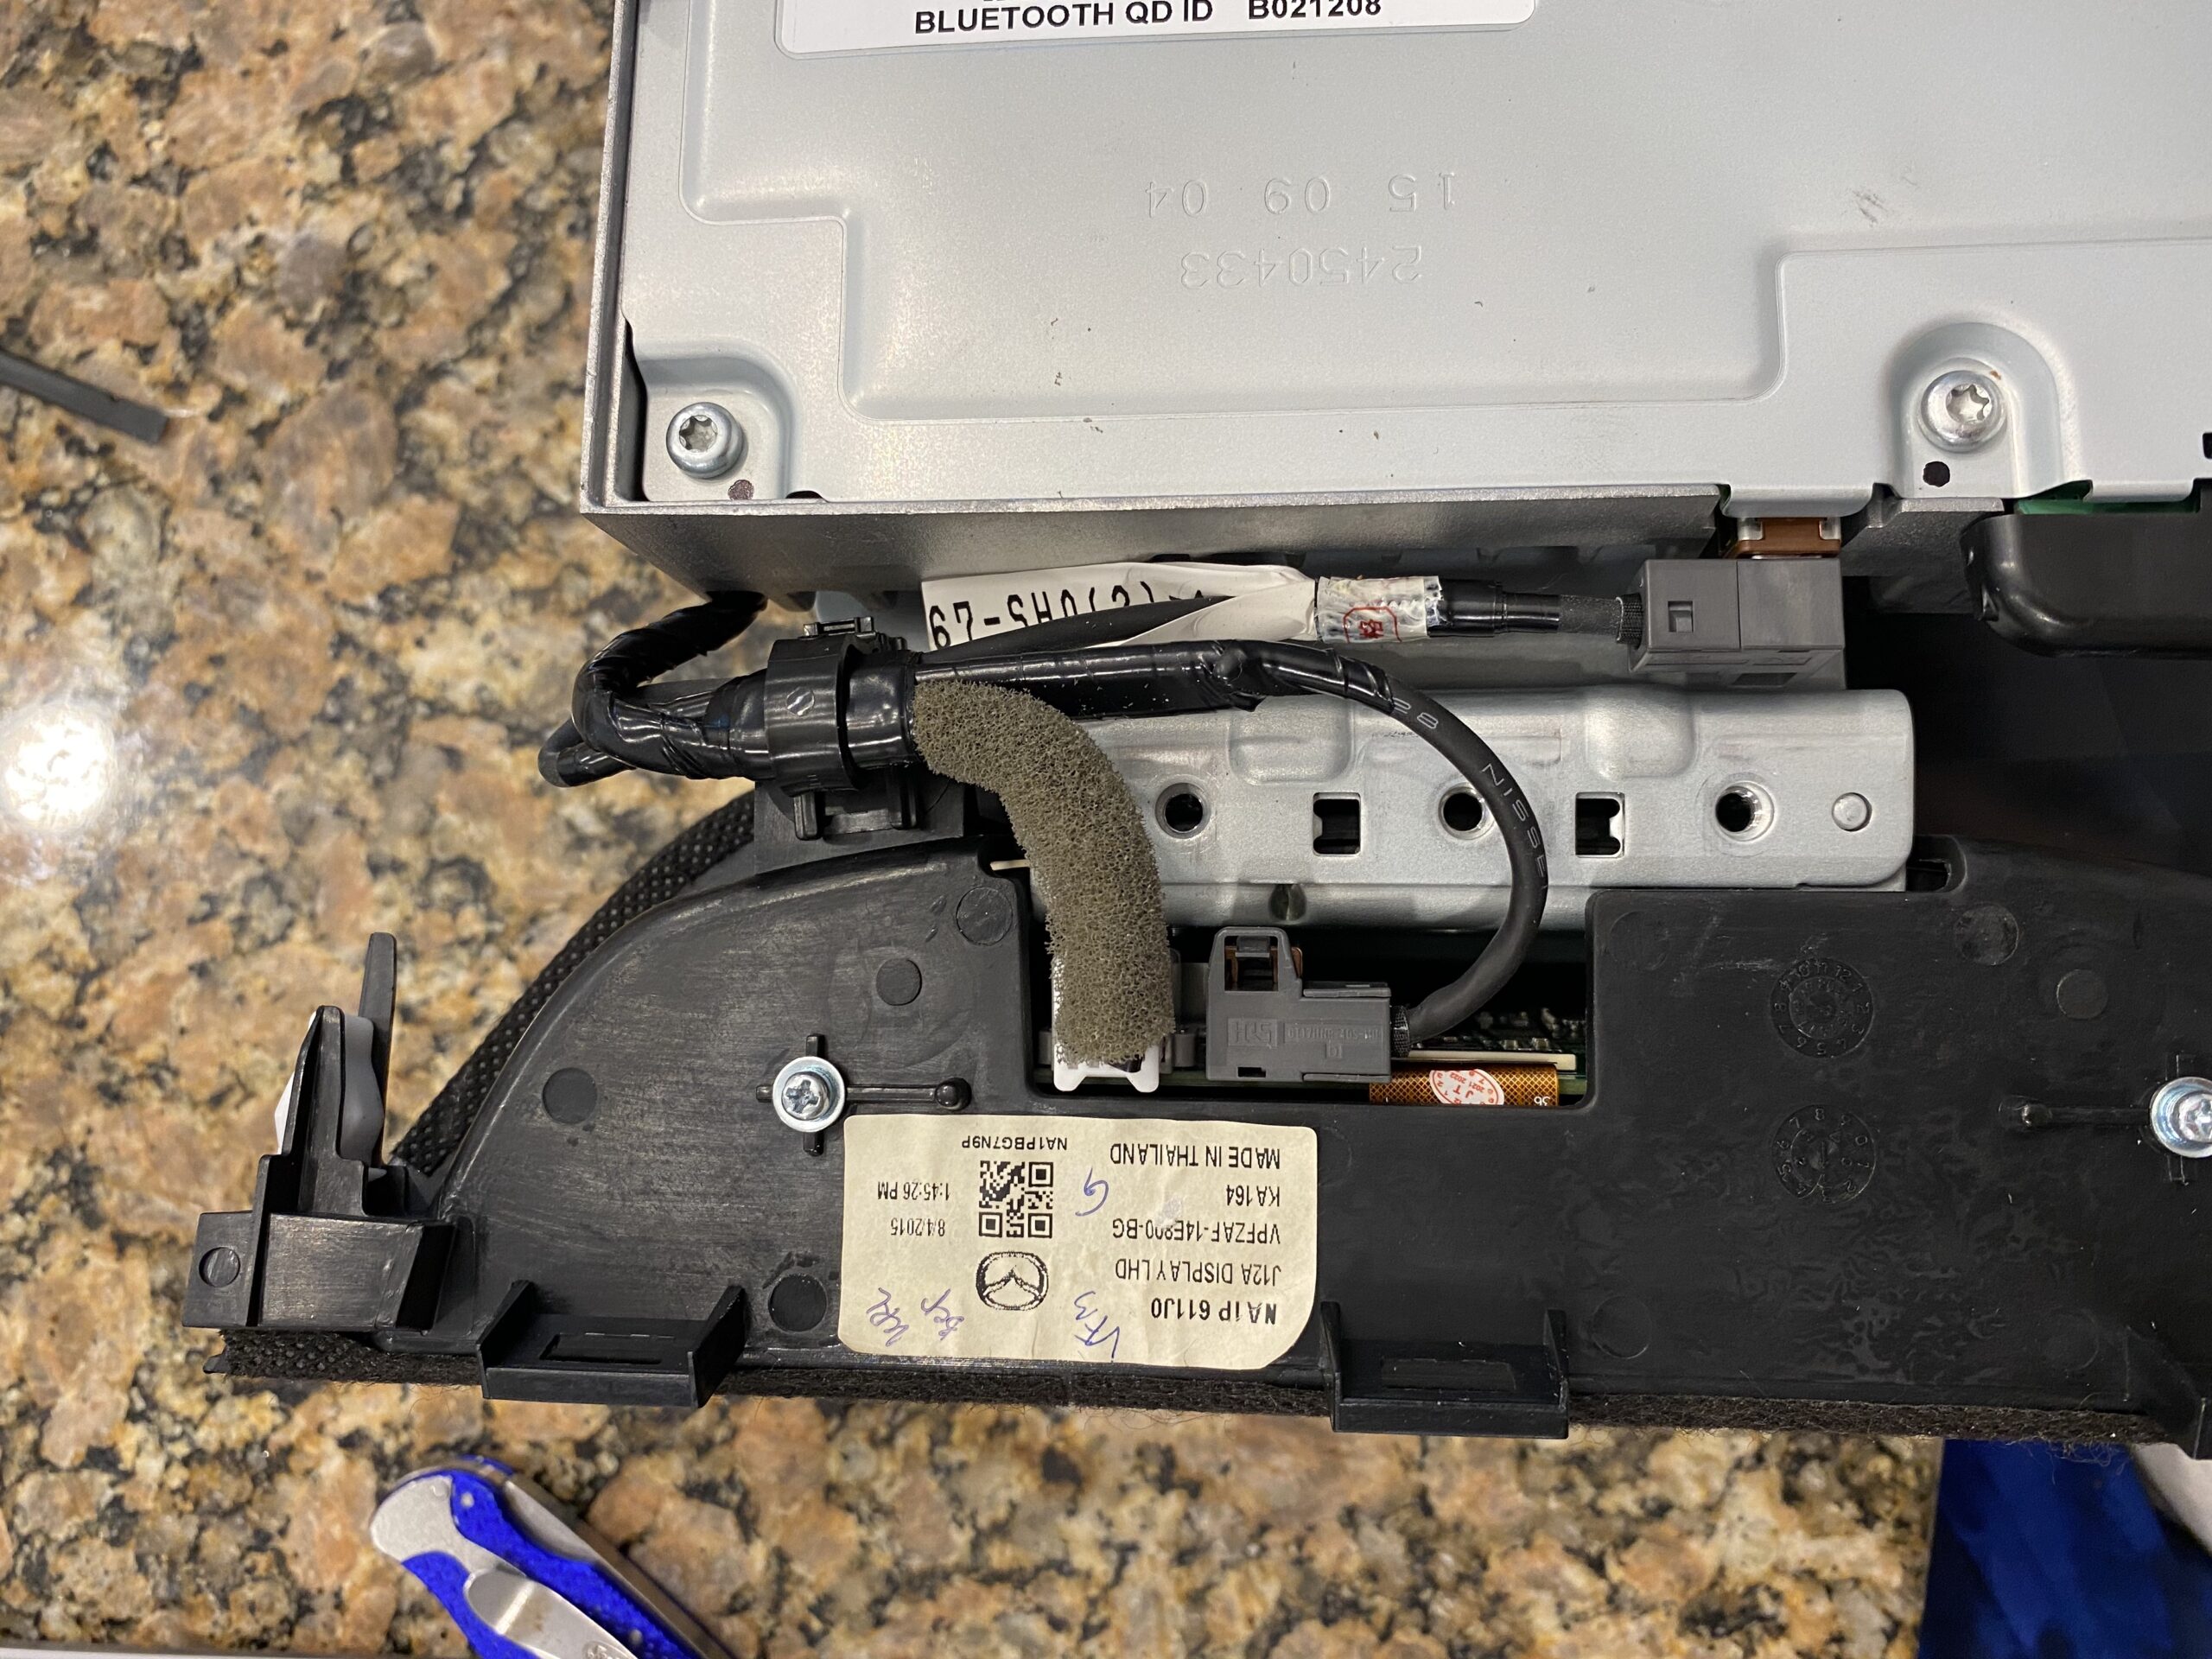
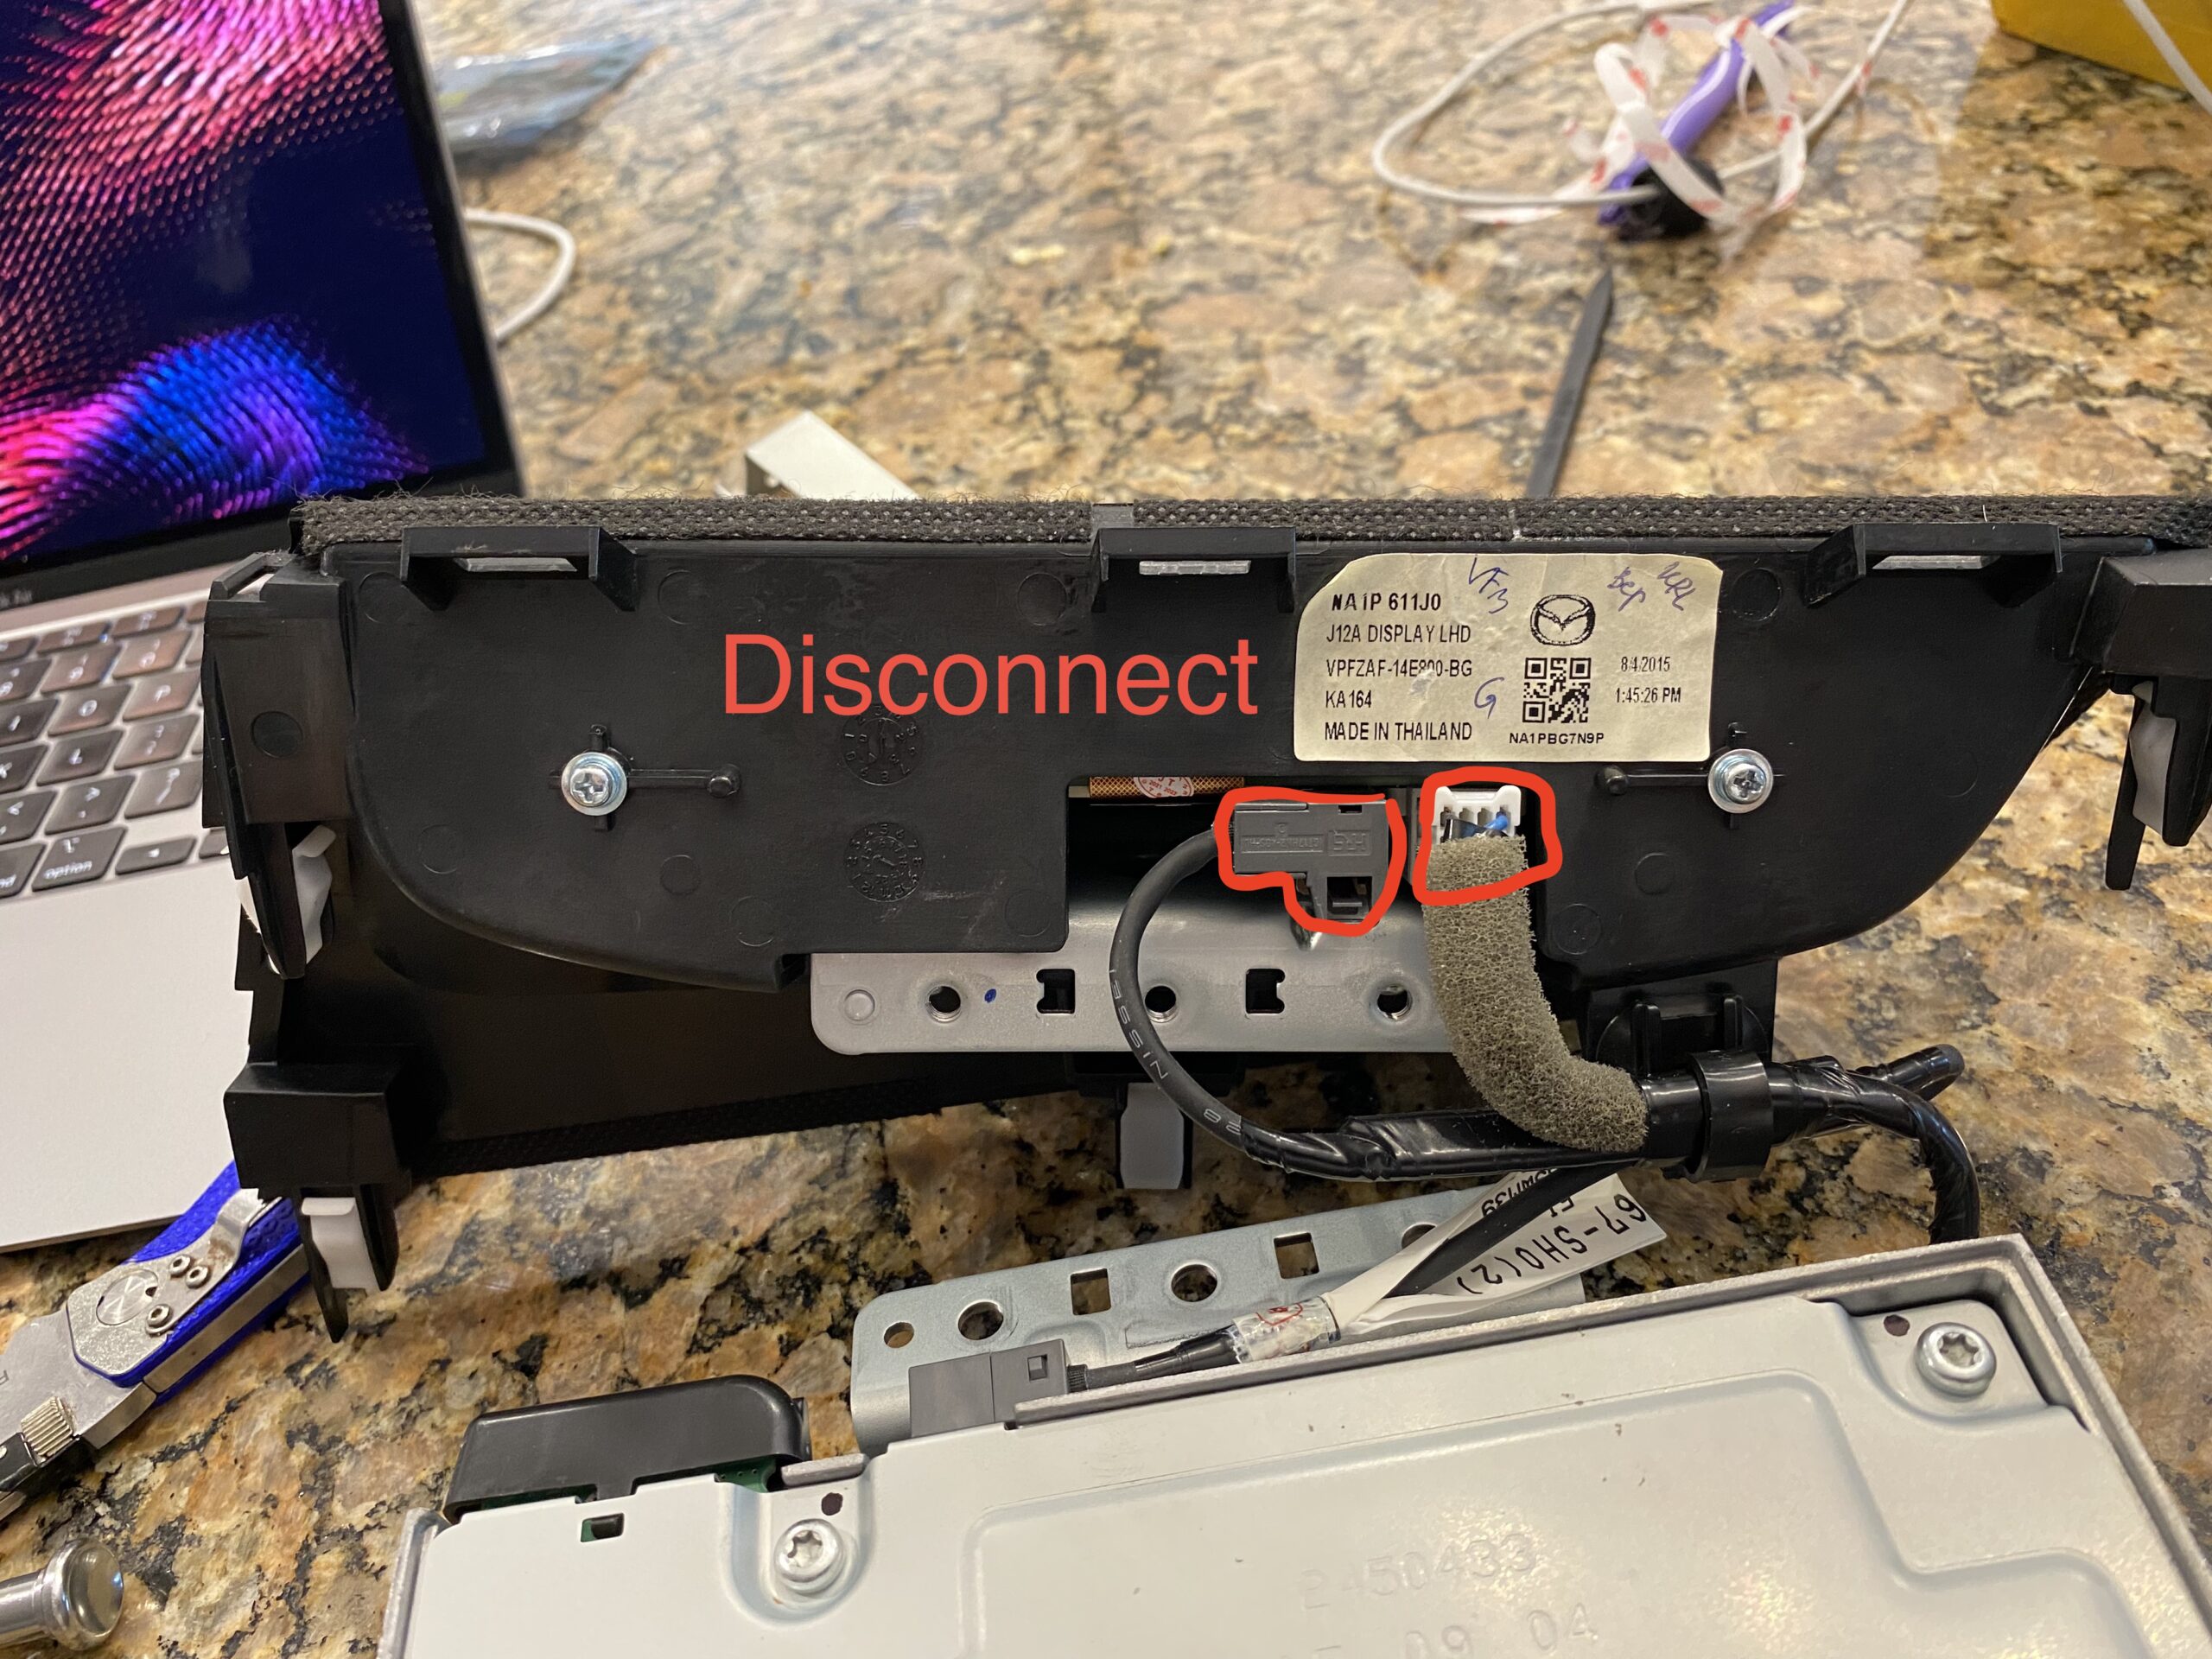
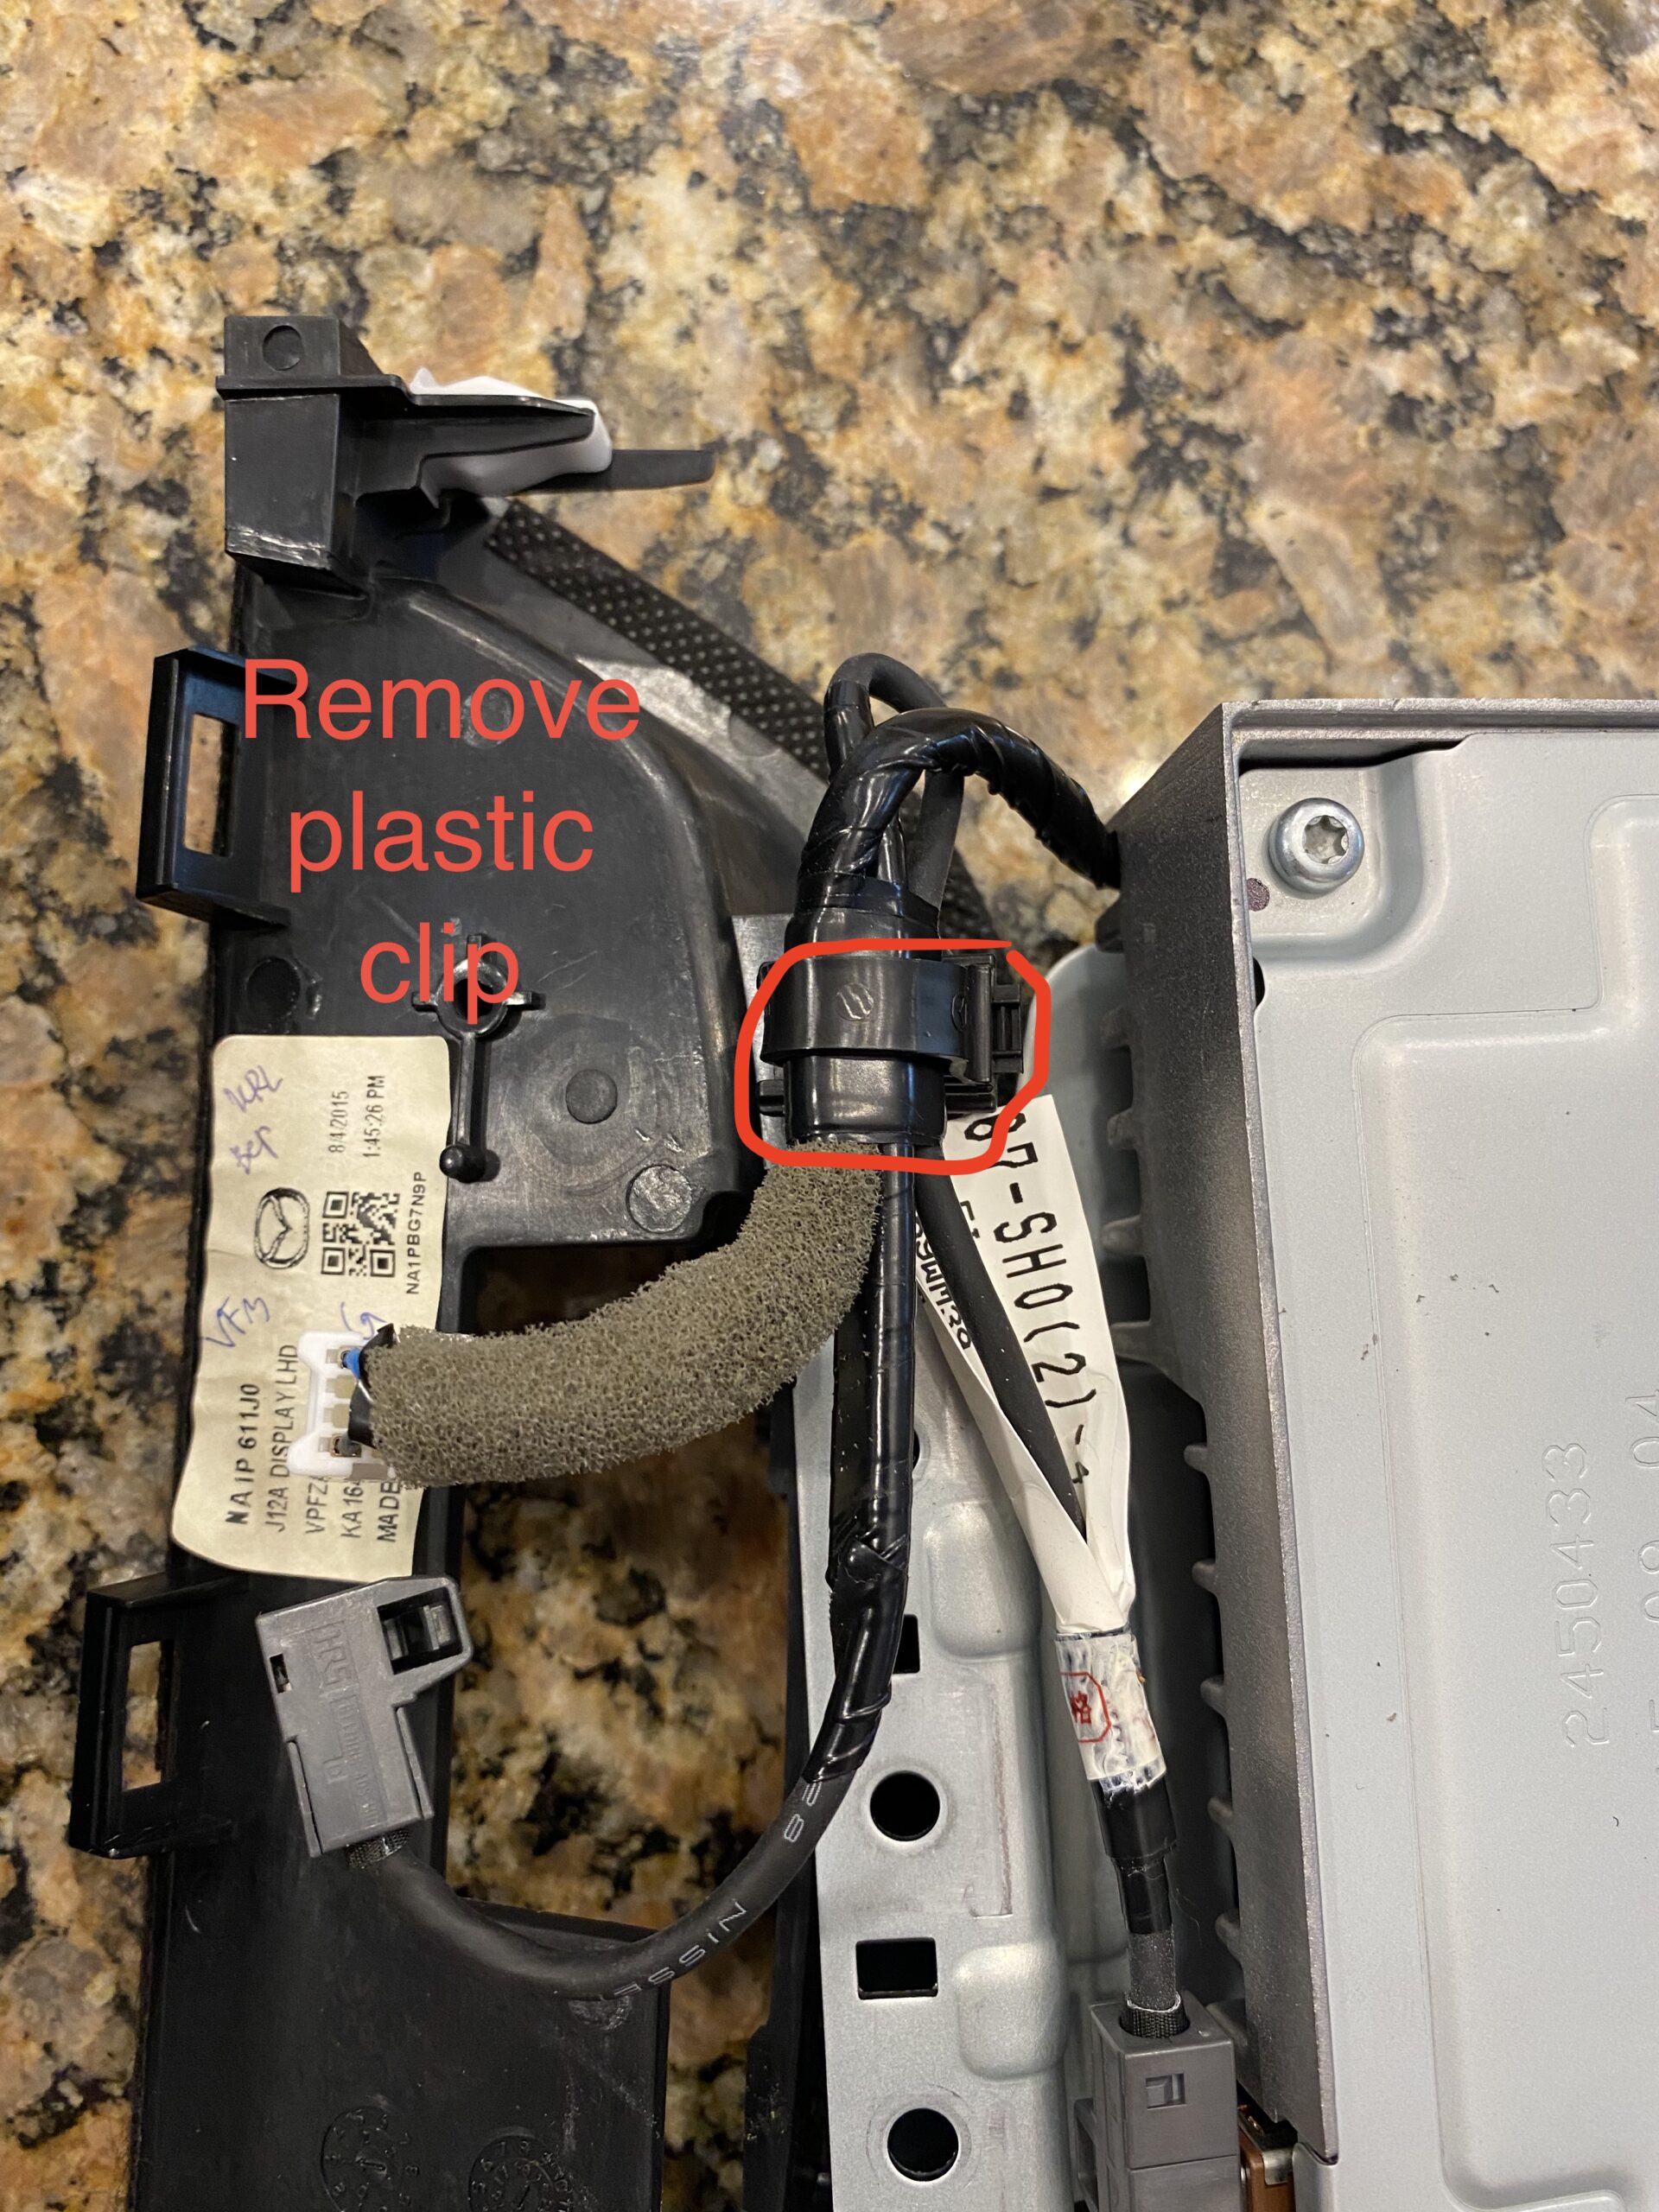
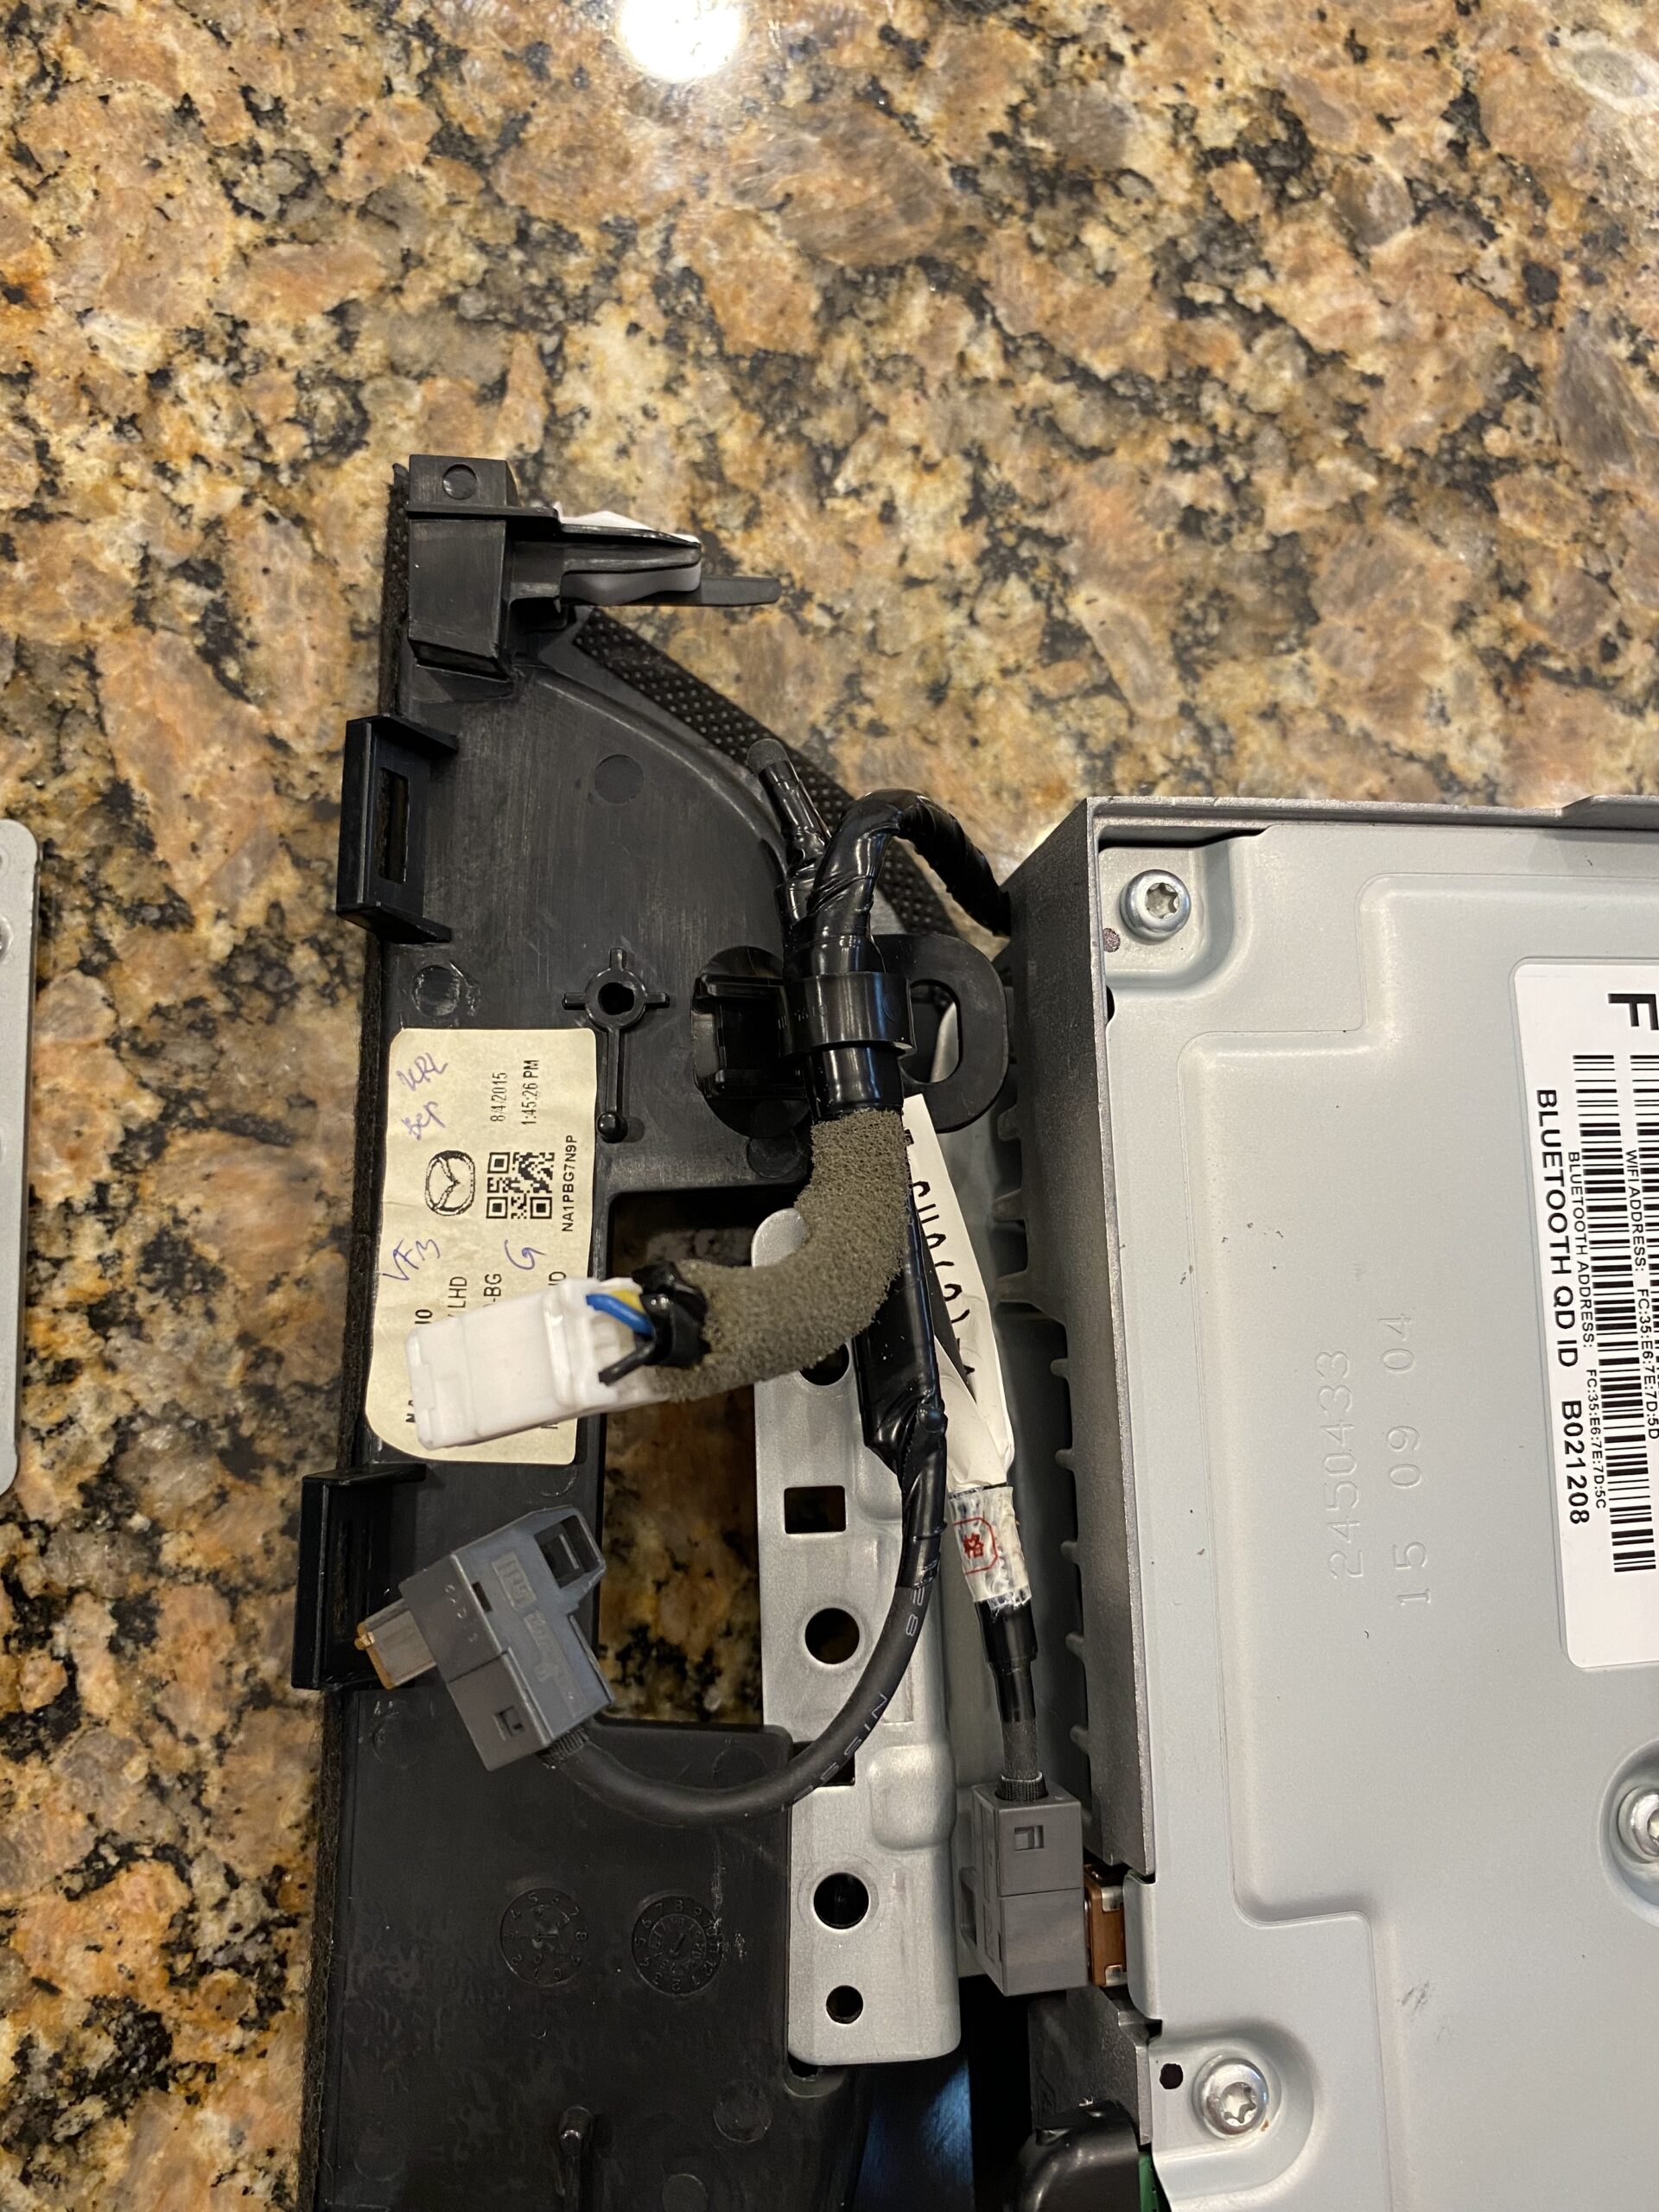
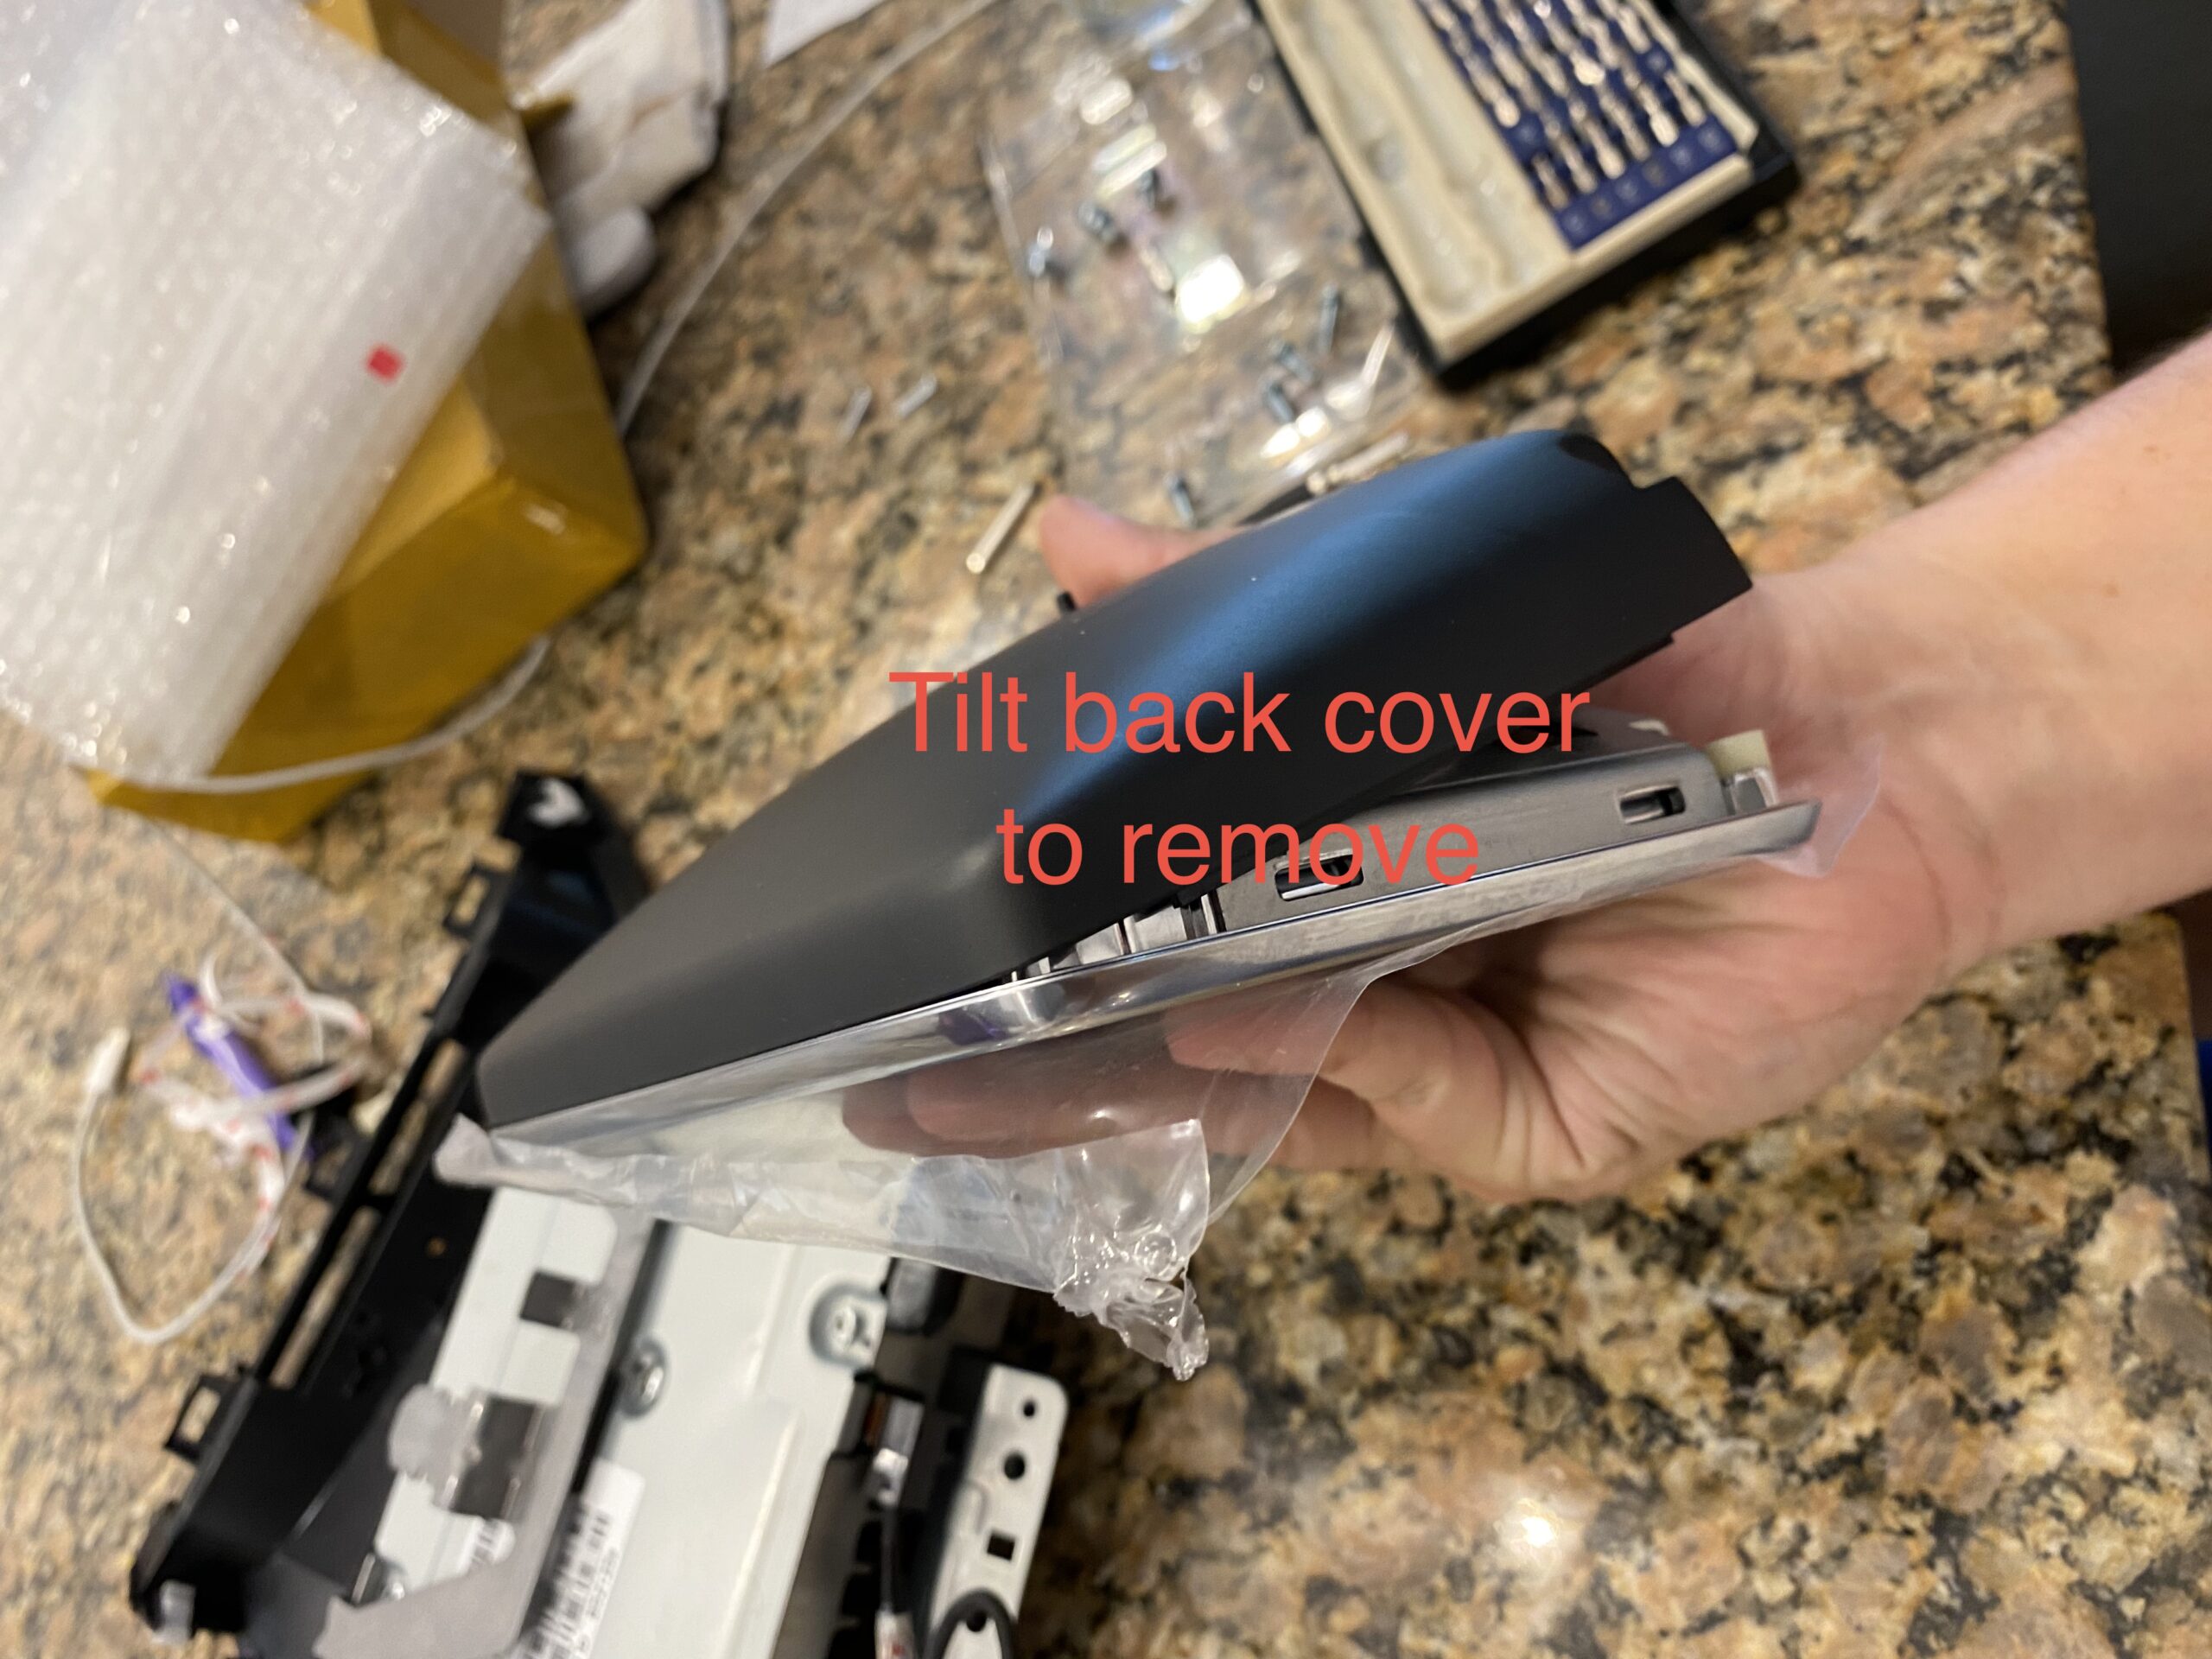
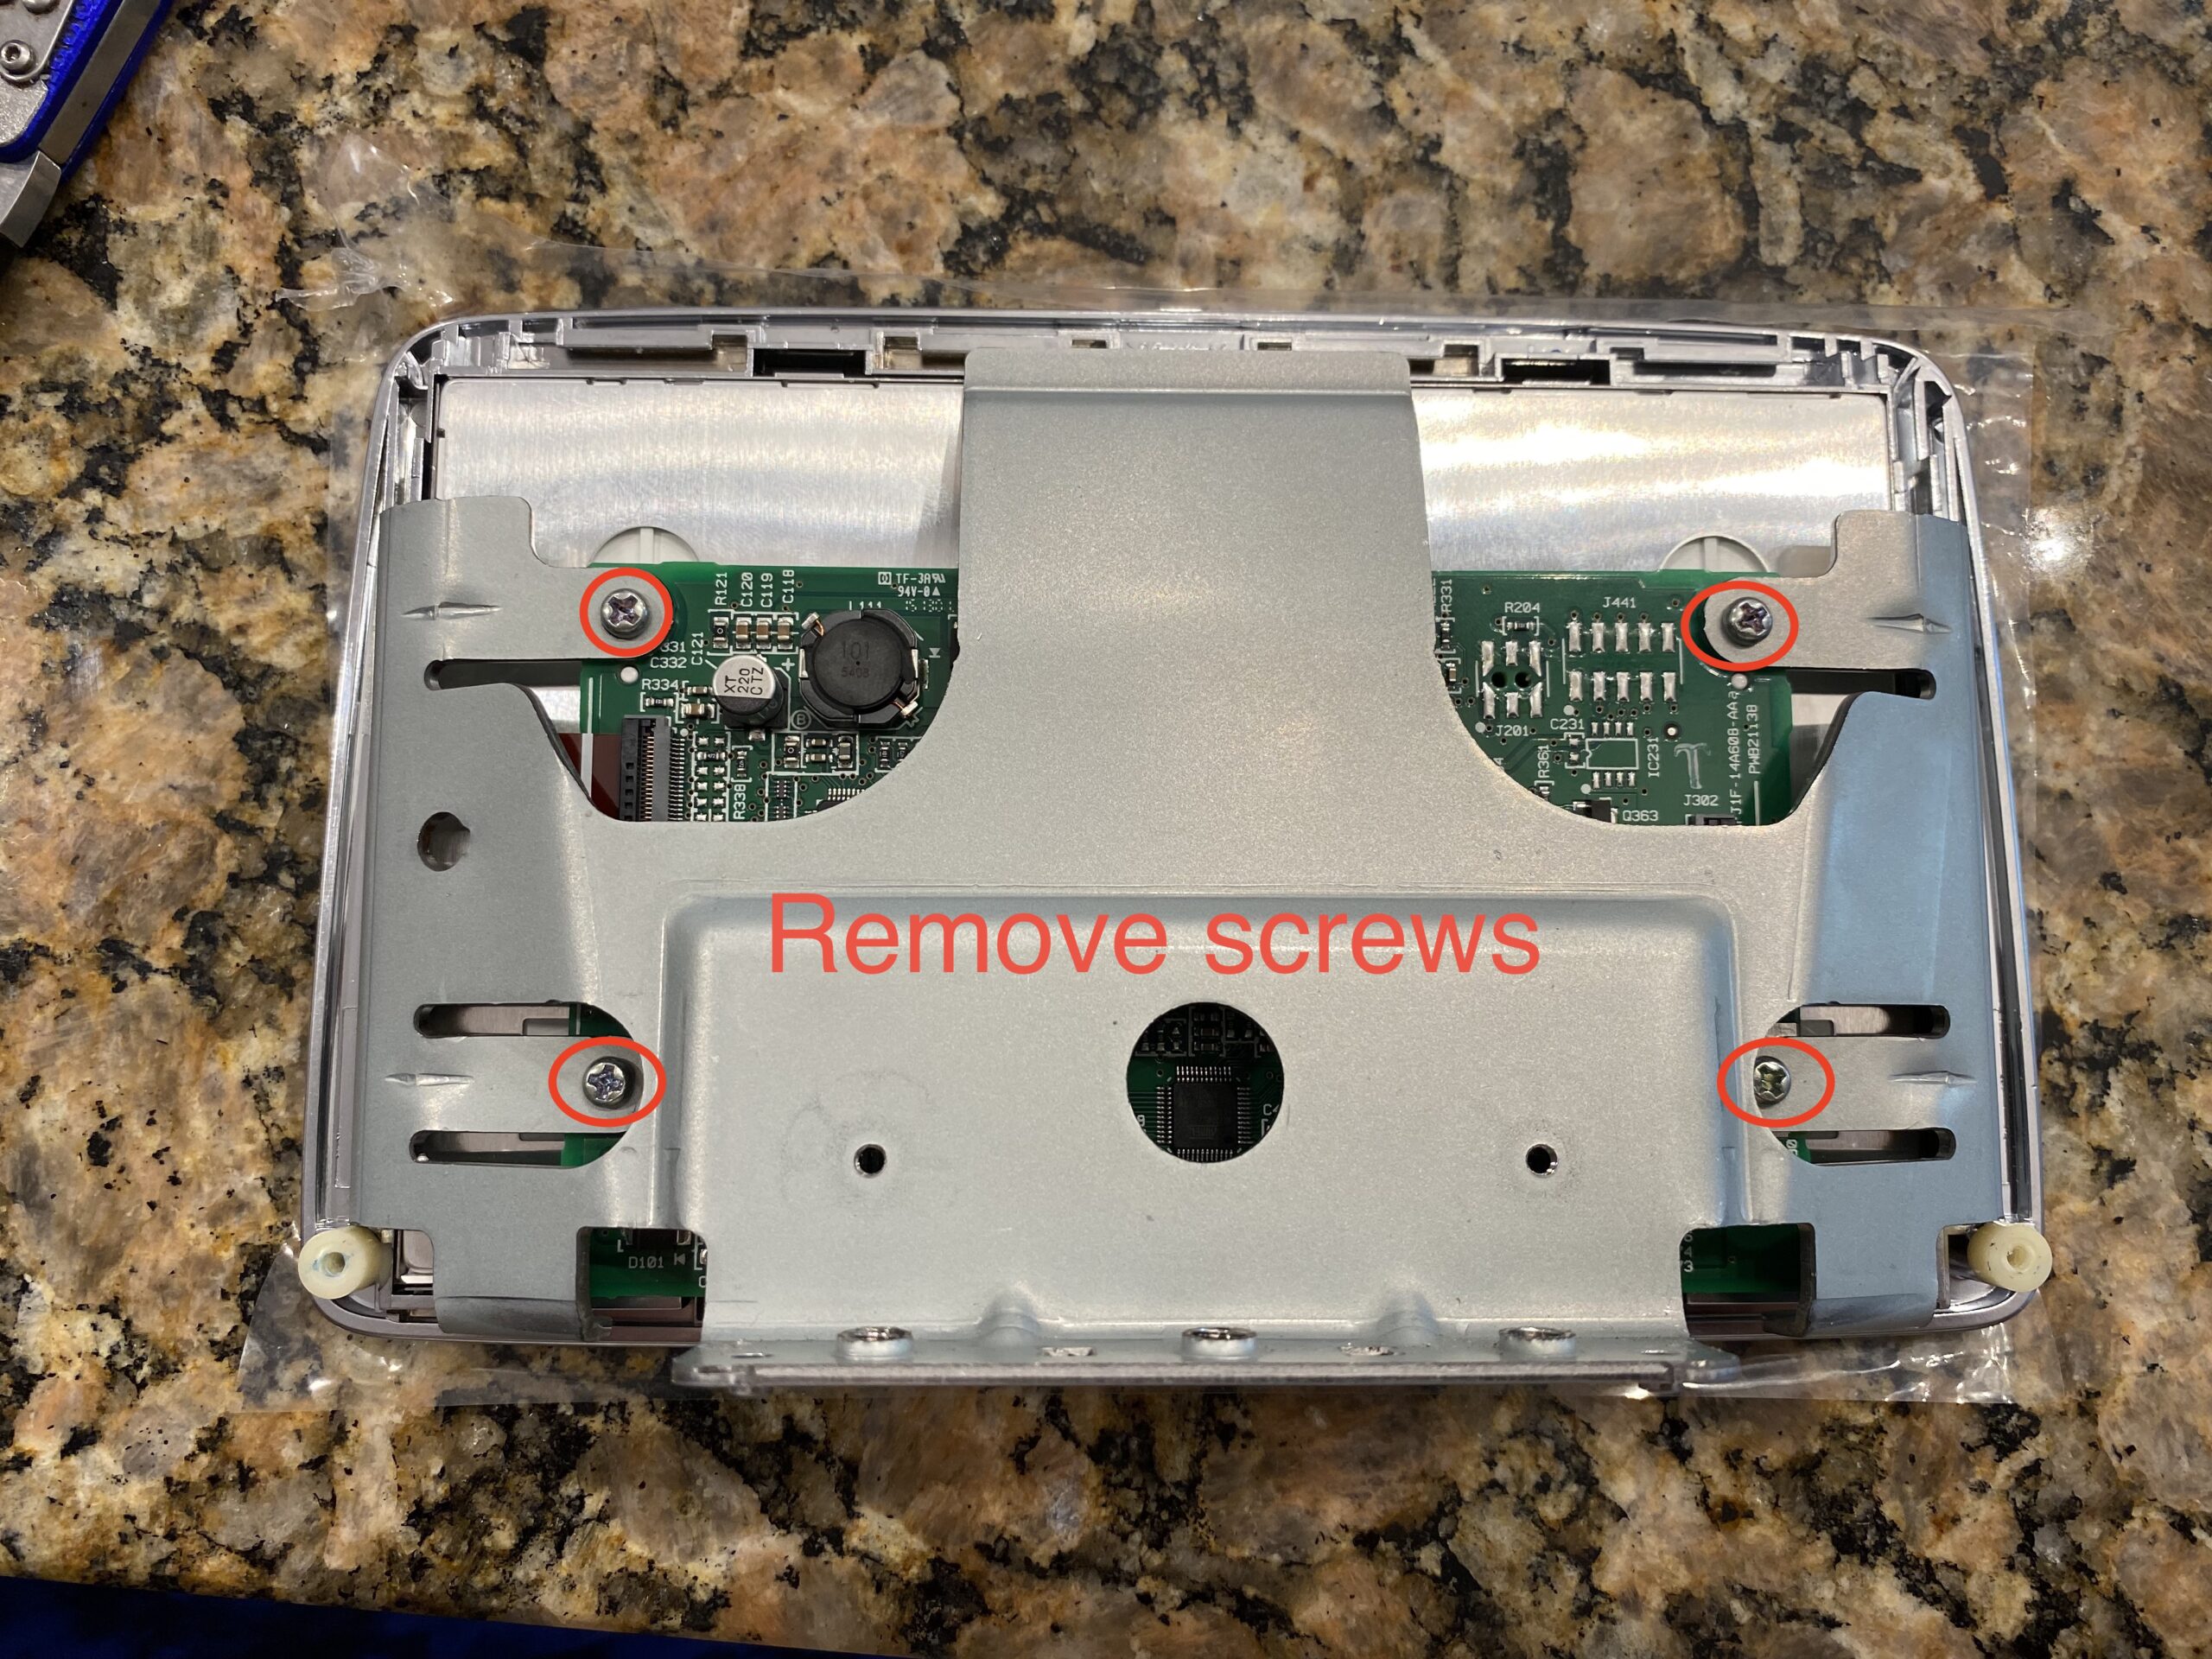
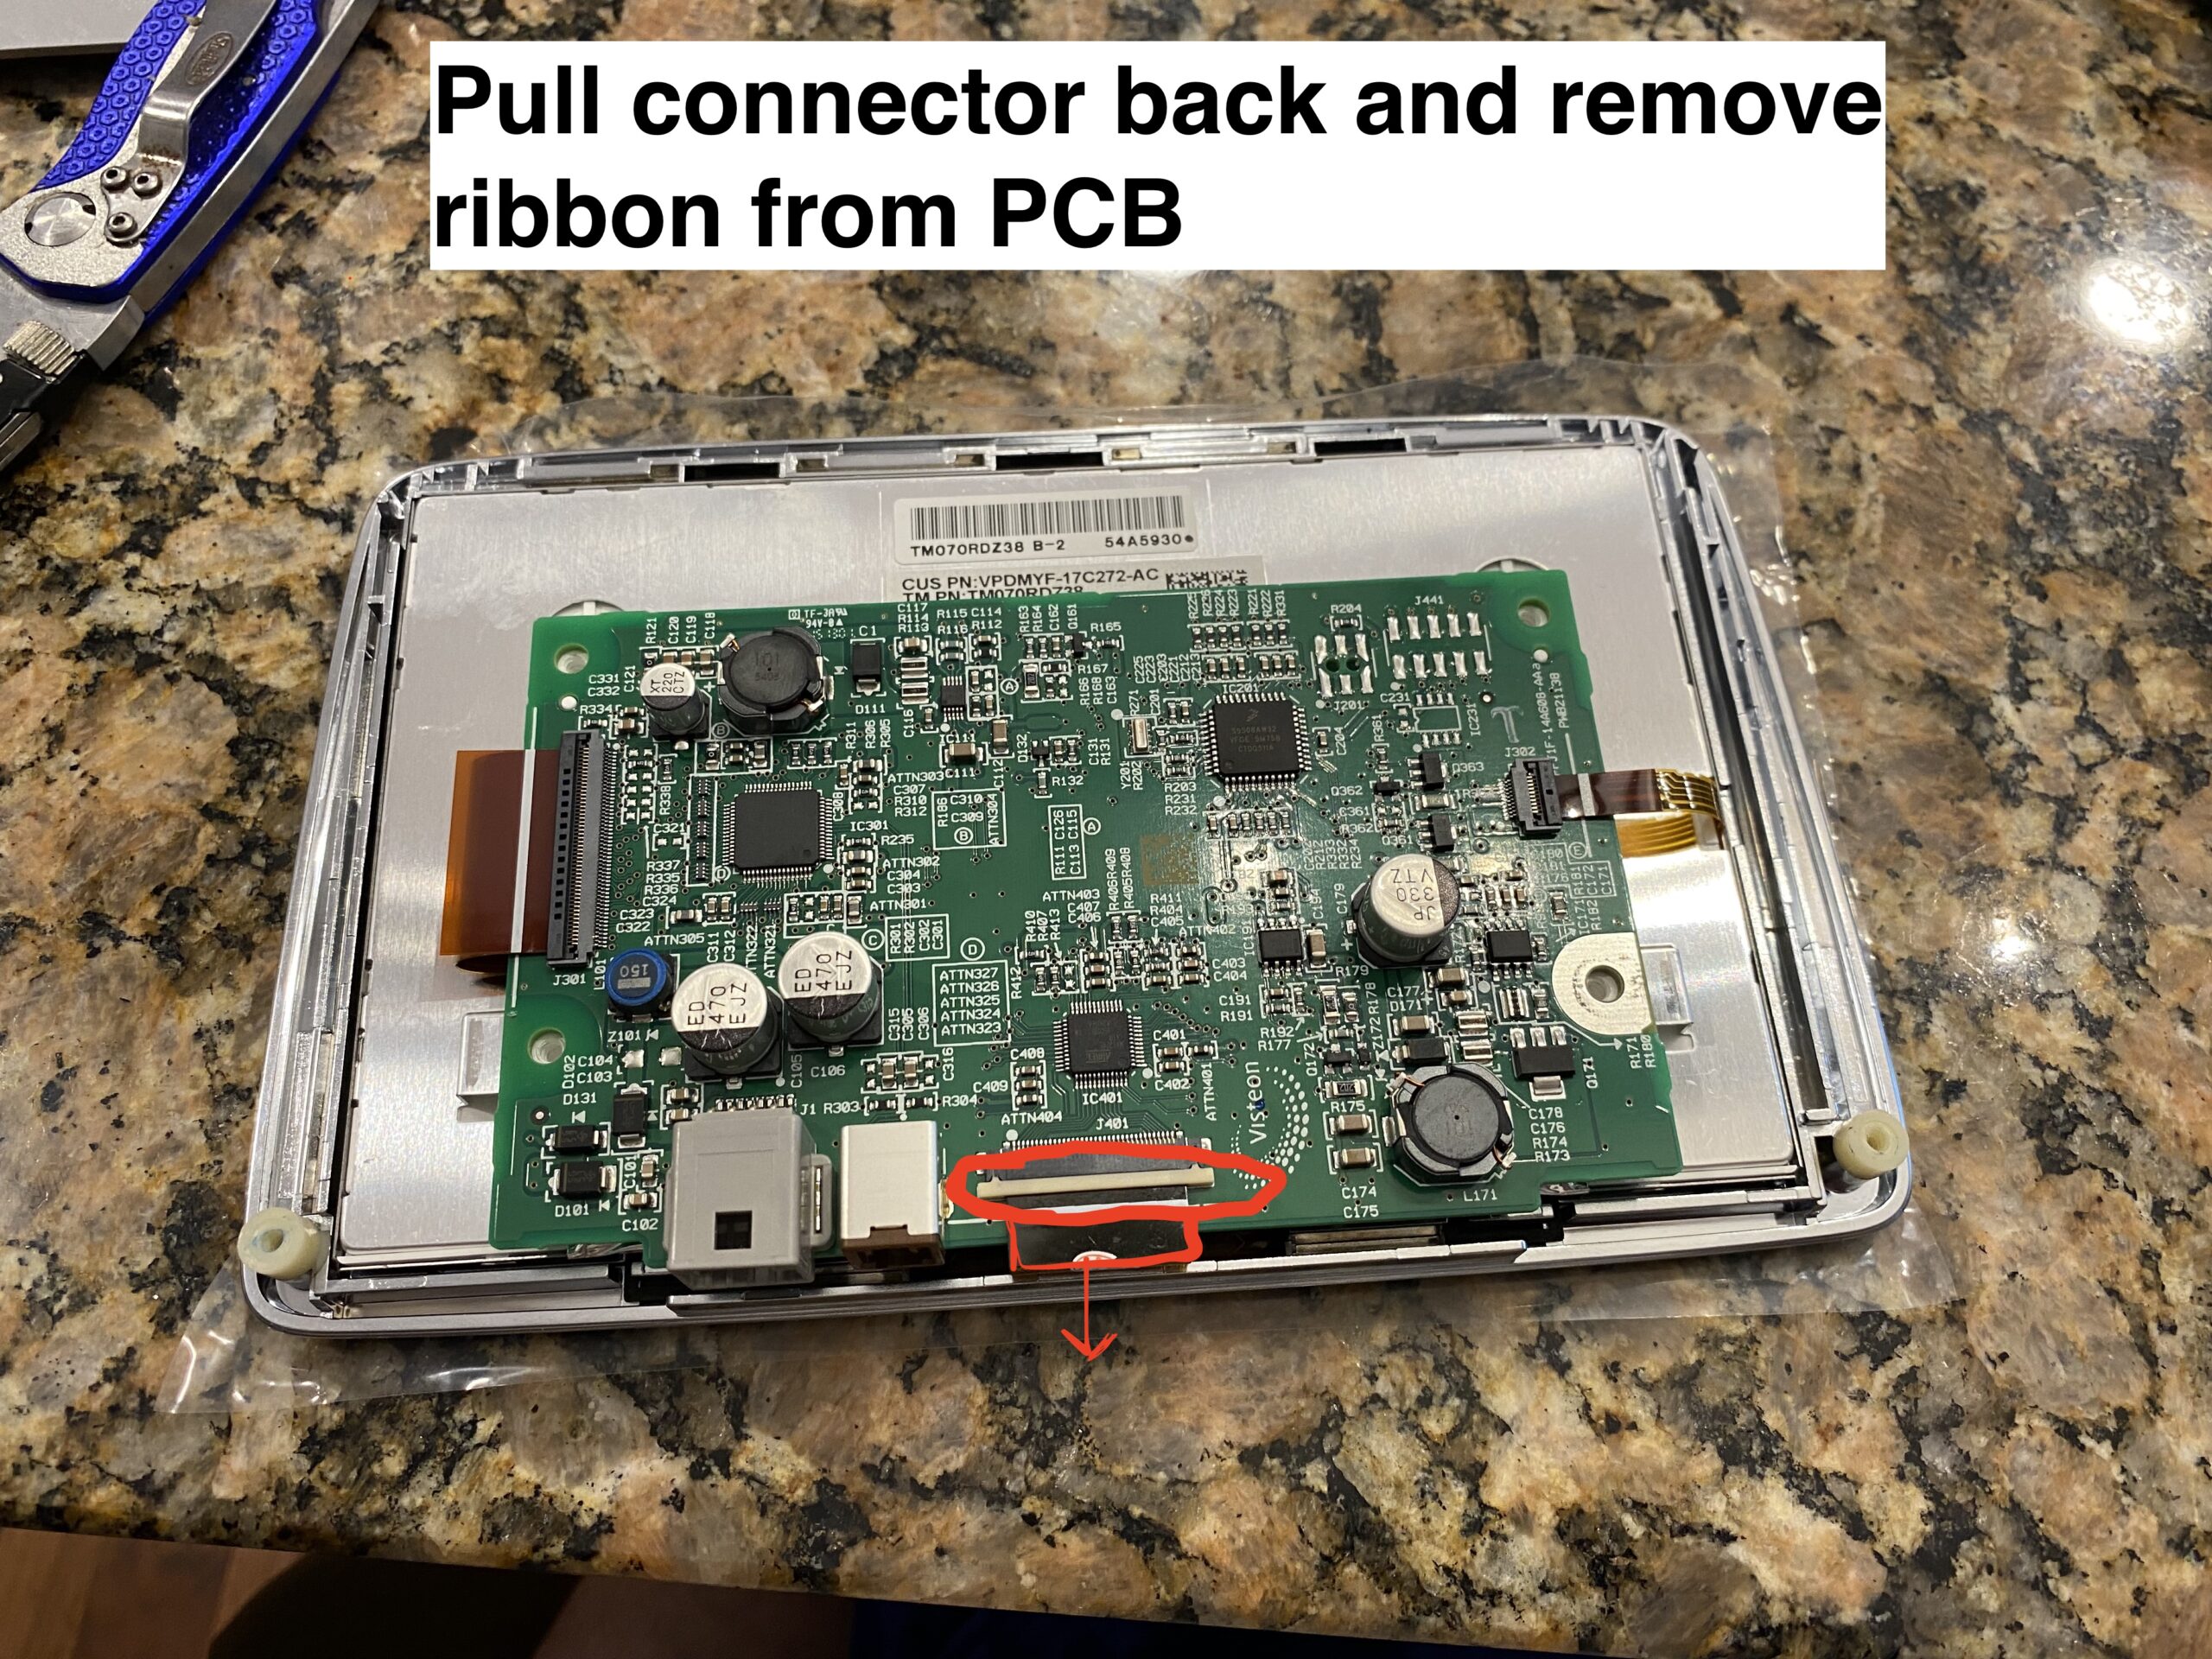
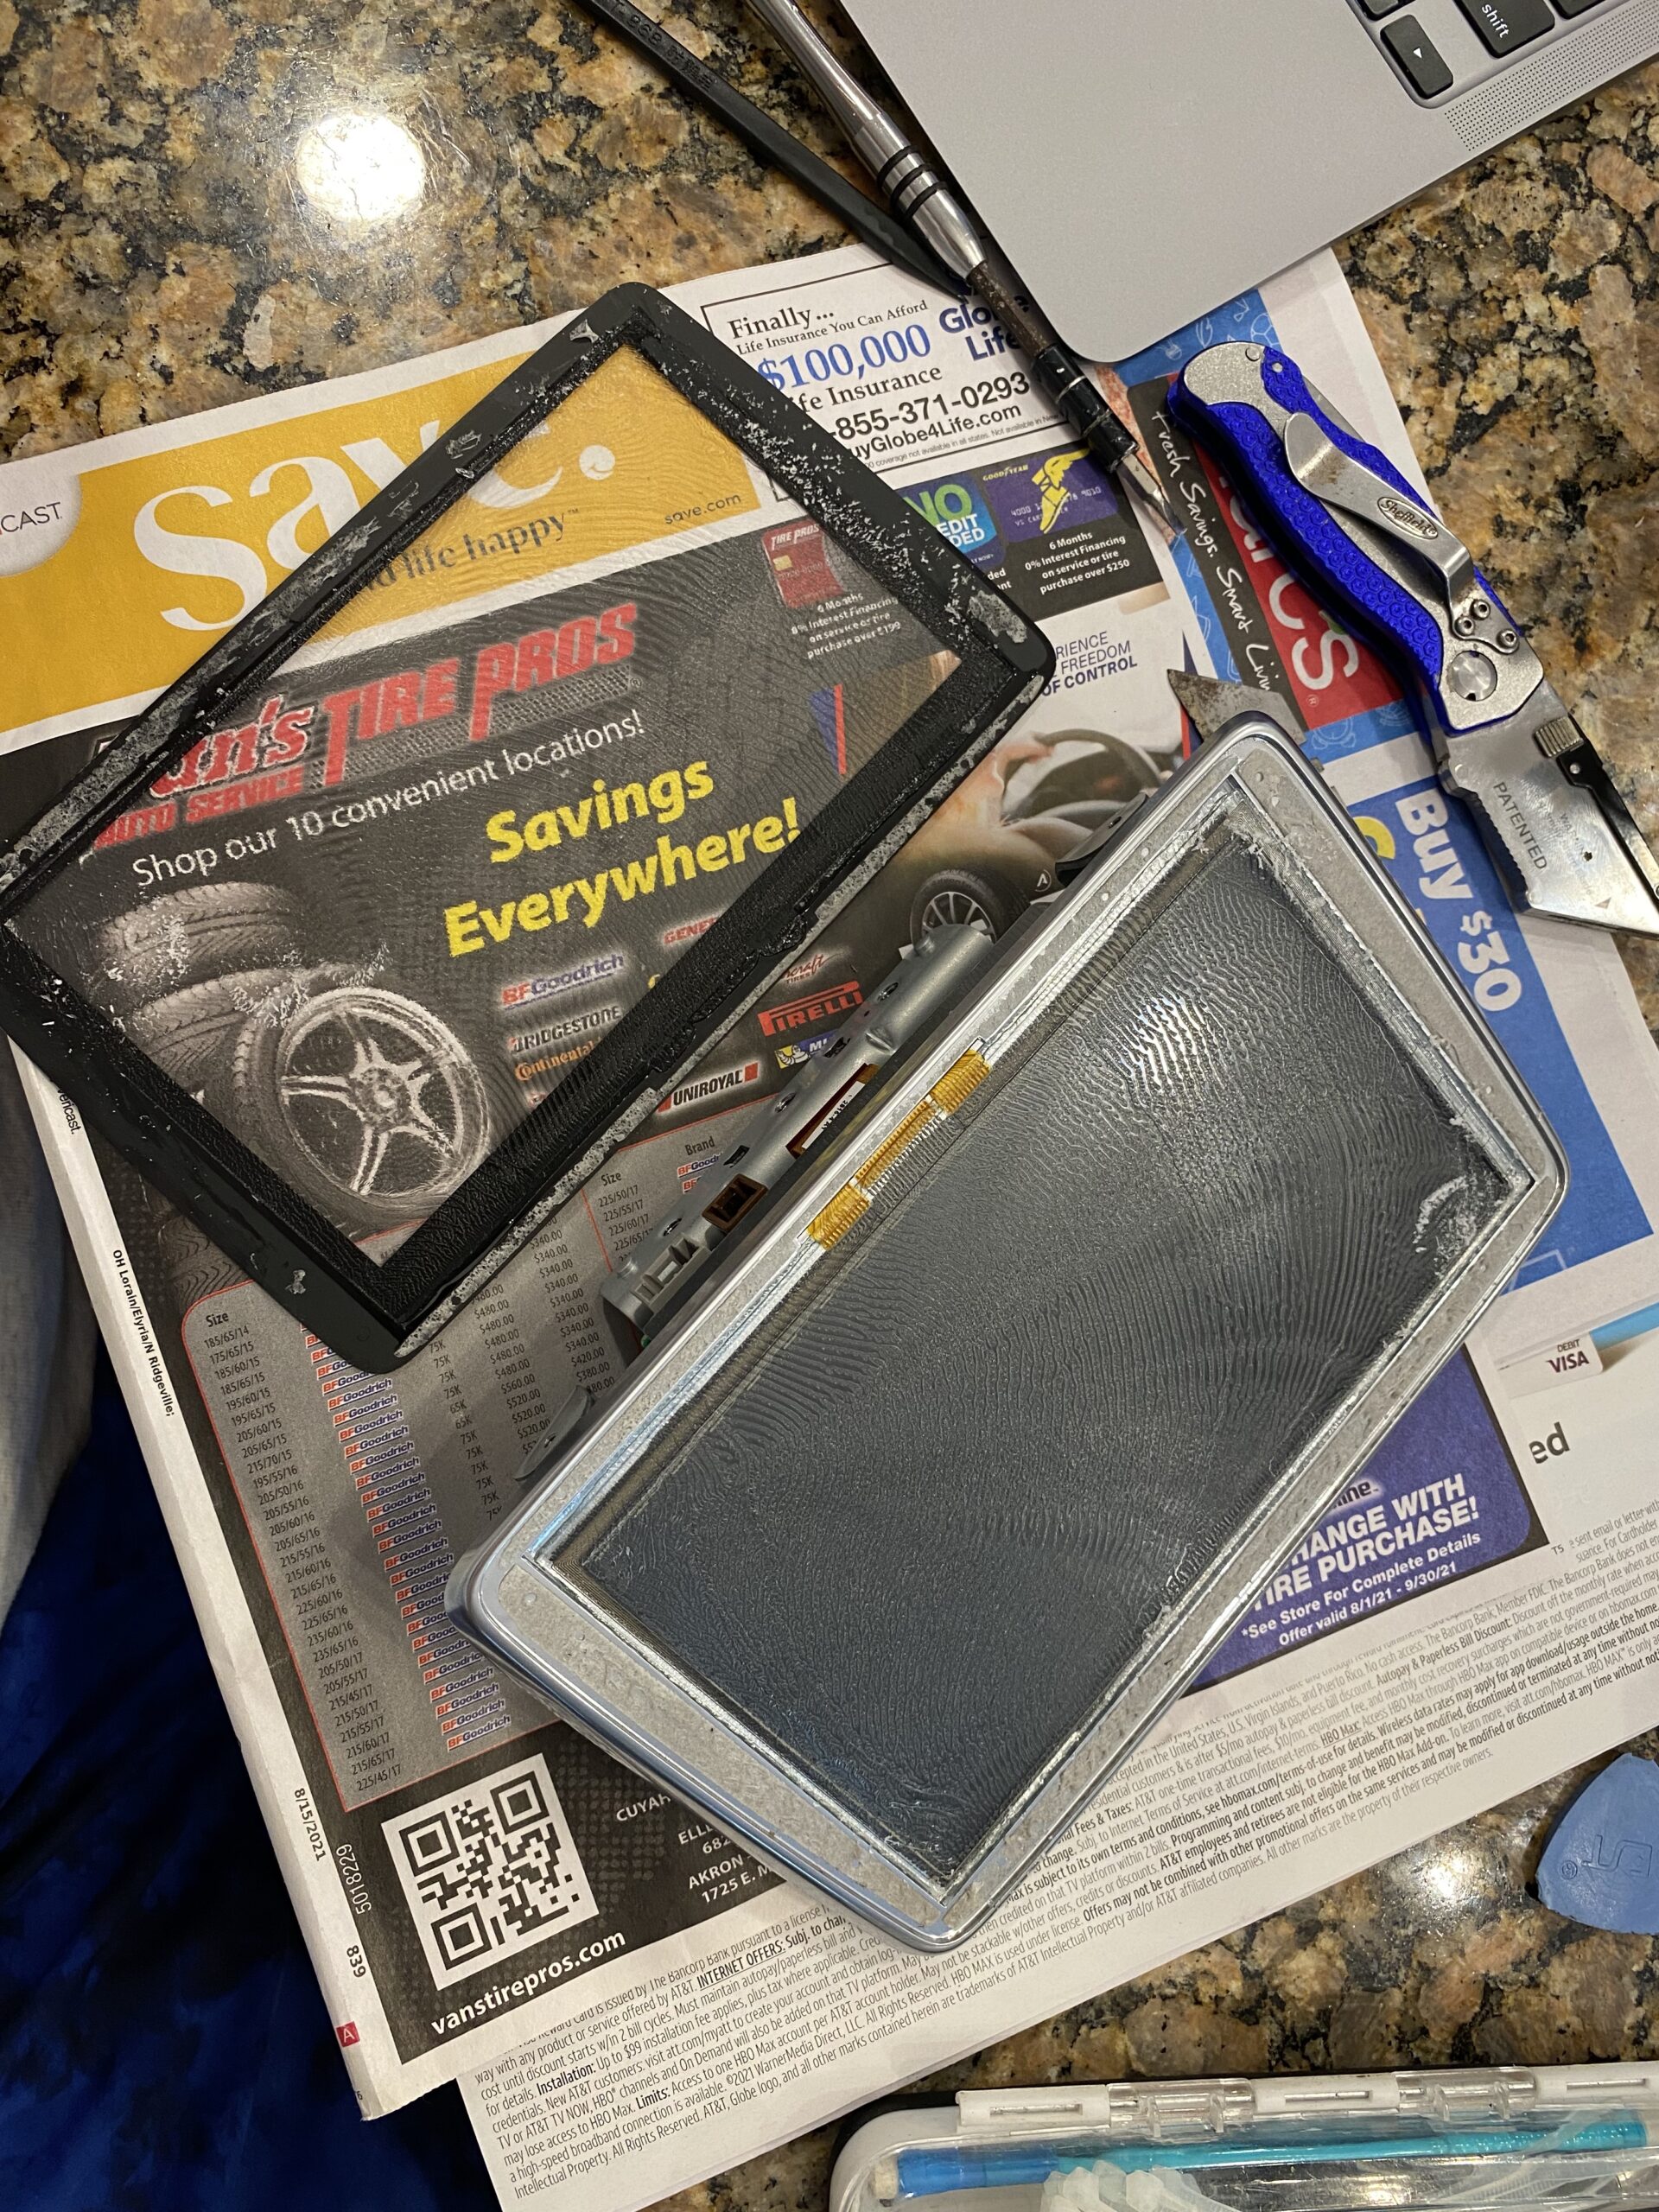
Step 2 — Open the screen housing
Separate the housing and expose the internal components carefully, avoiding stress on any ribbon cables.

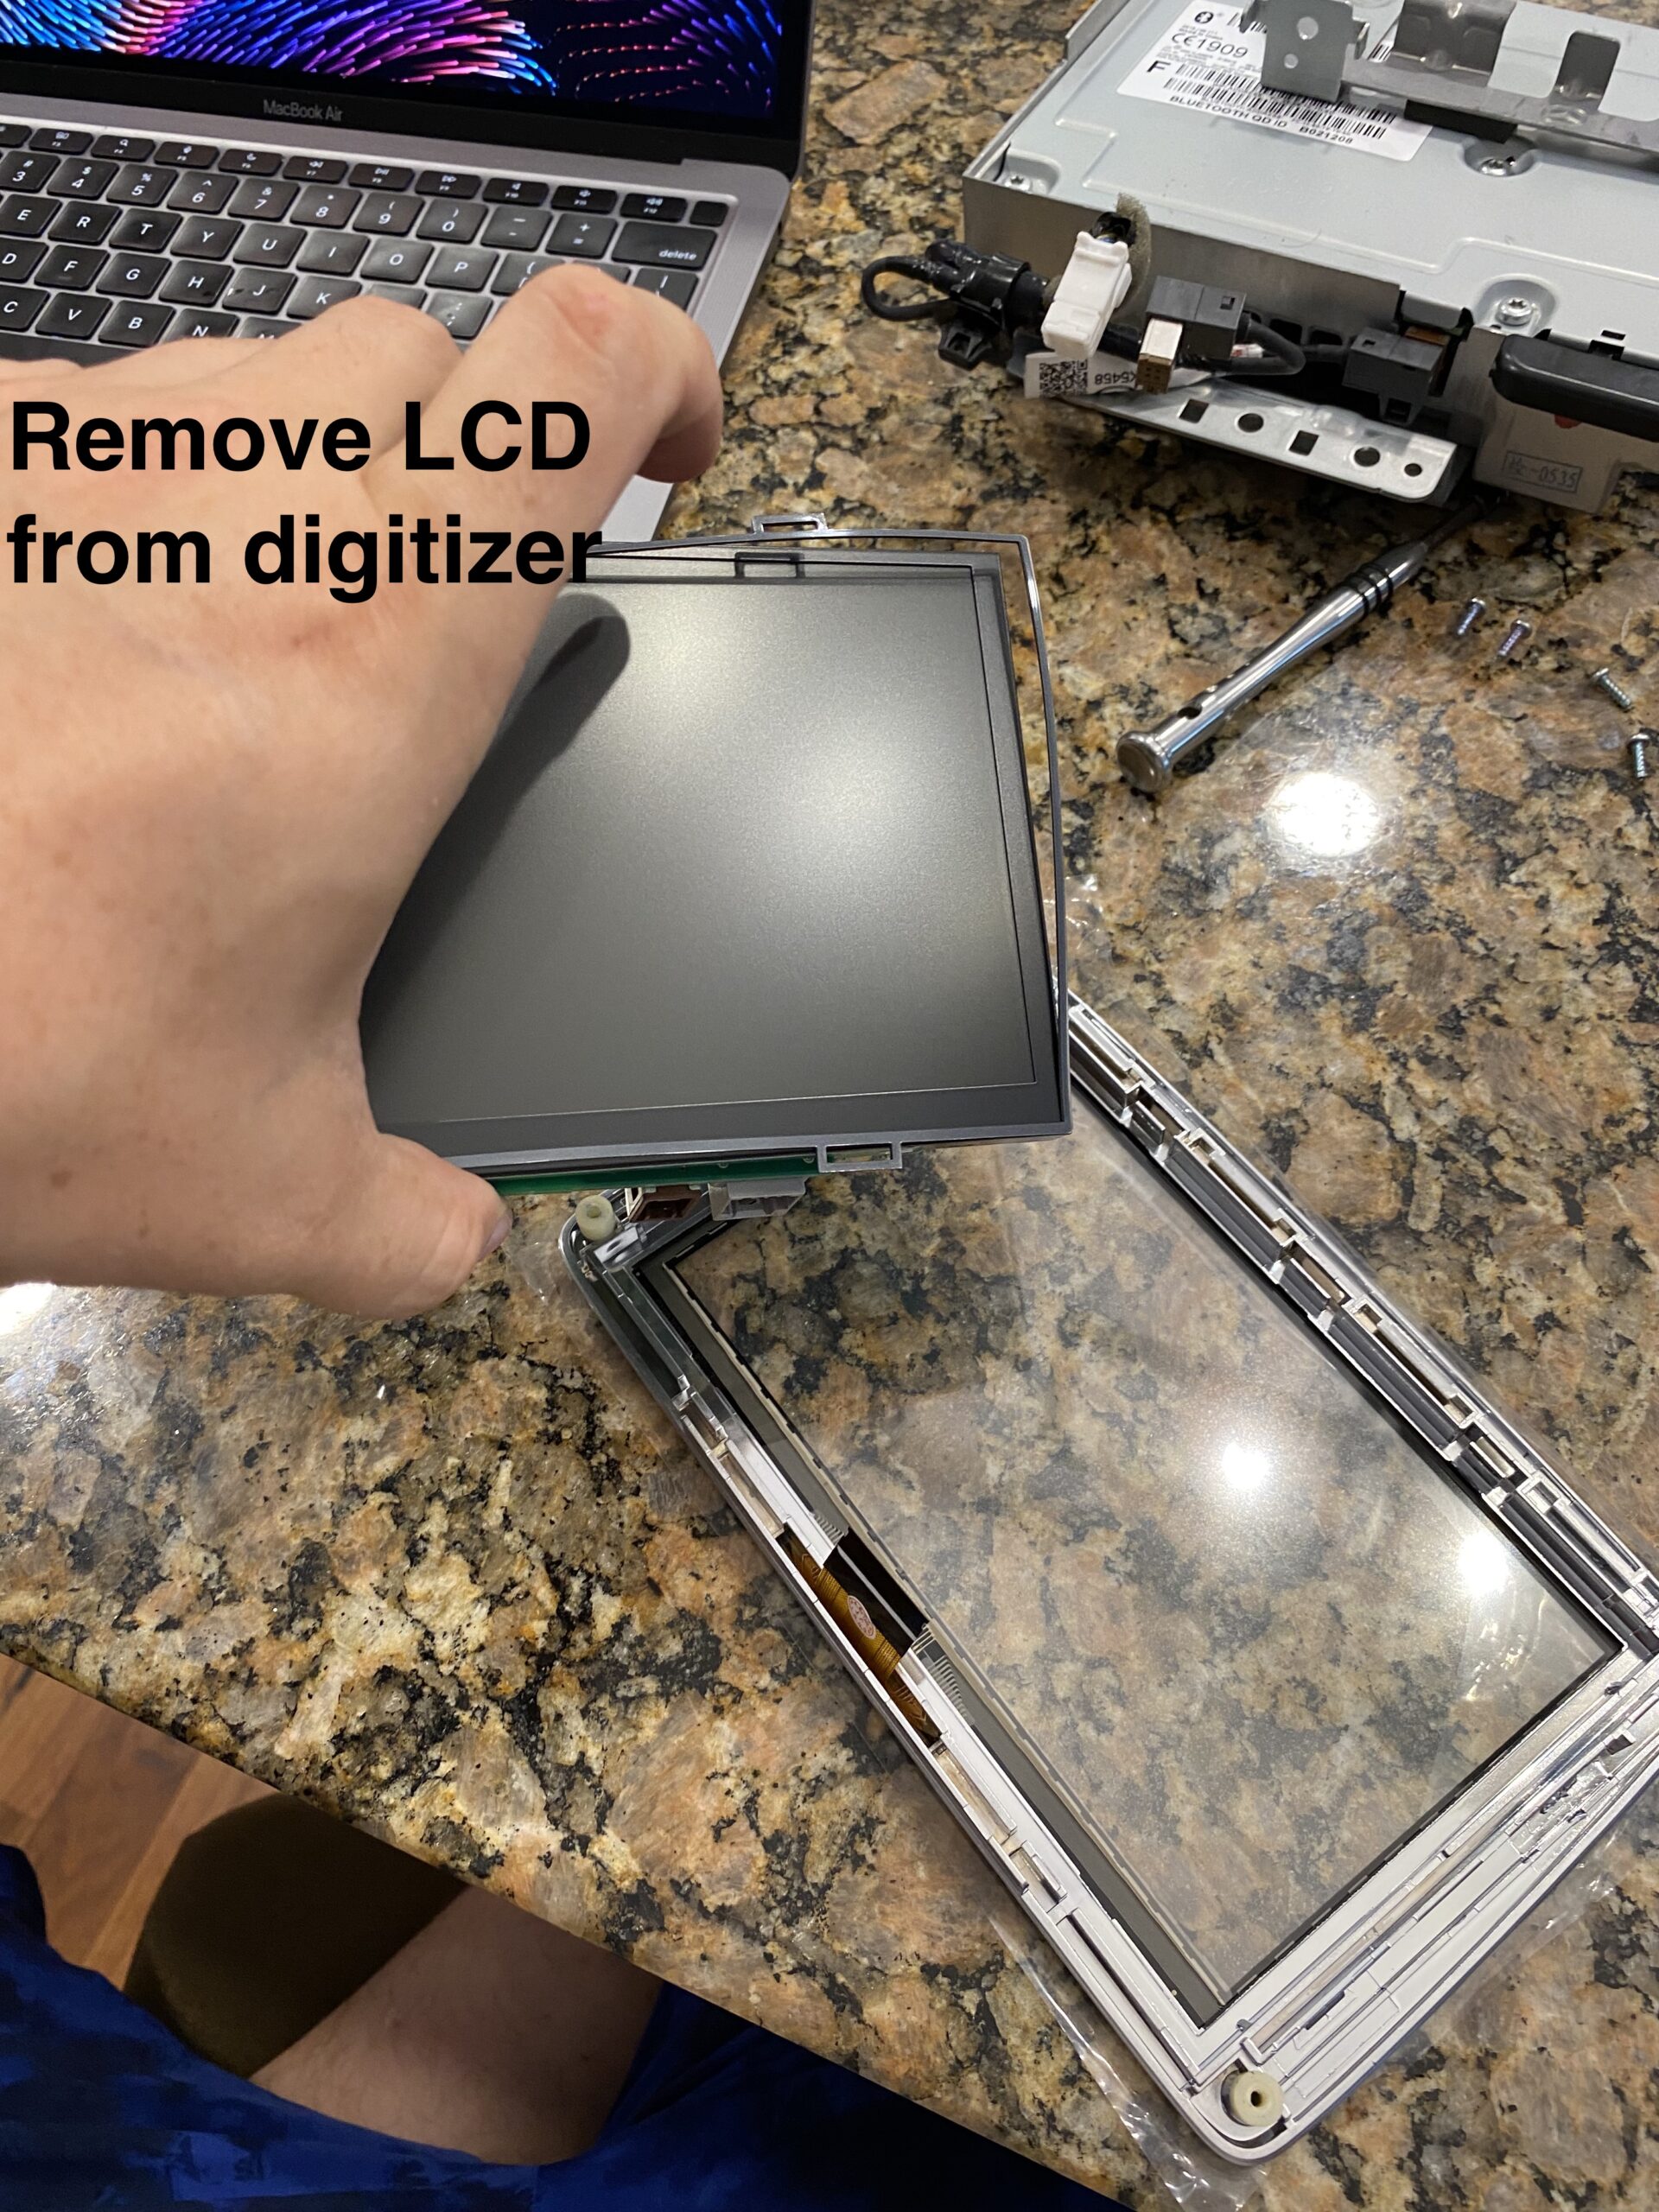
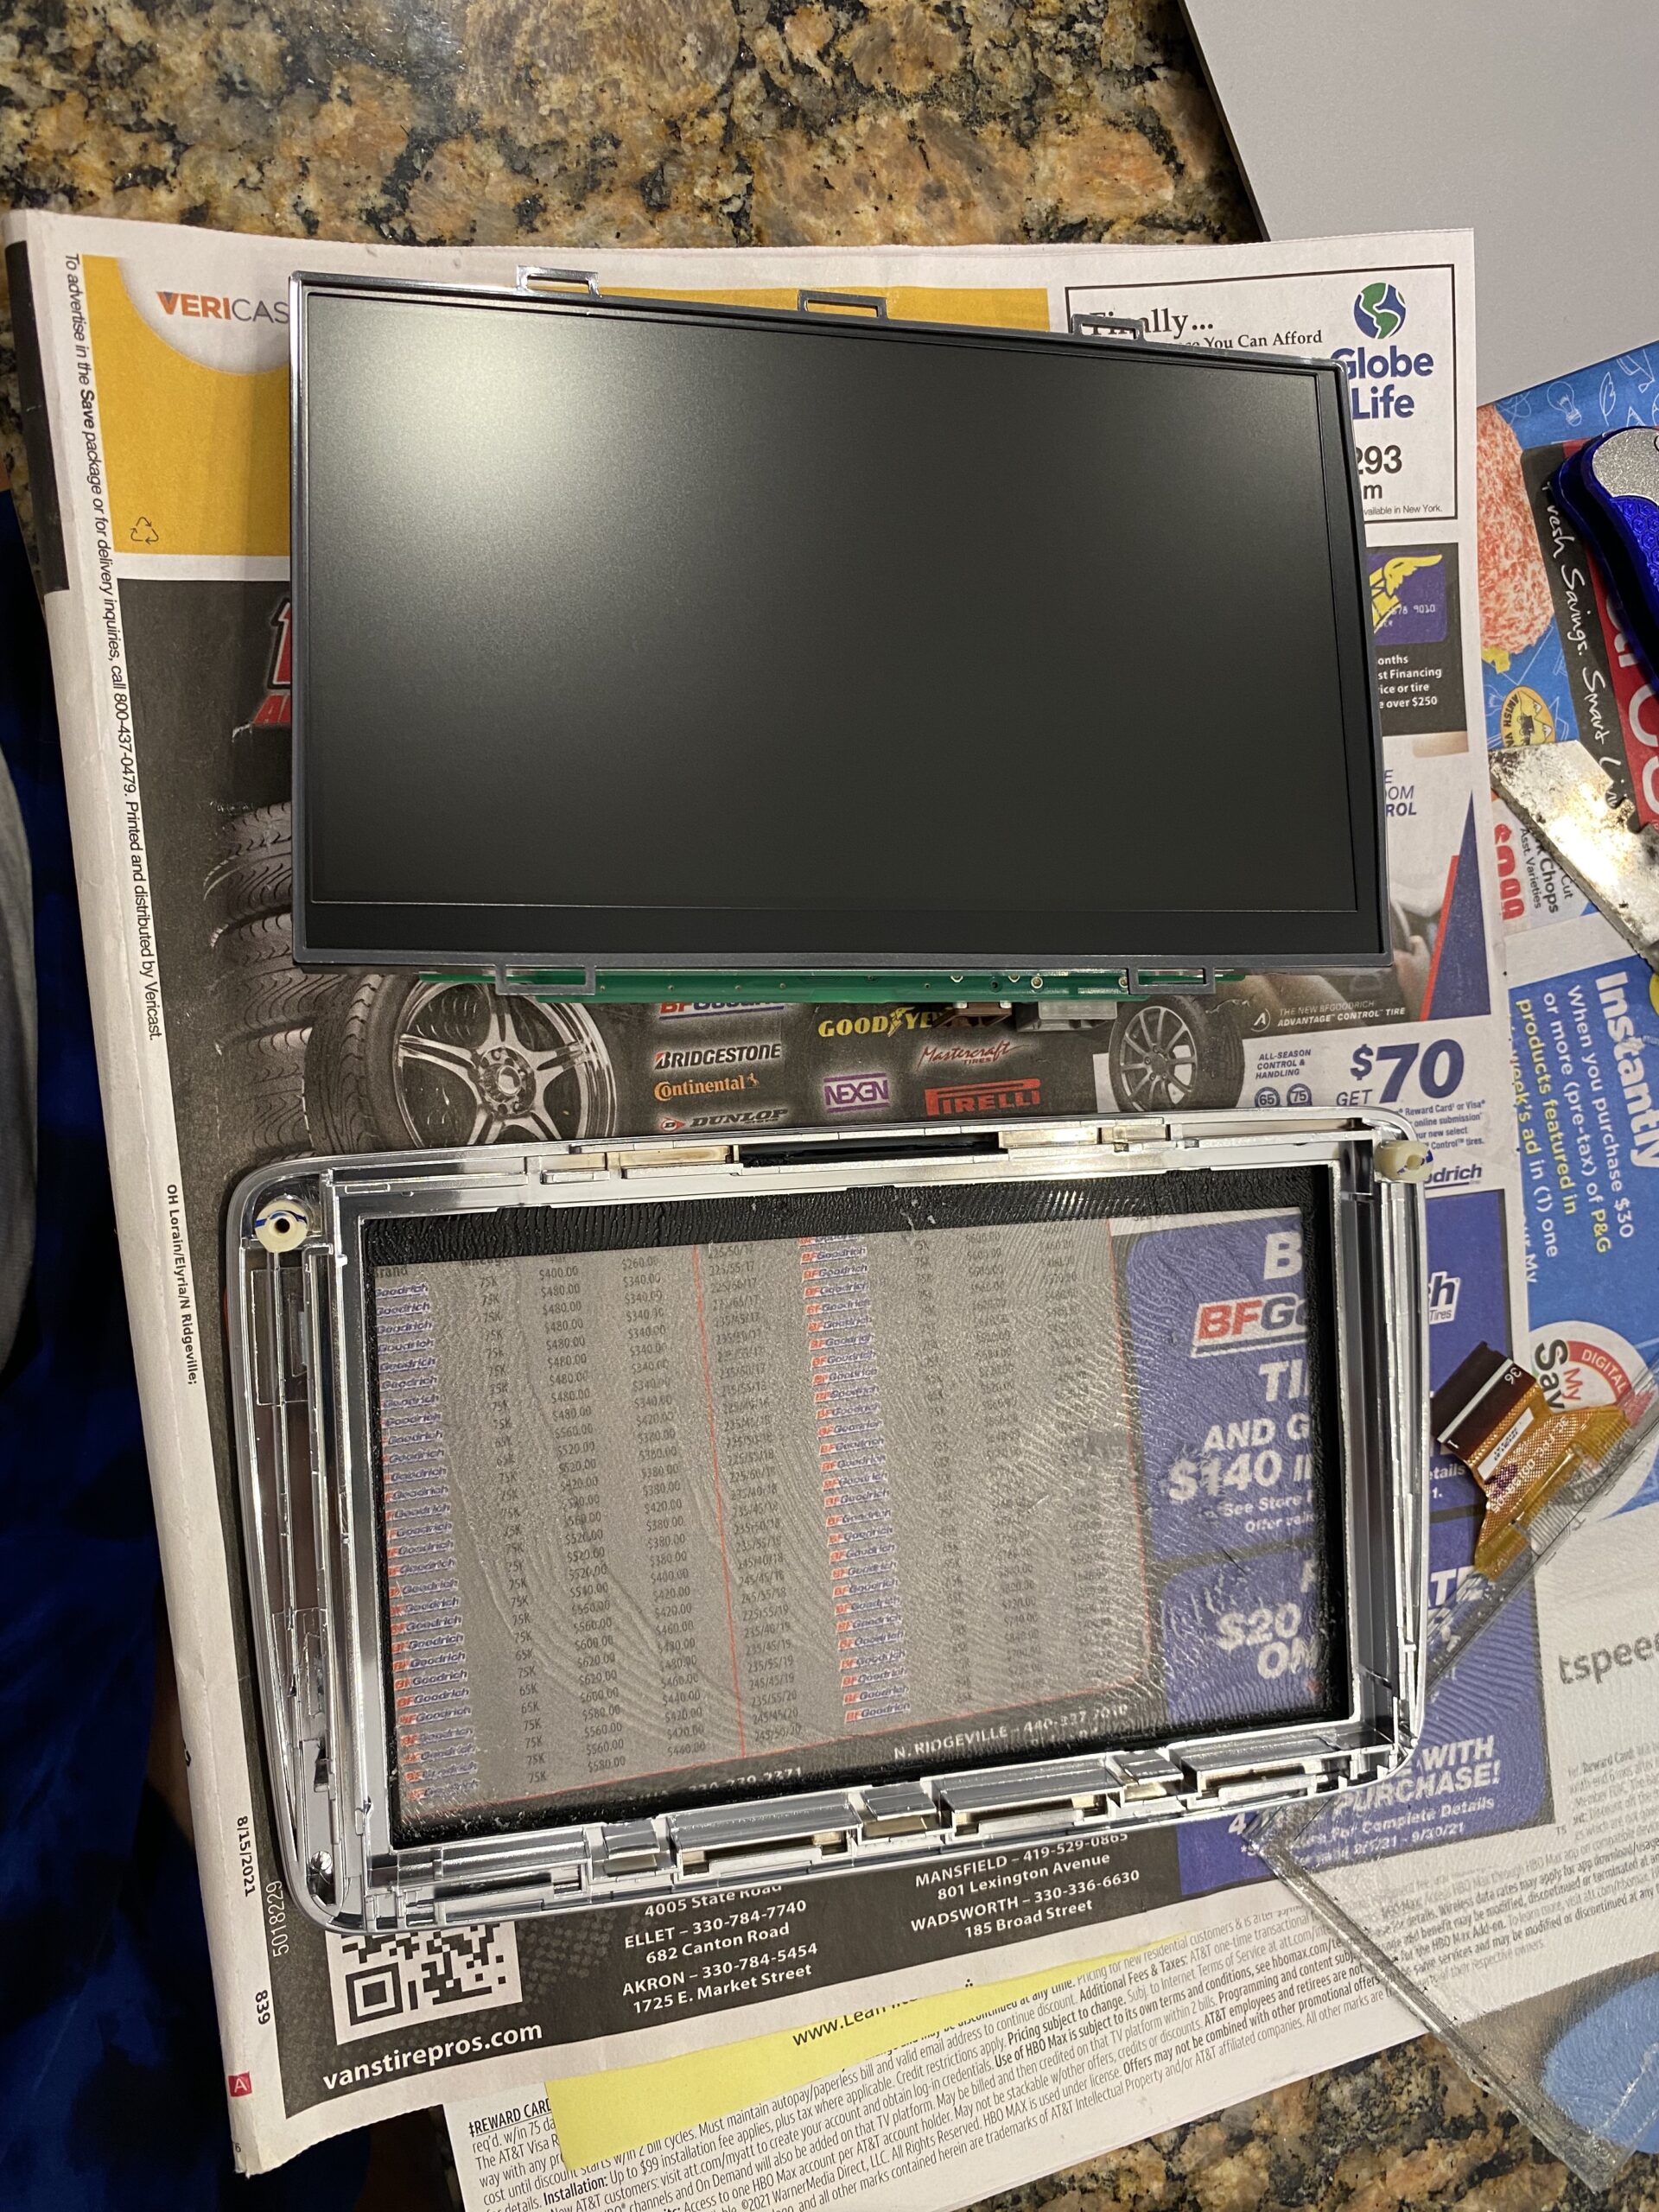
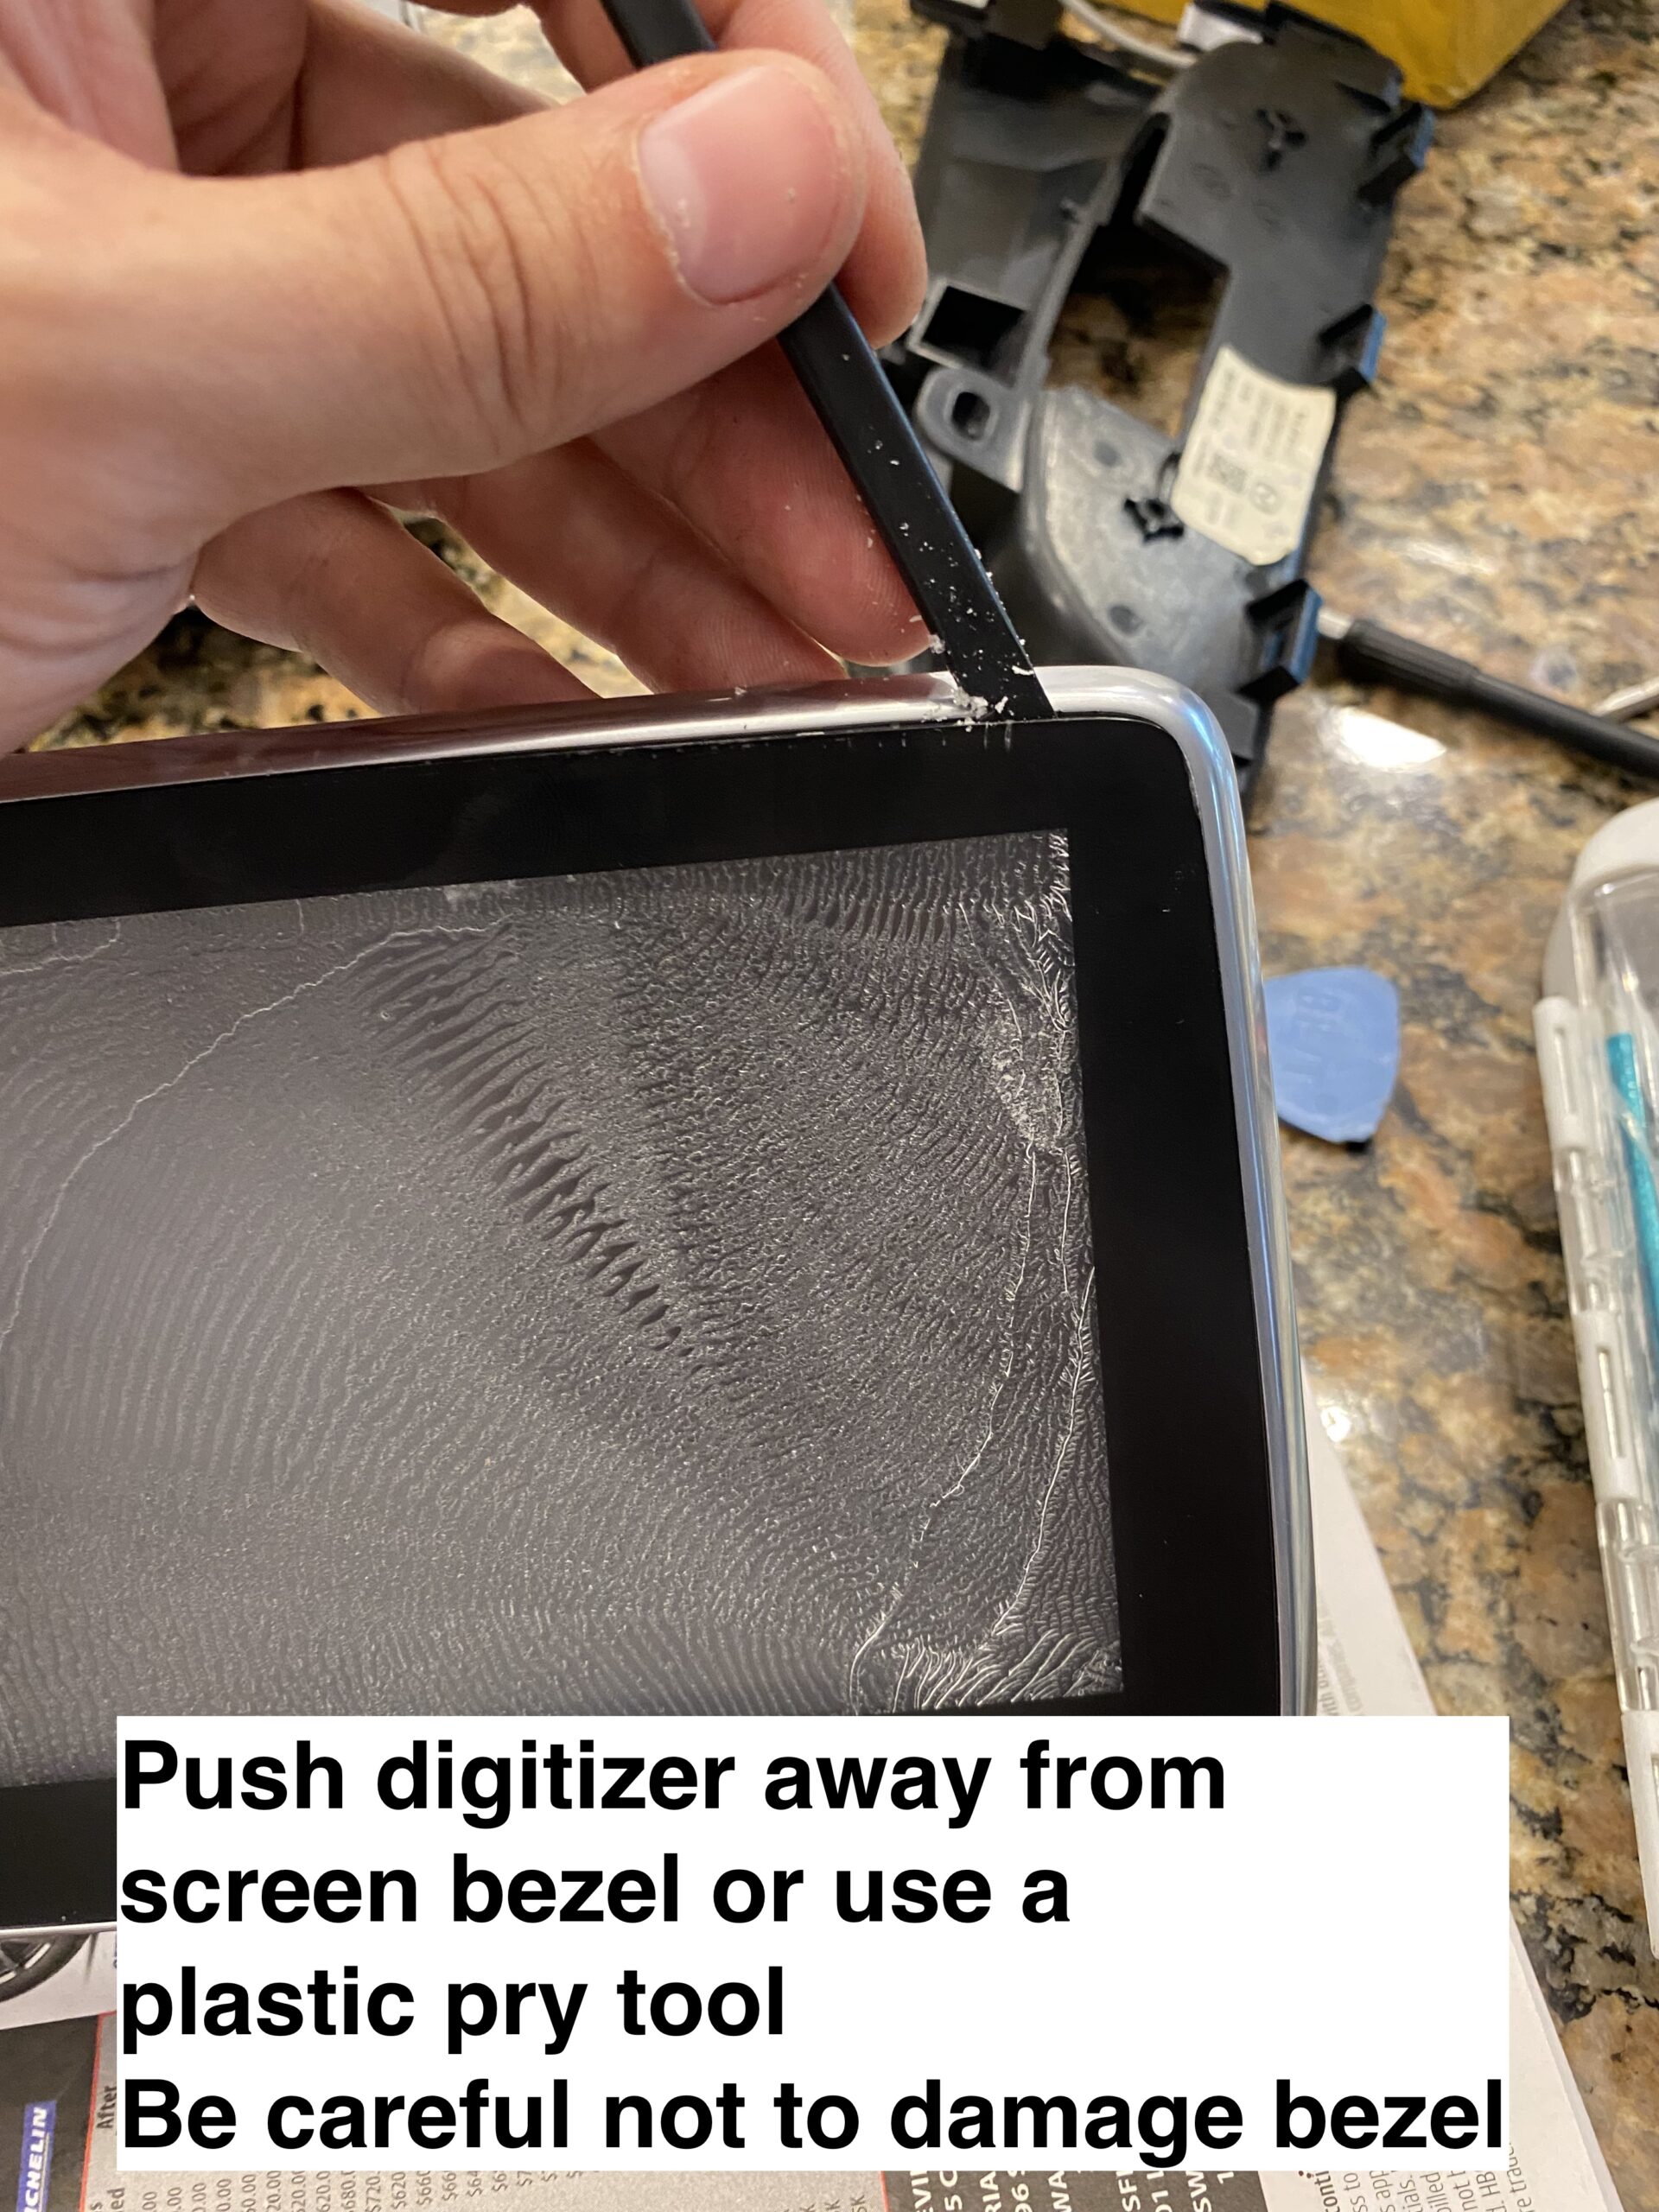
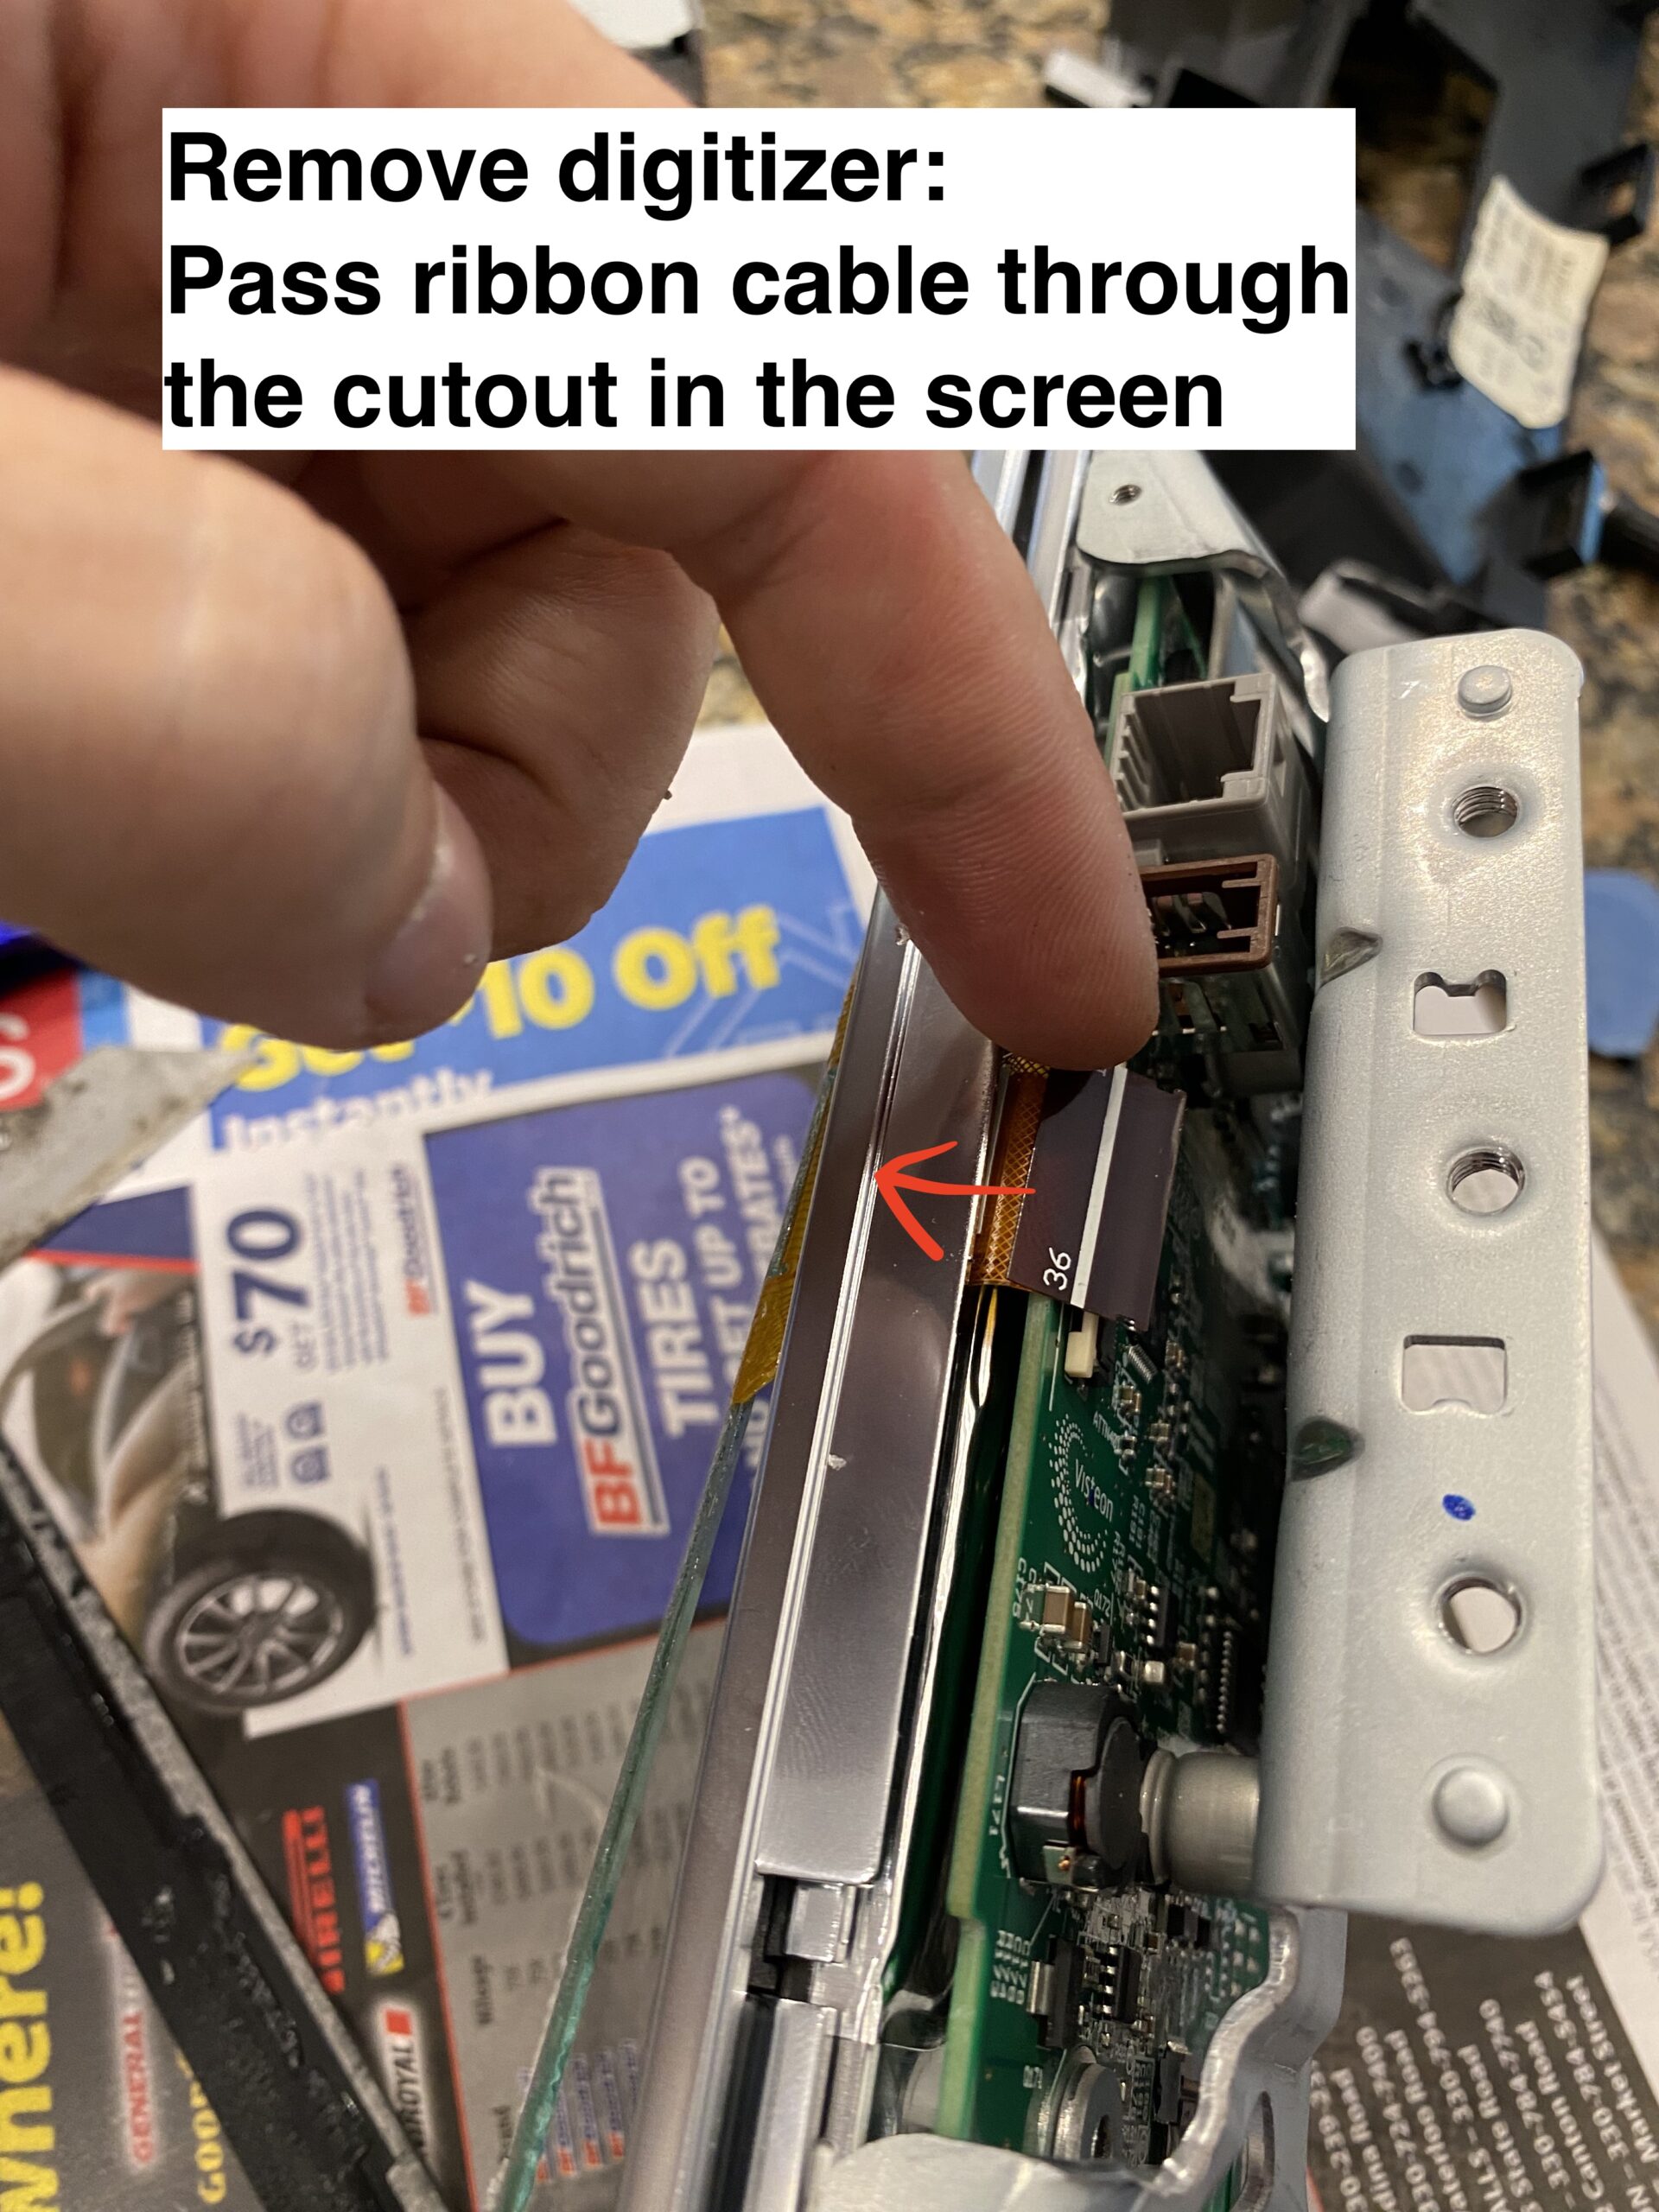
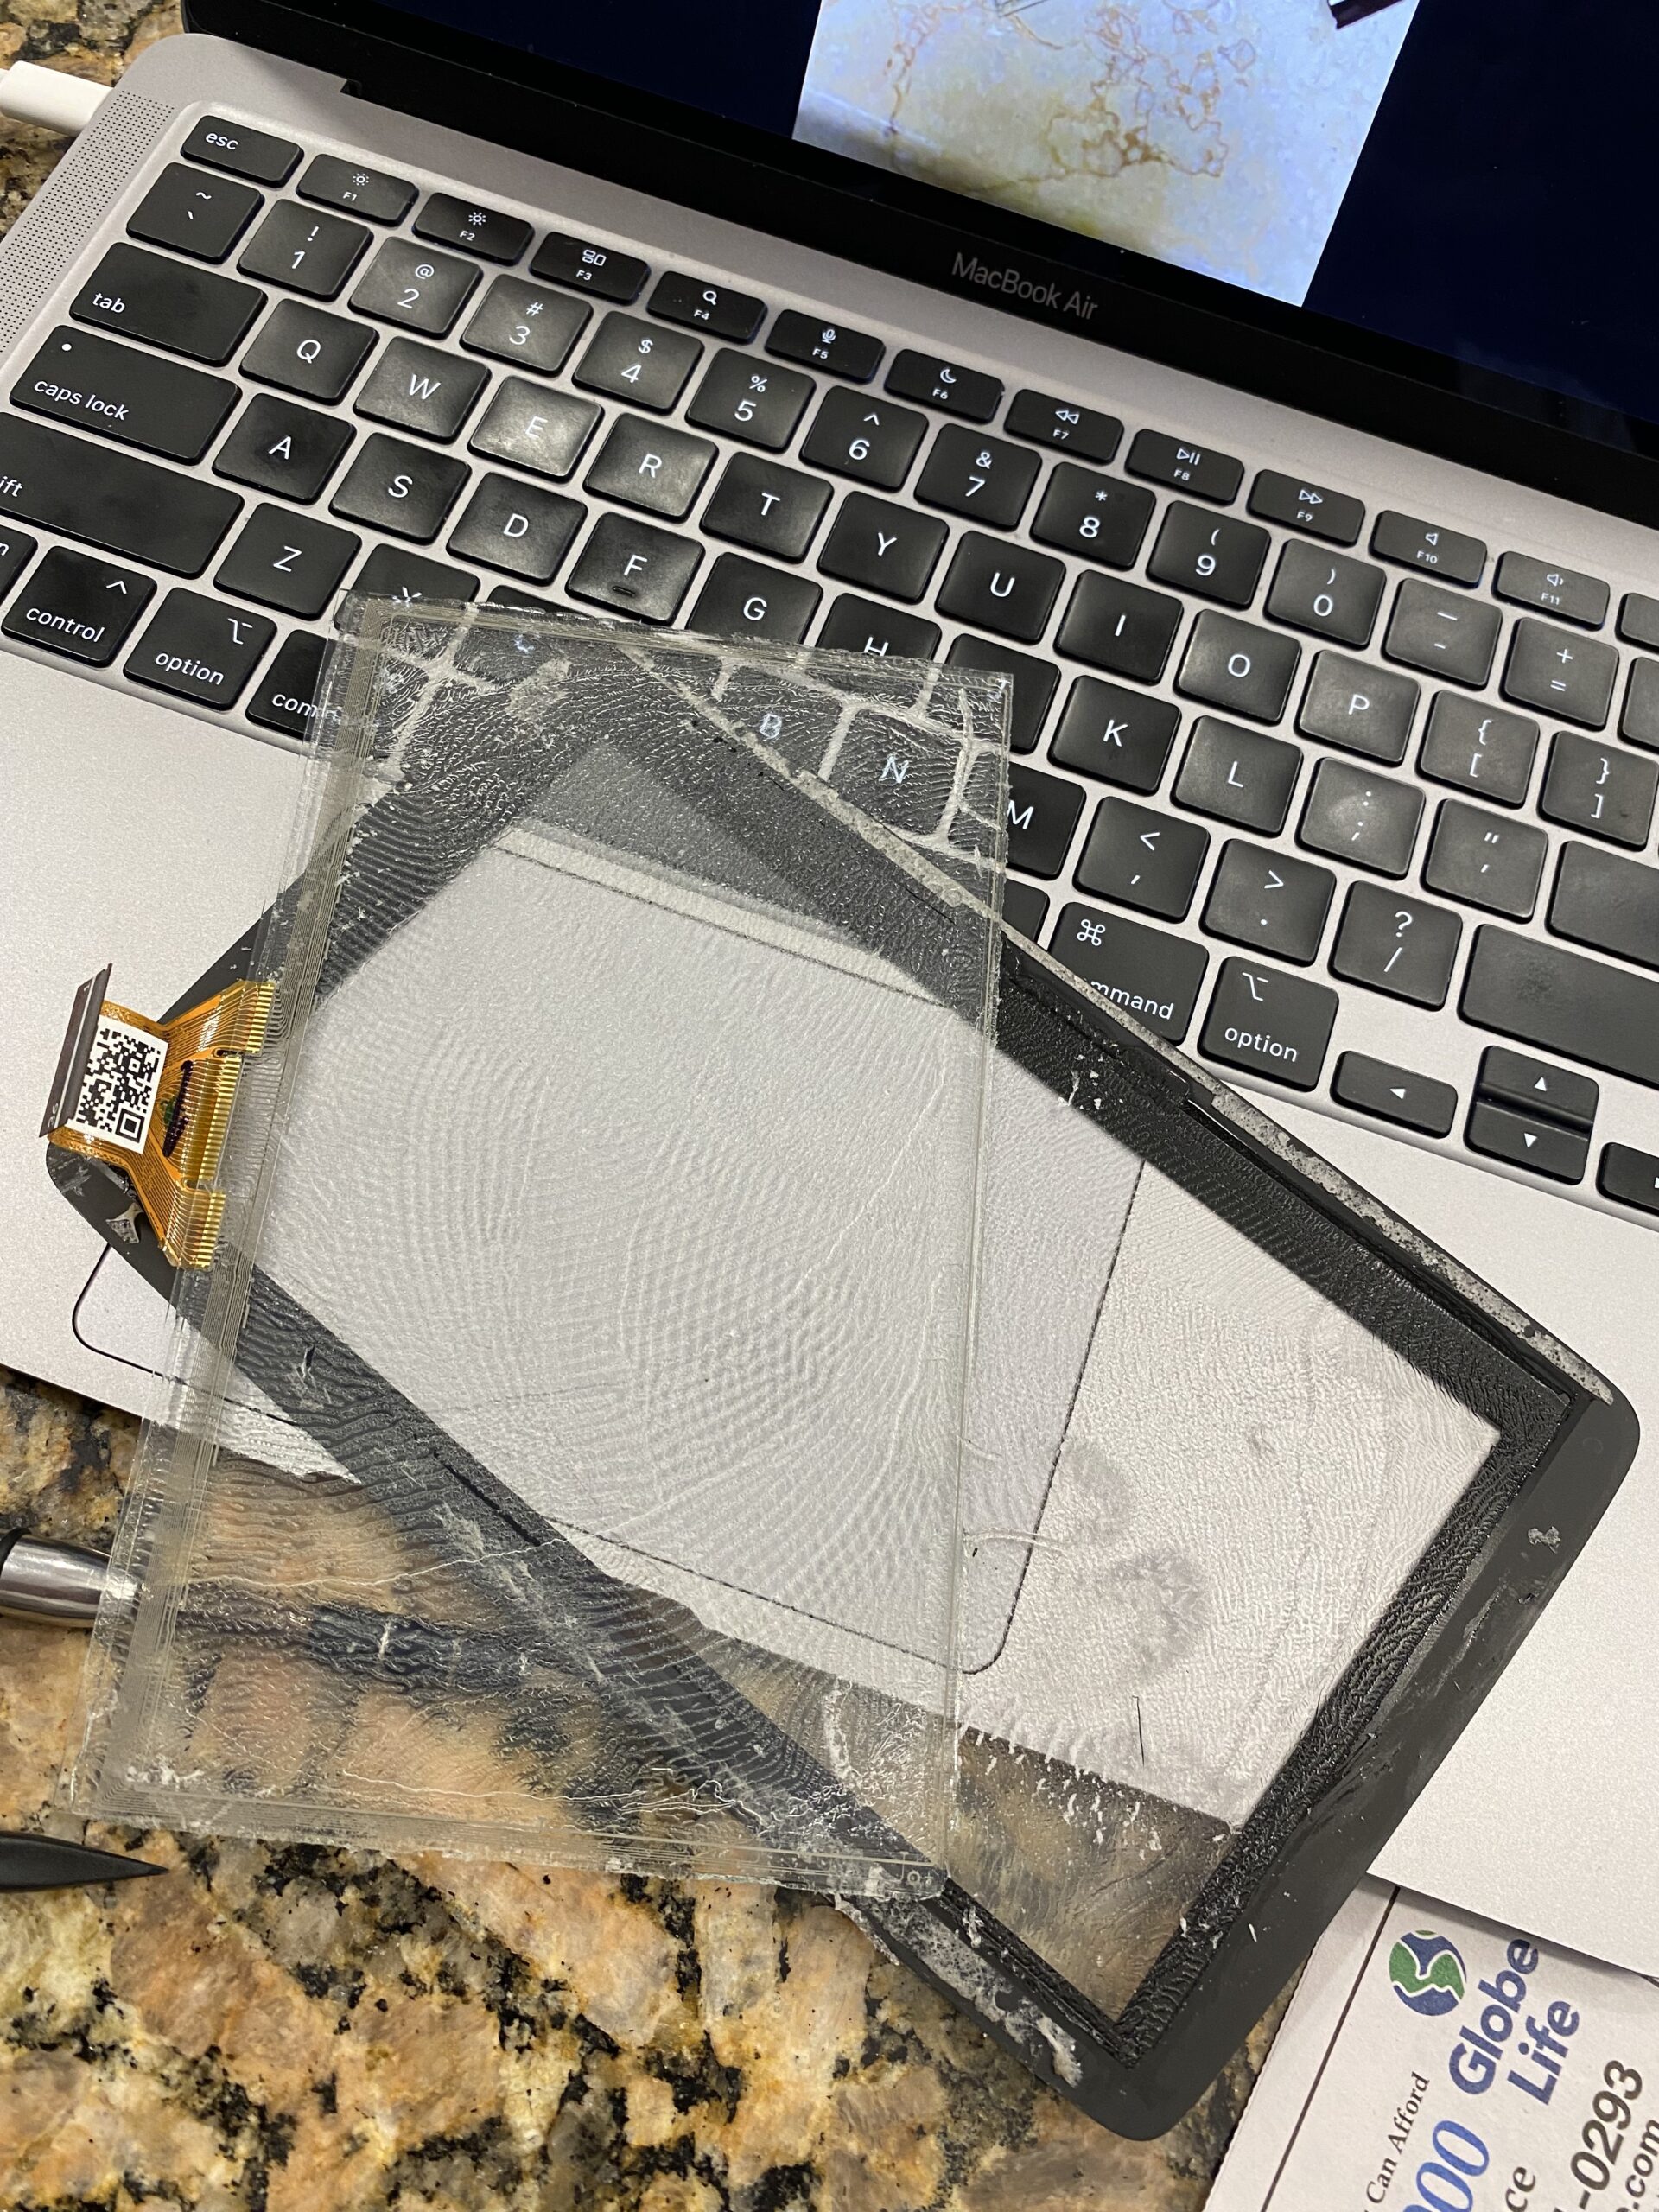
Step 3 — Remove the damaged digitizer
Work slowly when separating the old digitizer from the display assembly. Use heat carefully if needed to soften the adhesive.
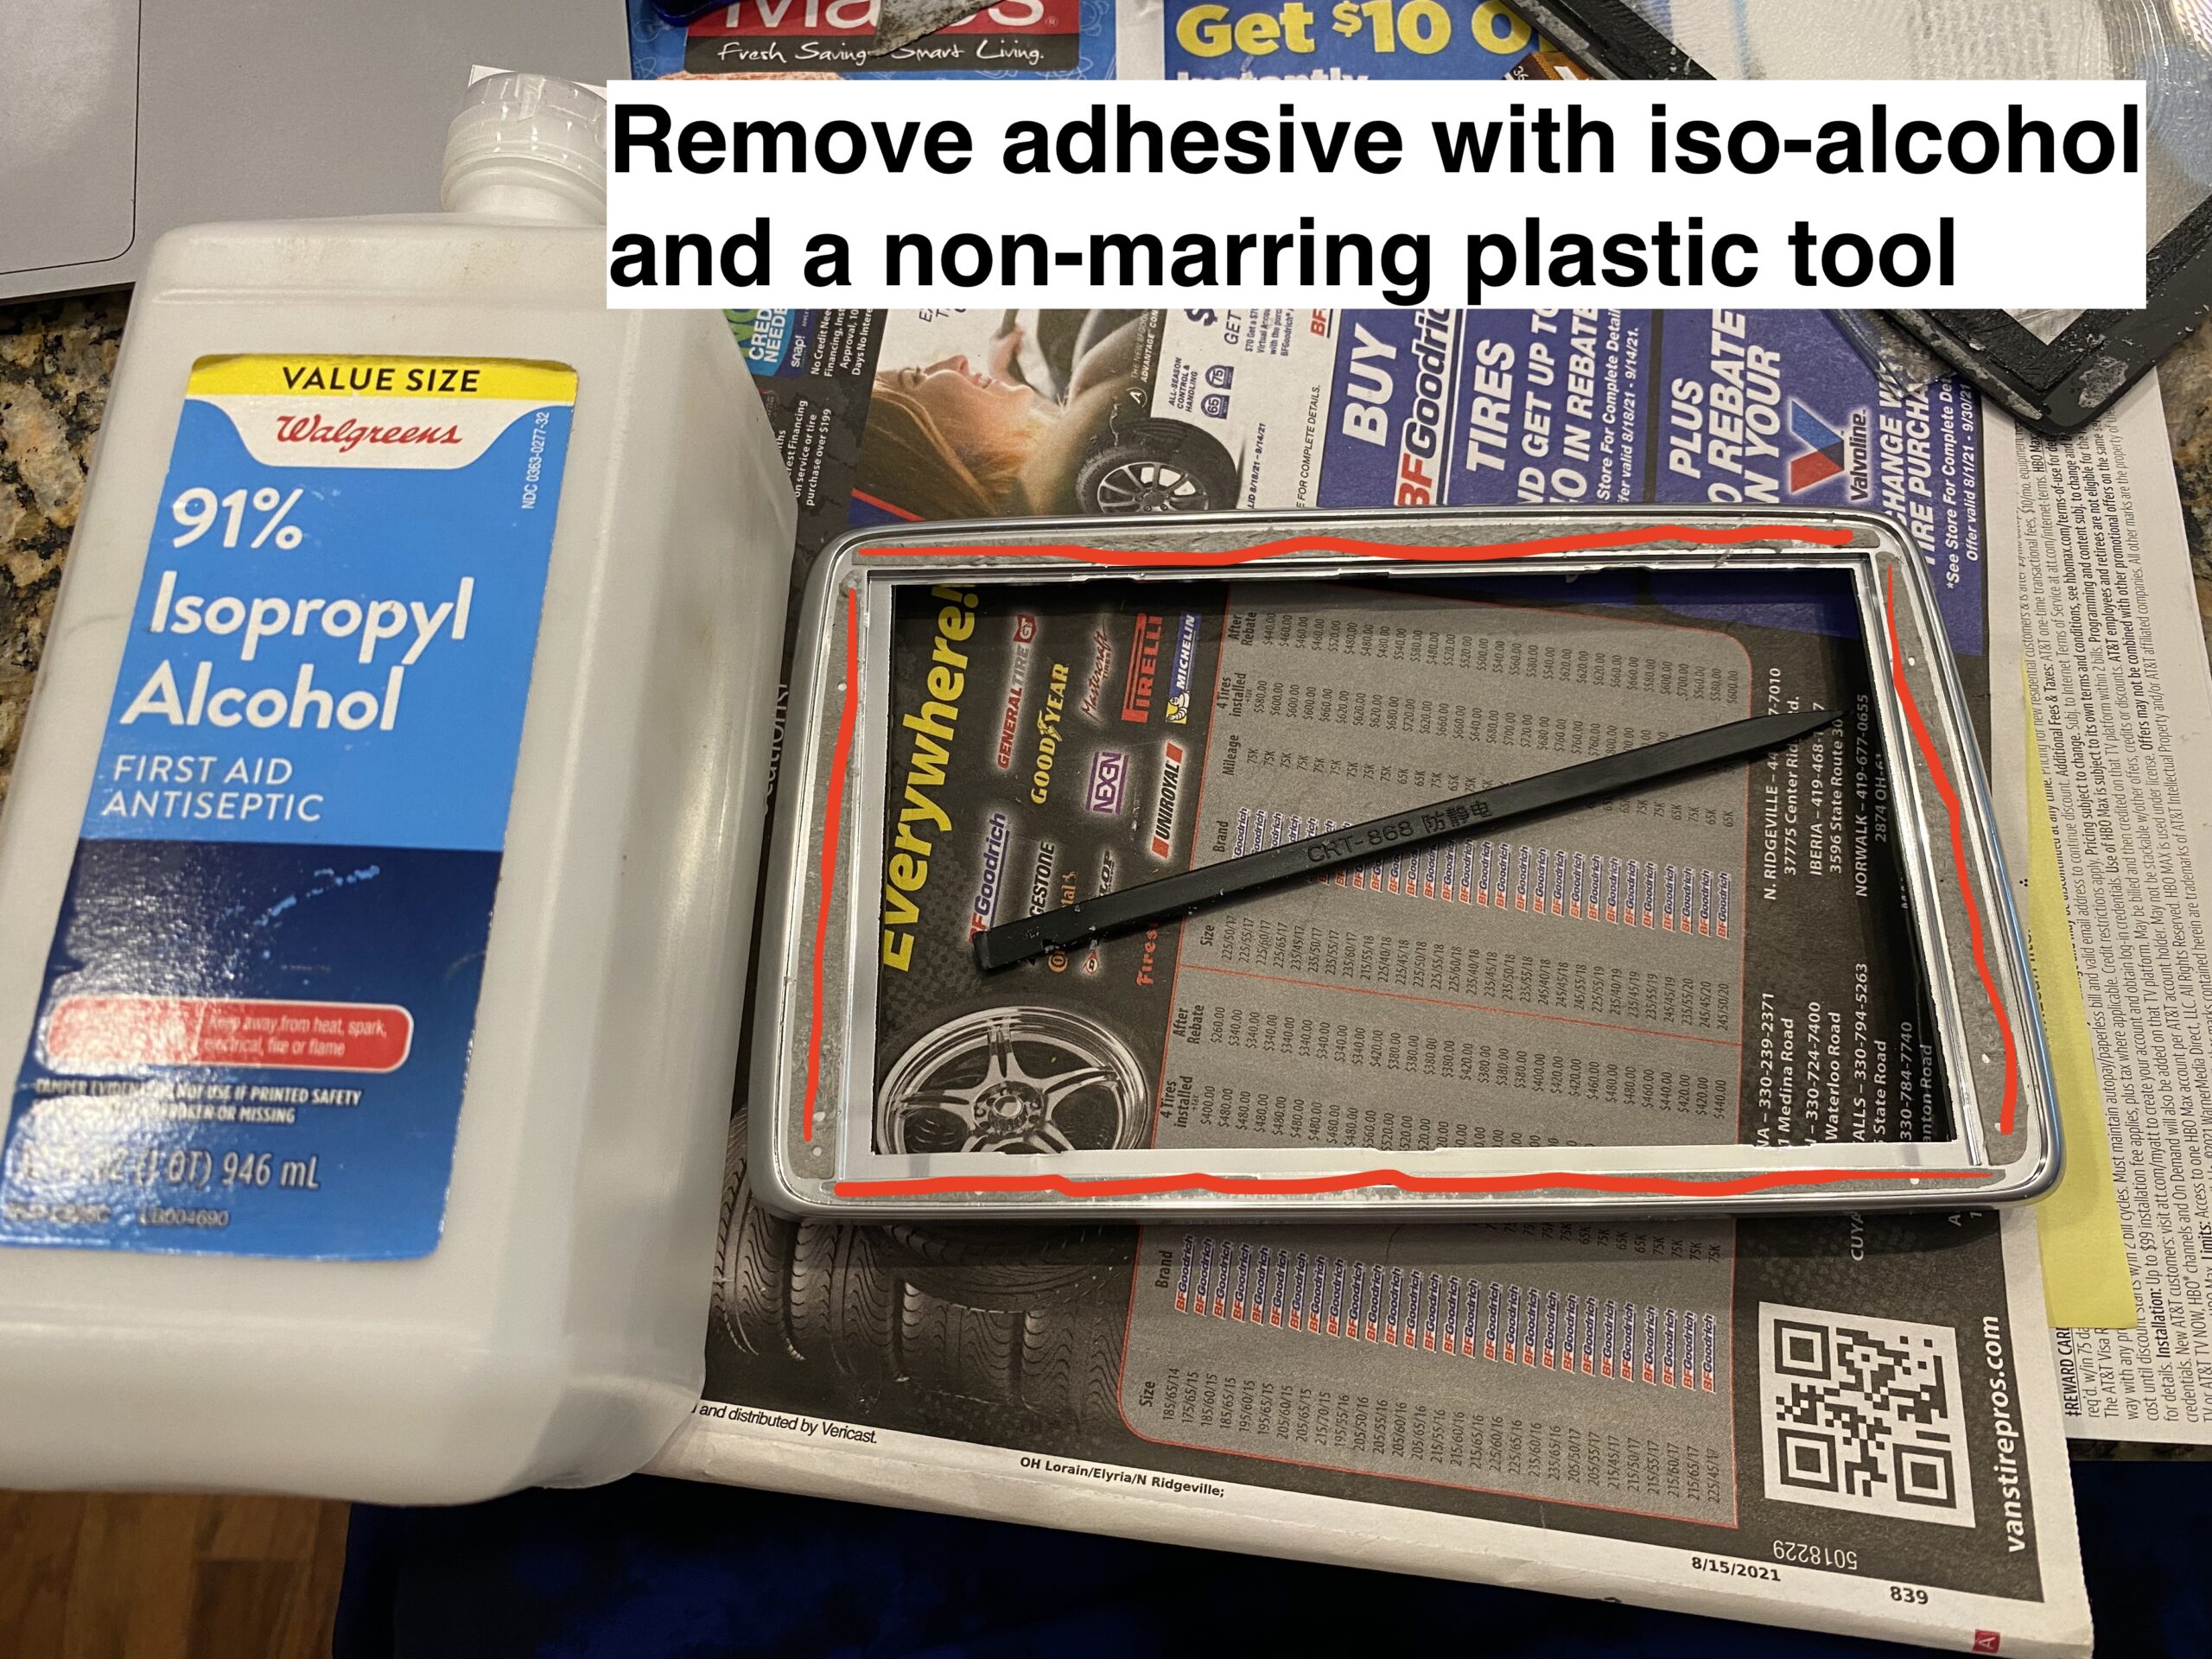
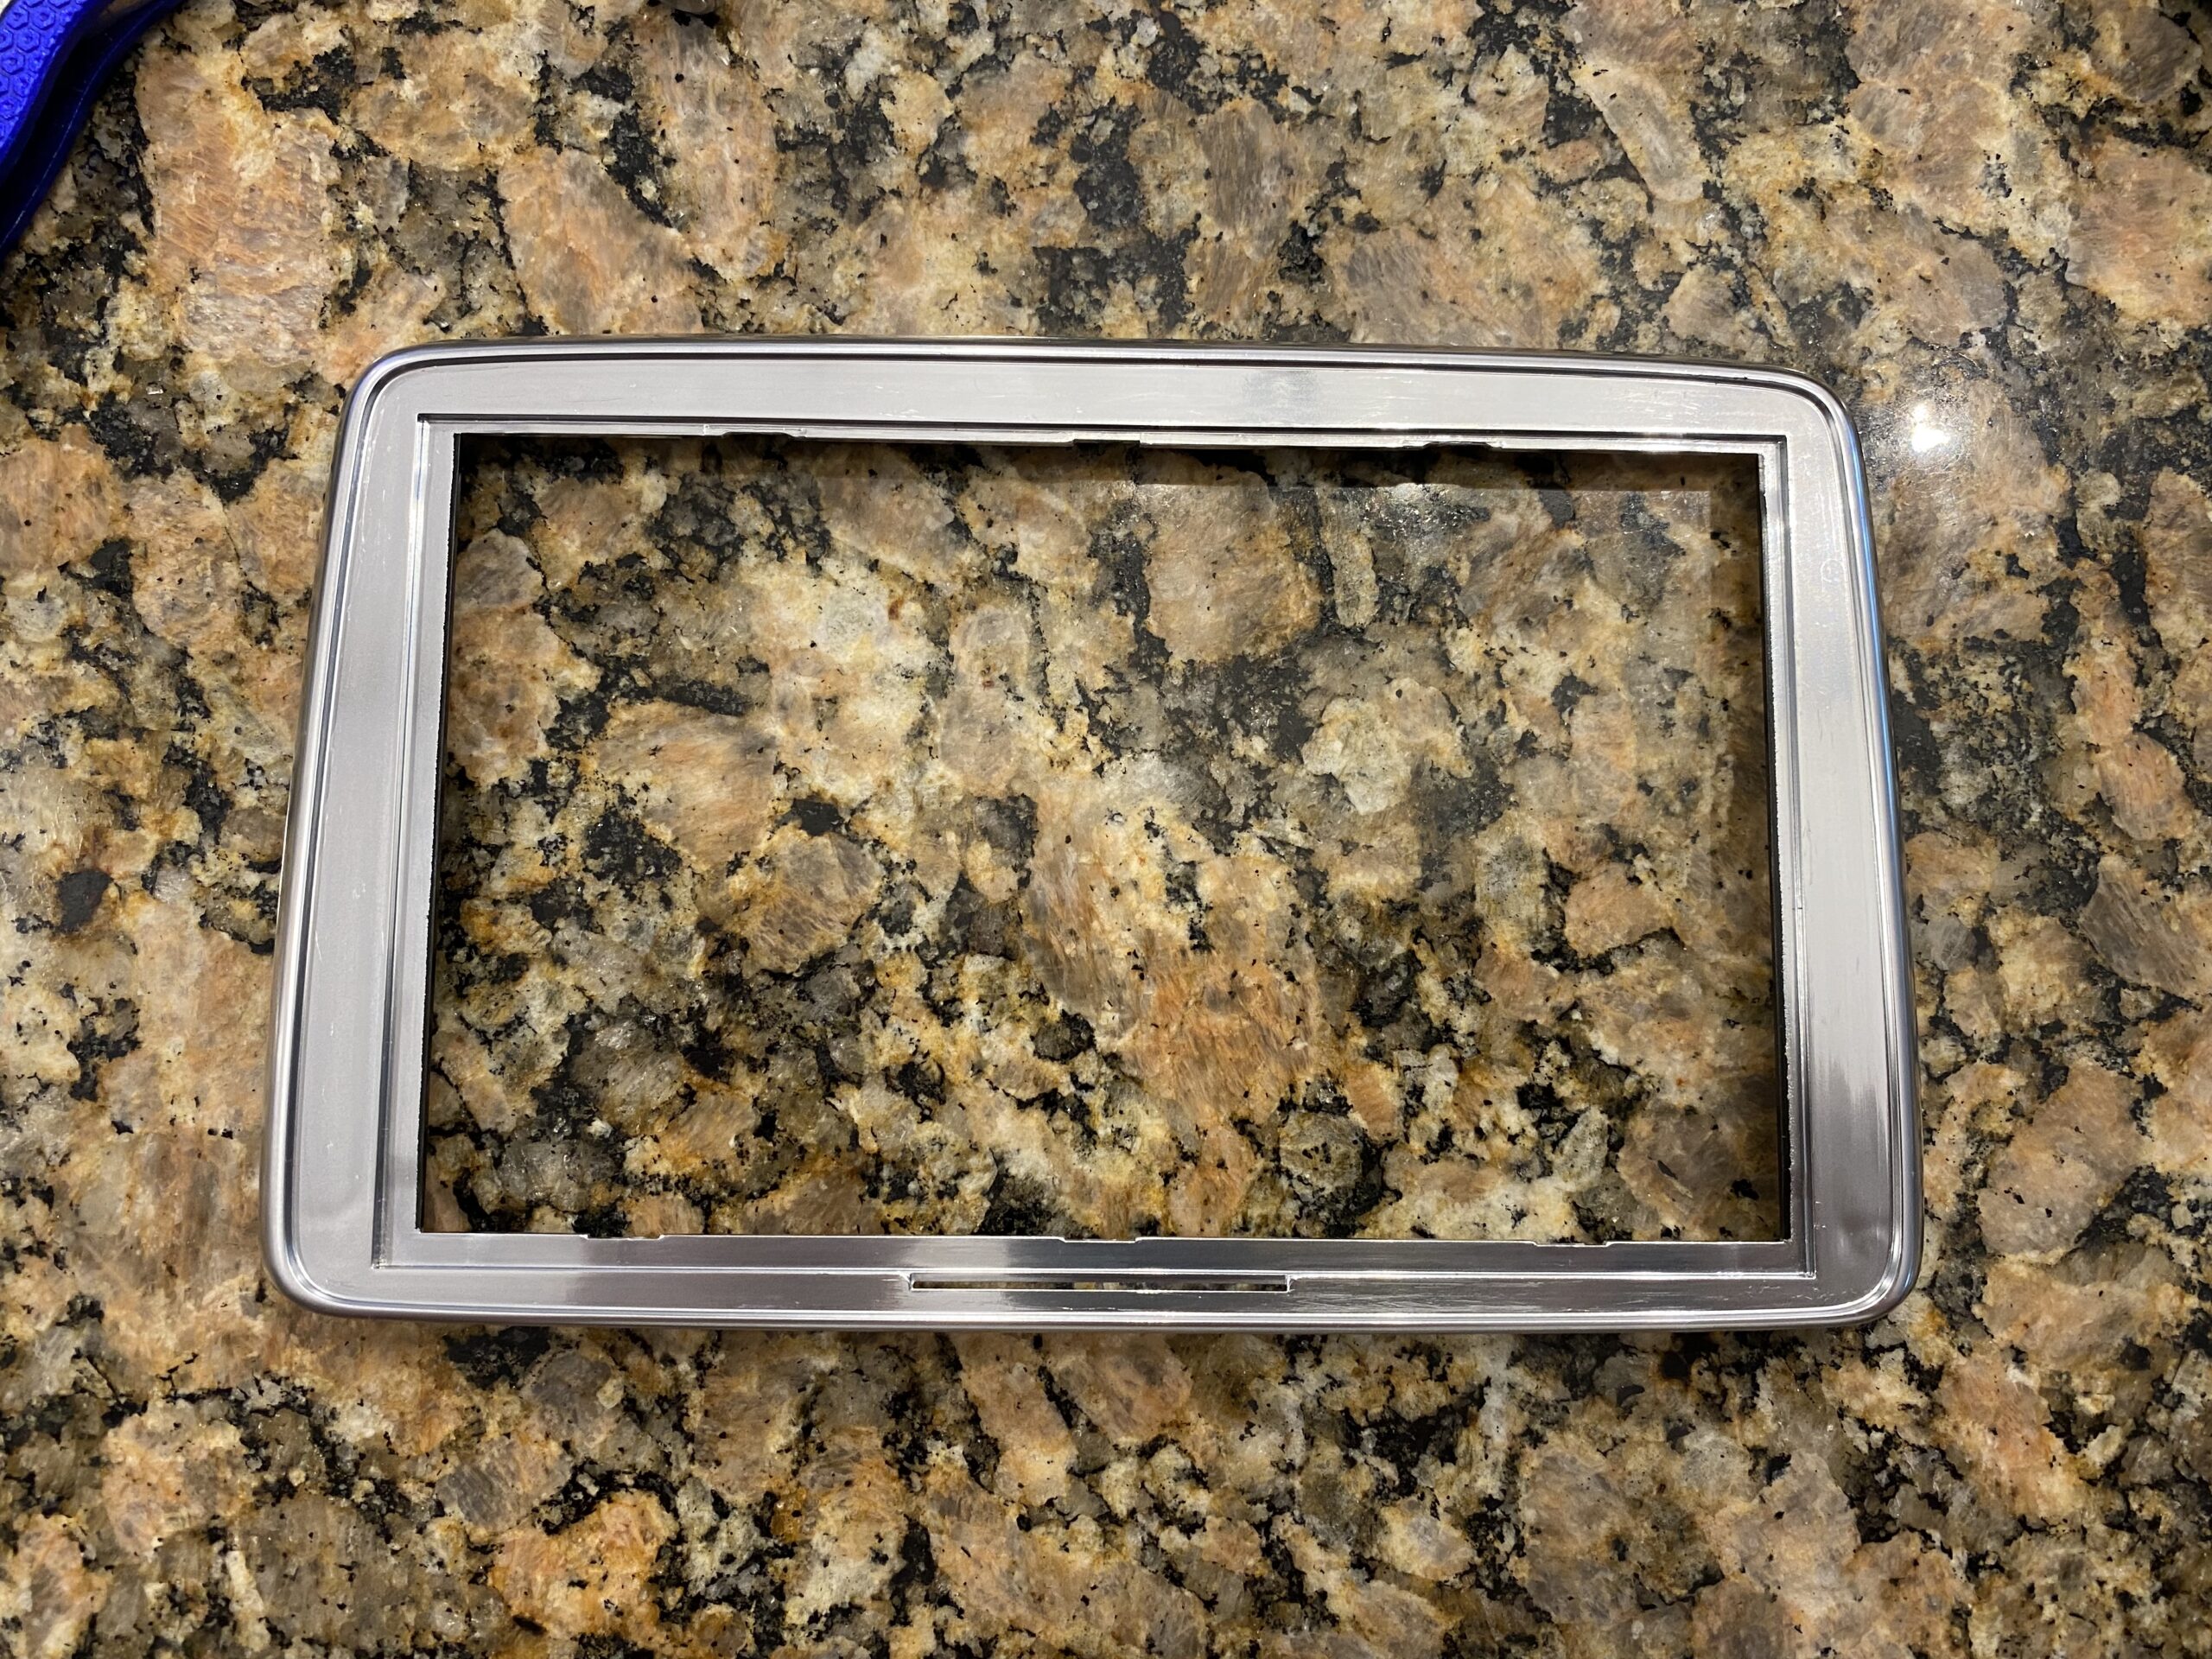
Step 4 — Clean the adhesive and prepare the surface
Remove all remaining adhesive and debris so the new digitizer can sit flat and bond properly.


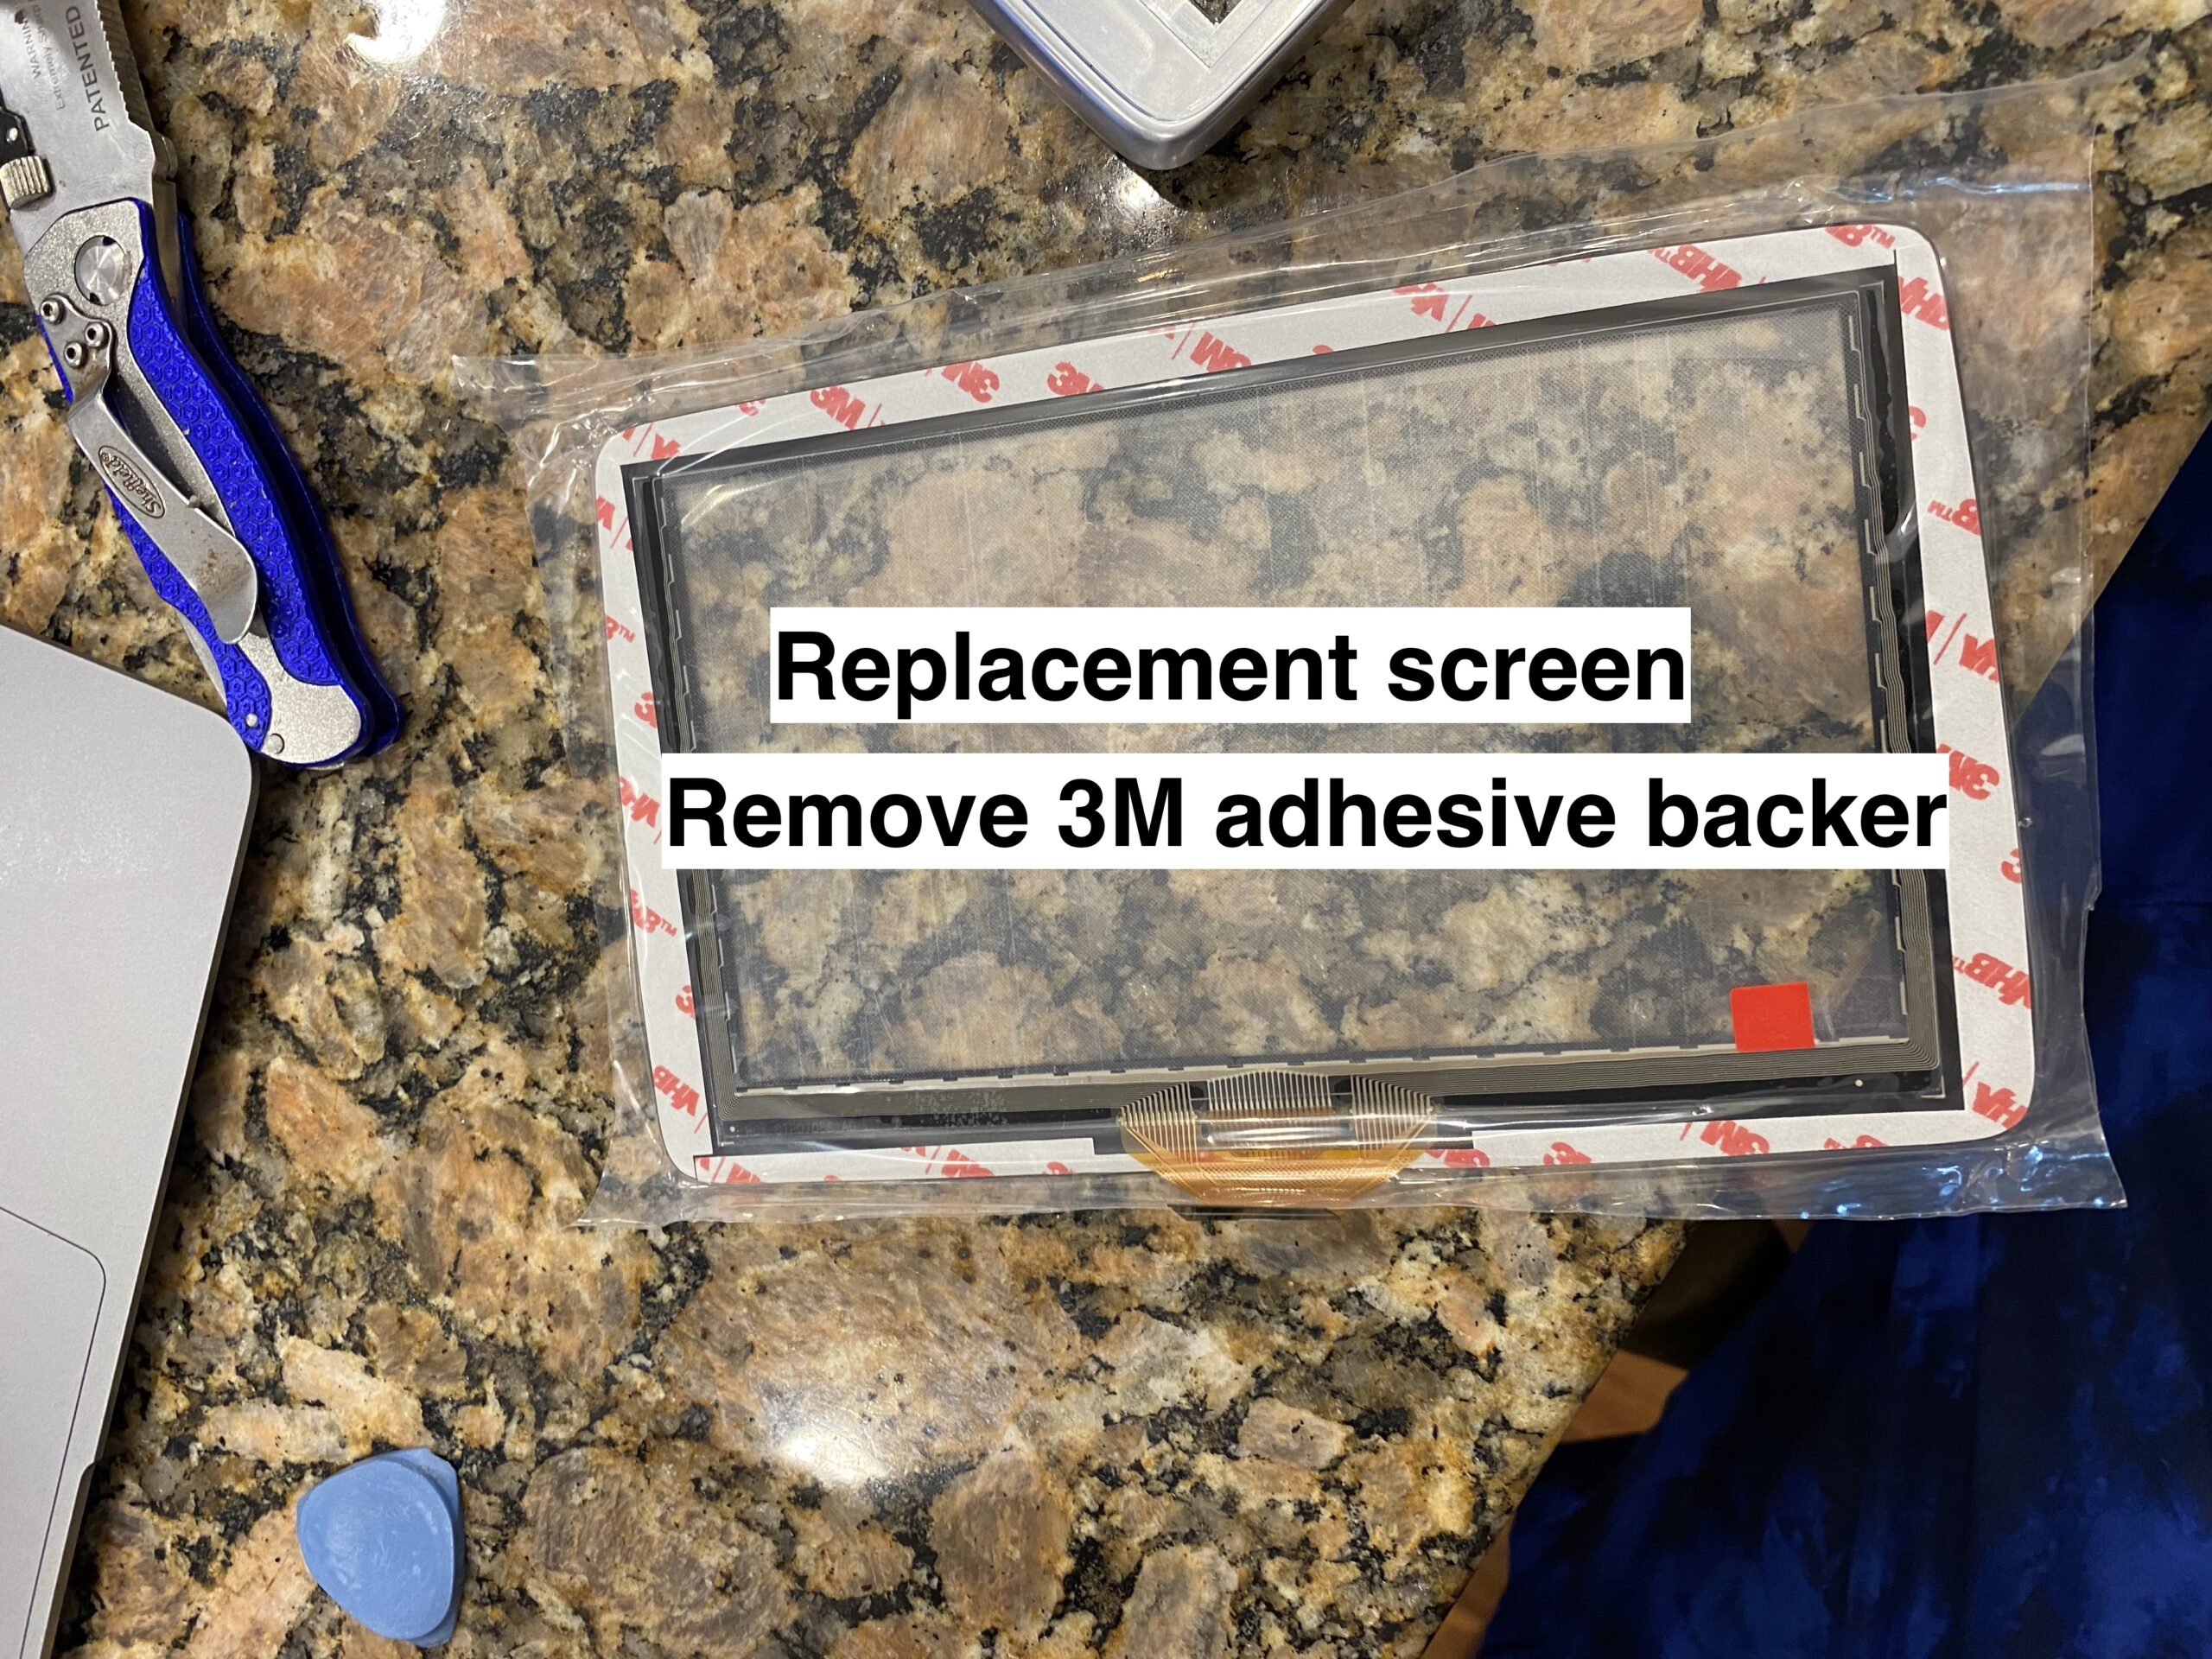
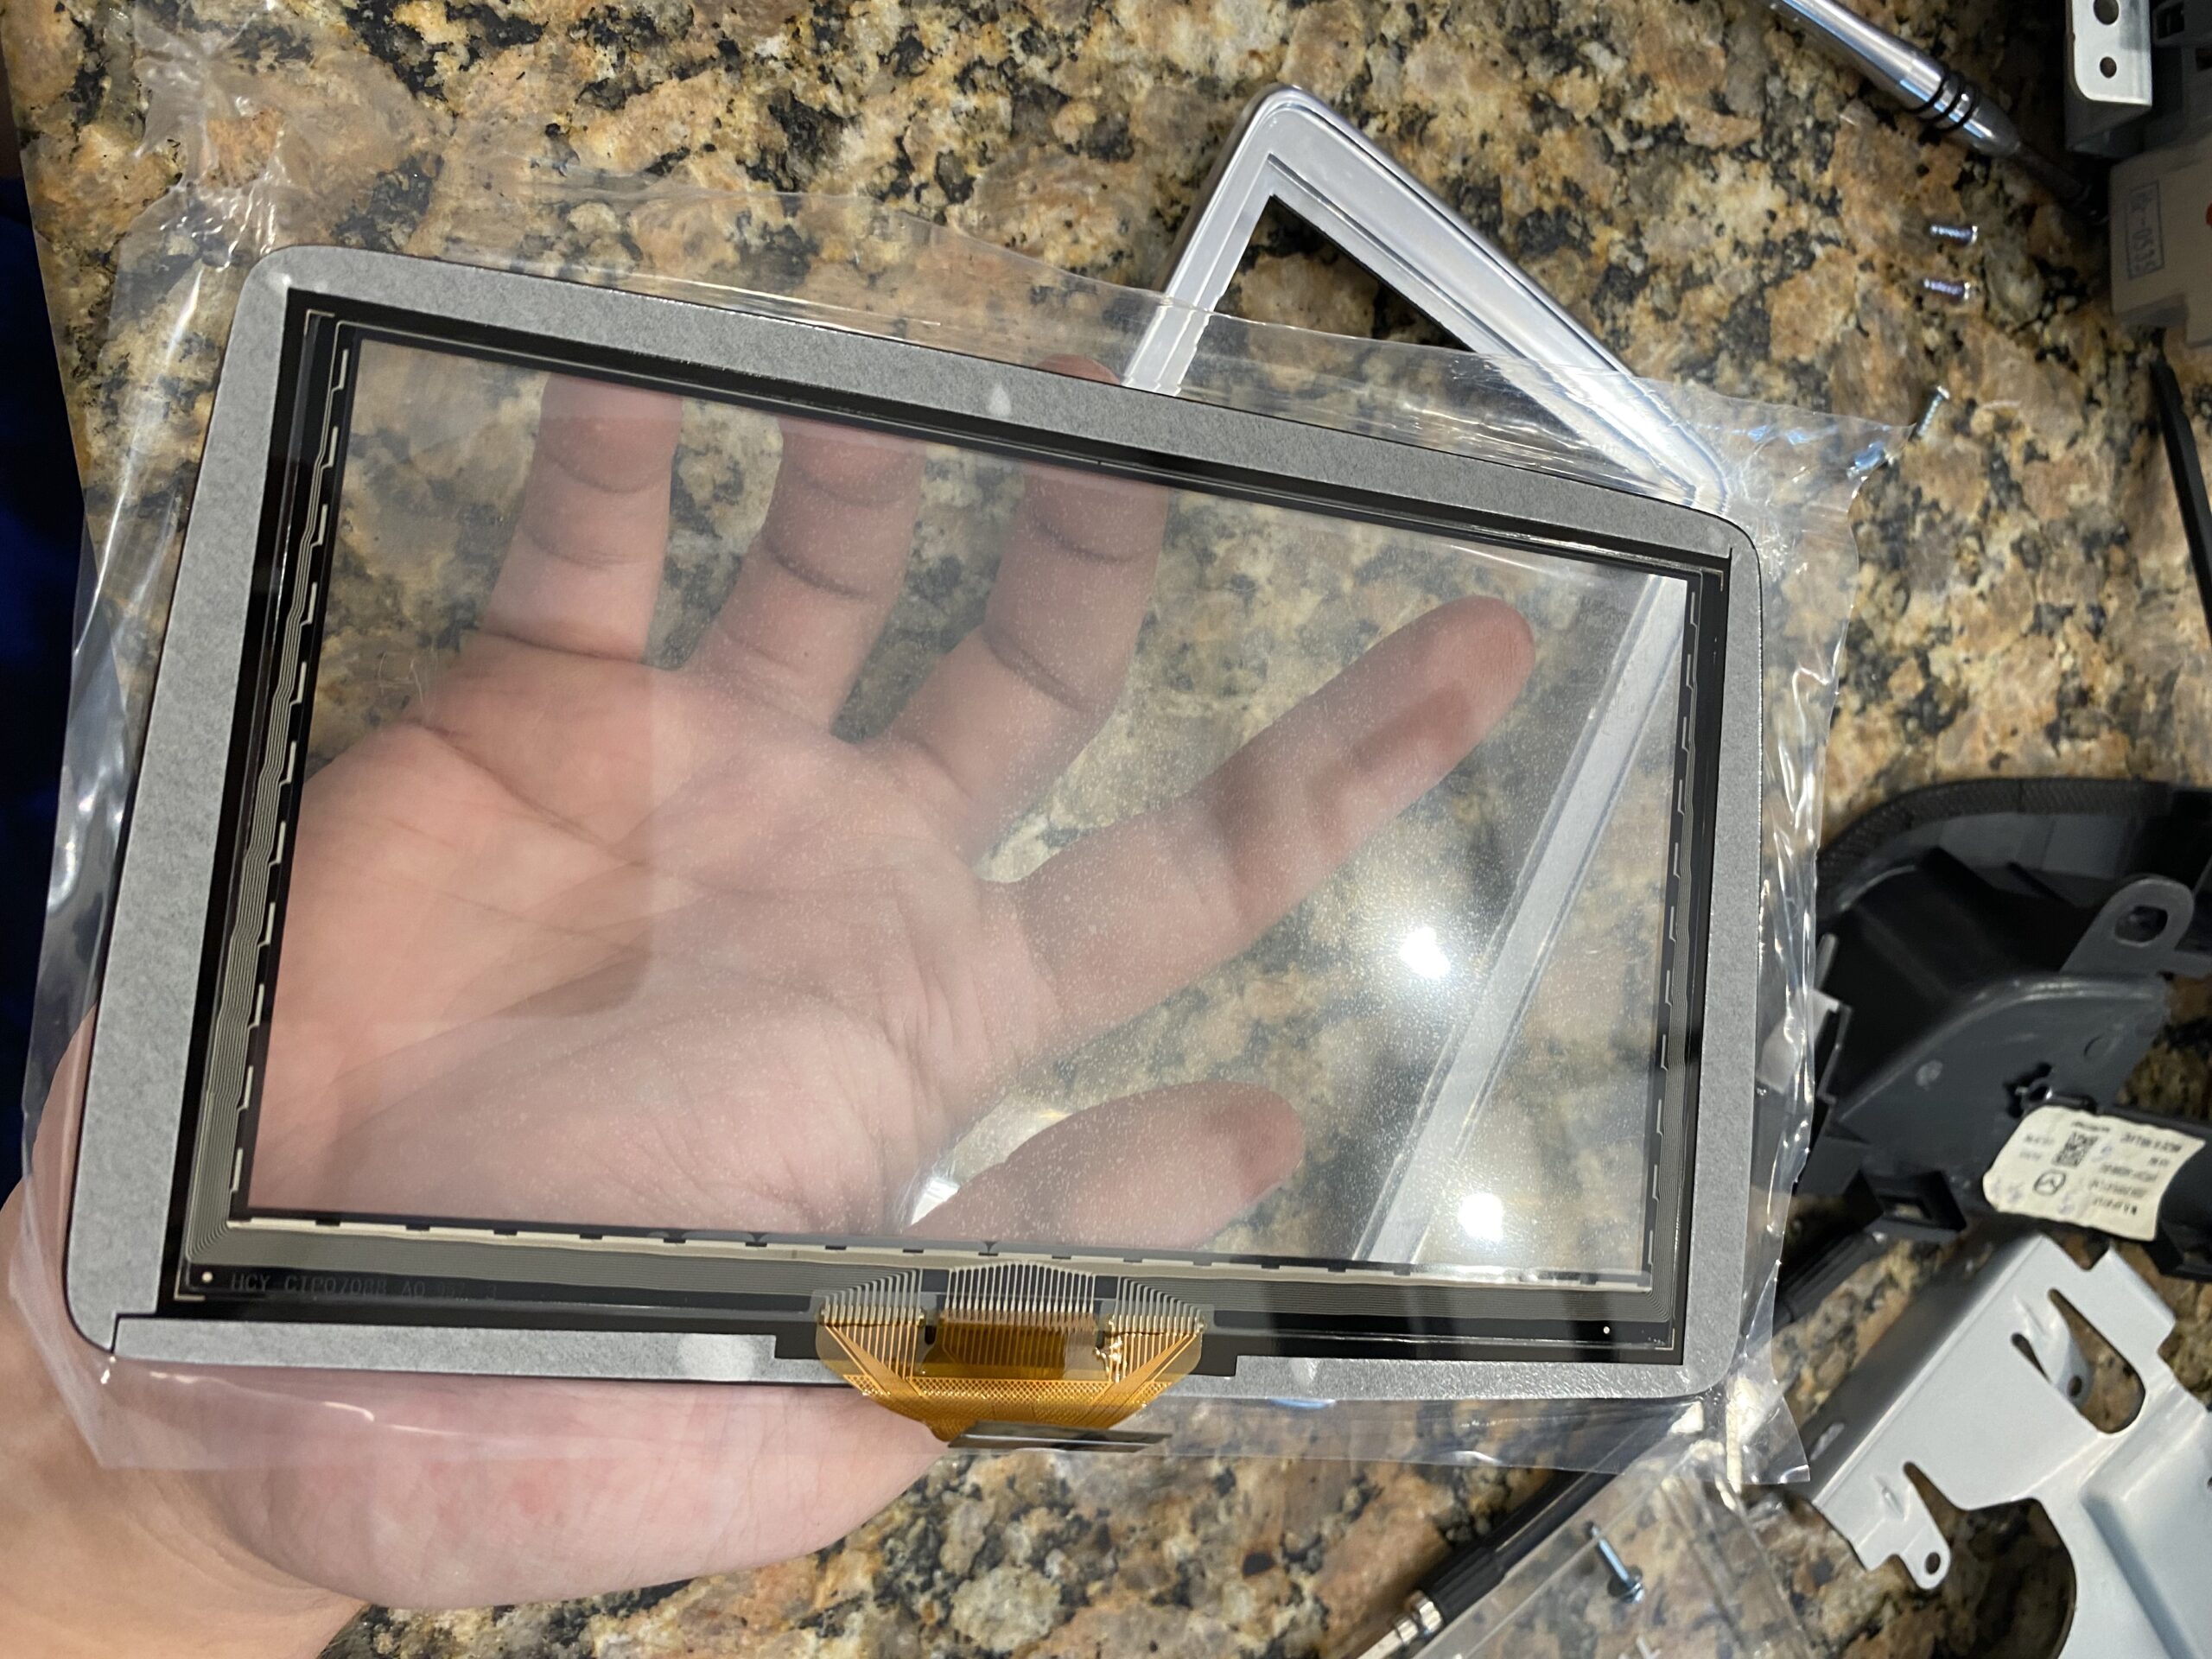
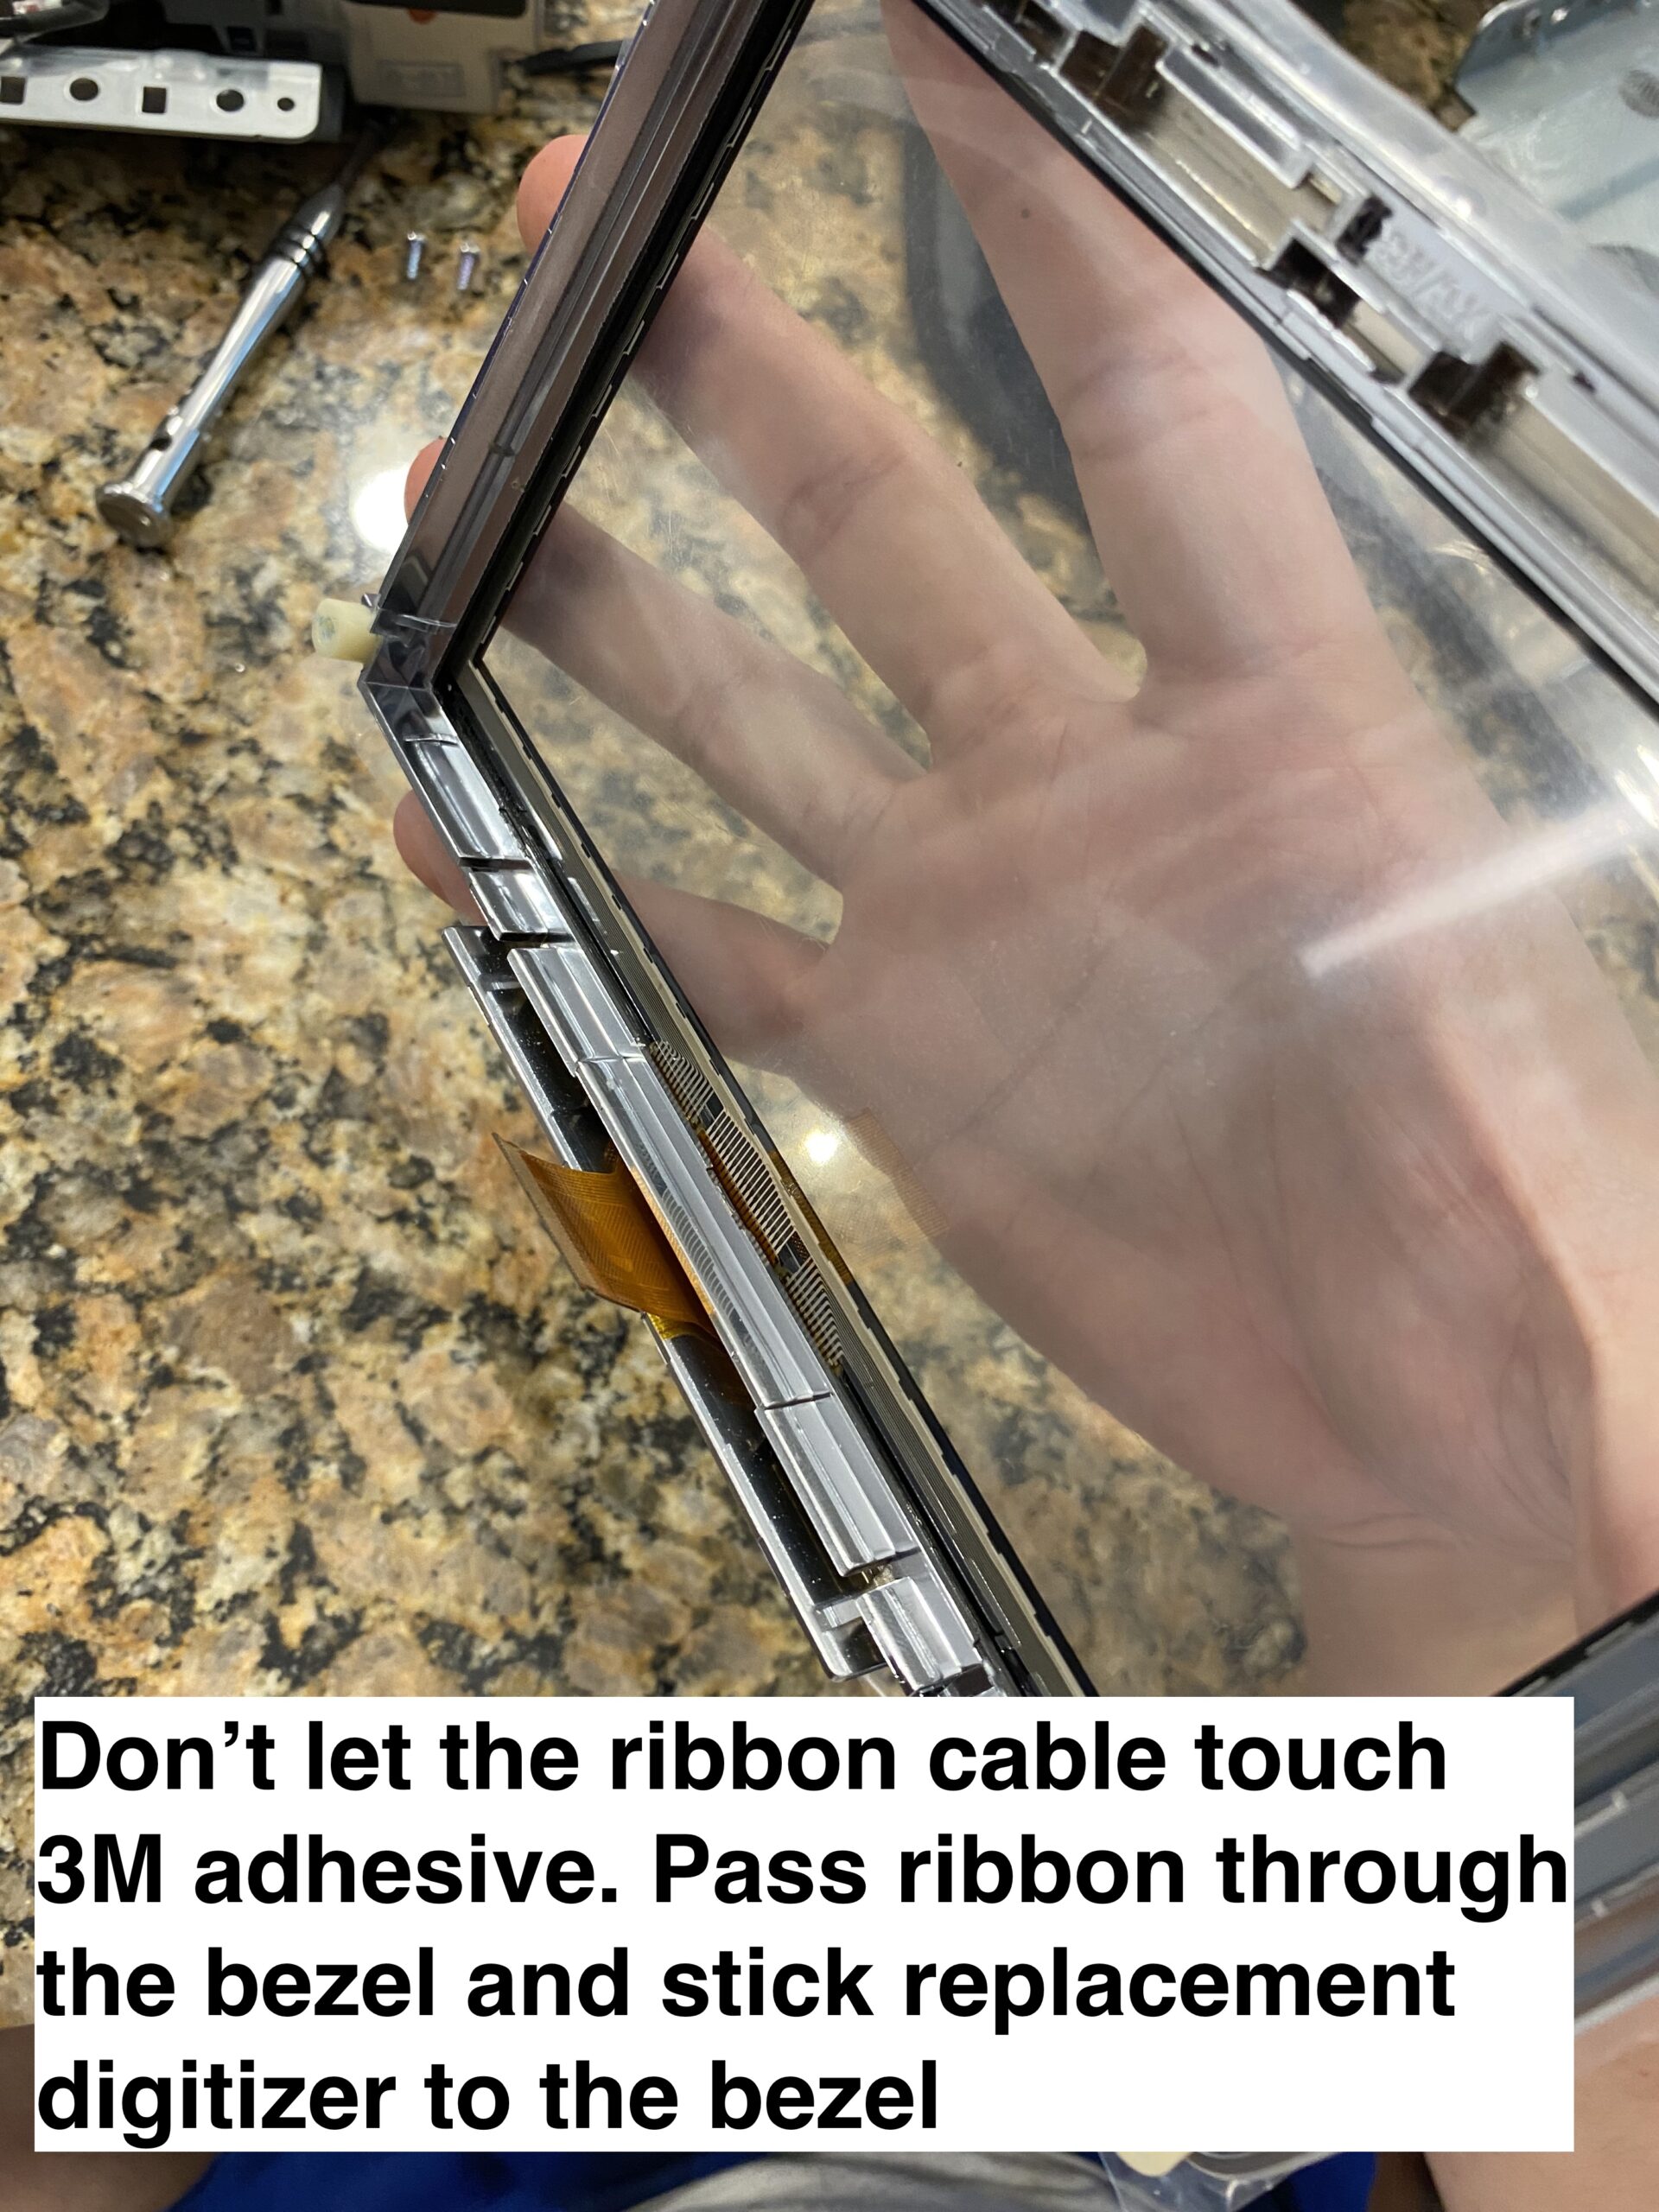
Step 5 — Install the new digitizer
Align the new digitizer carefully, route the ribbon correctly, and make sure the assembly sits flat before reassembly.

Step 6 — Reassemble and test
Reconnect everything, test touch response before fully buttoning it up, and then reinstall the trim pieces.

Final Notes
If your Mazda Connect screen is cracked or suffering from ghost touch issues, replacing only the digitizer can save a significant amount of money compared to replacing the full infotainment unit.
The most important step before ordering is confirming whether your screen uses the older 36-pin digitizer or the newer 50-pin digitizer.