When you are using SDR# you are looking at a chunk of radio spectrum. Standard radios only have the ability to process one signal at a time, you now have the ability to not only hear, but also see the signals.
Sample Rates
Your sample rate is your bandwidth. If you only want to see 1MHz of spectrum, choose 1.0MSPS. Higher sample rates above 2.4MSPS are not recommended
Interference
Interference from very strong signals will show up as mirrors that run in the opposite direction of the actual signal or only appear at the edge of the screen.
Interference from very strong signals will show up at intervals corresponding to your MSPS rate
If you have a signal at 100MHz, and your sample rate is 1MSPS
You will see a duplicated signal at 101MHz, 99MHz, 98MHz, and 102MHz.
If you have a signal at 100MHz, and your sample rate is 2MSPS
You will see a duplicated signal at 98MHz, 96MHz, 102MHz, and 104MHz.
The two display methods of SDR#
What is the FFT and Waterfall?
FFT: Top half of the screen
Waterfall: Bottom half of the screen
How to enter frequencies into SDR#
Frequency entry
Type it into the VFO
Click on the bottom or top half of a number
Drag the waterfall or FFT
Use your scroll wheel
Eliminating the center signal spike
If you want to get rid of that DC spike in the center, enable Correct IQ
Decoding digital tips
For decoding digital signals
max out the volume, use WFM, change frequency step to 6.25KHz, and change the bandwidth to fit perfectly around the signal’s envelope.
Set your sample rate to .900000001 MSPS (I personally have had the best results with this)
Also uncheck the filter audio box, chances are, your application will want a clean signal coming from SDR# to decode digital data properly.
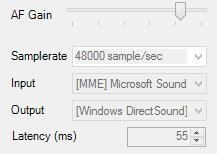
Decreasing latency
If you are decoding time sensitive information (Trunked radio decoding), turn down your audio latency so it is low enough to where the audio doesn’t pop from buffer underruns, but is fast enough so that the beginning of conversations aren’t cut off.
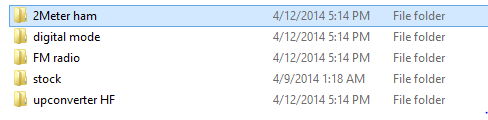
Keeping things organized
If you are going to be using your SDR for multiple uses, like HF, VHF, and Digital. Duplicate your SDR# folder for each instance. This will save configuration time, so you won’t have to change modulation, volume, or Gain every time you want to listen to different modes.
When to use AM
If you do not have an upconverter, there are only very few times you will use AM,SSB,USB,LSB,DSB,CW,or RAW. These include
Listening to Airband (120MHz)
Listening to CB Radio (26-27MHz)
12 and 10meter ham bands (24-30MHz)
Low tech gadgets that run on 27 and 49MHz (RC Cars)
Remote controls that run on ~400MHz (Car door unlocks)
some low tech ISM devices 902-928MHz (home automation, weather sensors)
Otherwise use NFM or WFM
Common interference in the home
If you use Wi-Fi or Ethernet in your home, you may see lots of interference in the 140-160MHz range, when browsing these ranges don’t use Tuner-AGC unless you have already locked onto a signal you want to listen to. If you are just browsing, keep the gain somewhat low to avoid overloading the device.
AGC
When to use AGC
Use AGC when you are aware that checking the box may lead to visible interference, only use AGC when you are sure the frequency you are on, is the only signal you want to listen to.
Tuner-AGC seems to work better than RTL-AGC at picking signals out from noise
Calibration
RTL-Calibration
Generally RTL sticks need calibration. If you are only listening to FM Radio, calibration probably isn’t needed, but for narrow and more precise signals, it is required.
It is recommended to wait several minutes before calibrating, when the temperature of the dongle warms up, the frequency could shift 4+ppm.
Calibration is calculated in ppm (parts per million) AKA Hertz per MHz
so, if your correction is 50ppm, a signal at 1,000,000Hz(1MHz), will be 1,000,050Hz(1.00005MHz)
Remember that this scales the higher in frequency you go. So at 900MHz, the correction will not be 900,000,000/900,000,050
It will be 900,045,000. At 900MHz, a difference of 45 KHz is huge, especially for narrow signals like voice.
When calibrating your dongle, always opt for using a higher frequency reference point.
Calibrating to a local NWS station (162MHz) is good, but calibrating to a local GSM tower, or trunked radio control channel is much preferred.
Getting a clearer picture
FFT Resolution
If you are listening to narrowband signals, it may be helpful to get a clearer view of the signals you are looking at.
When you first start using SDR# turn your contrast down to a level where:
no signal = blue
weak signal = light blue
med signal = orange
strong signal = red
Note, while gain controls how the signal is heard and viewed, contrast is only visual.
One note though – it seems you’re doing everything in full range (0 to -130).. And since the guide seems to be rtlsdr specific (for example you mention max 2.4 msps), i’d really recommend adjusting the fft range to a max of -70 or -80. The dongles do not go any lower than that.. This generally also means that contrast can be left at default.


Leave a Reply